Monday, 22 December 2014

A Multitude of Different Kinds of Fudge

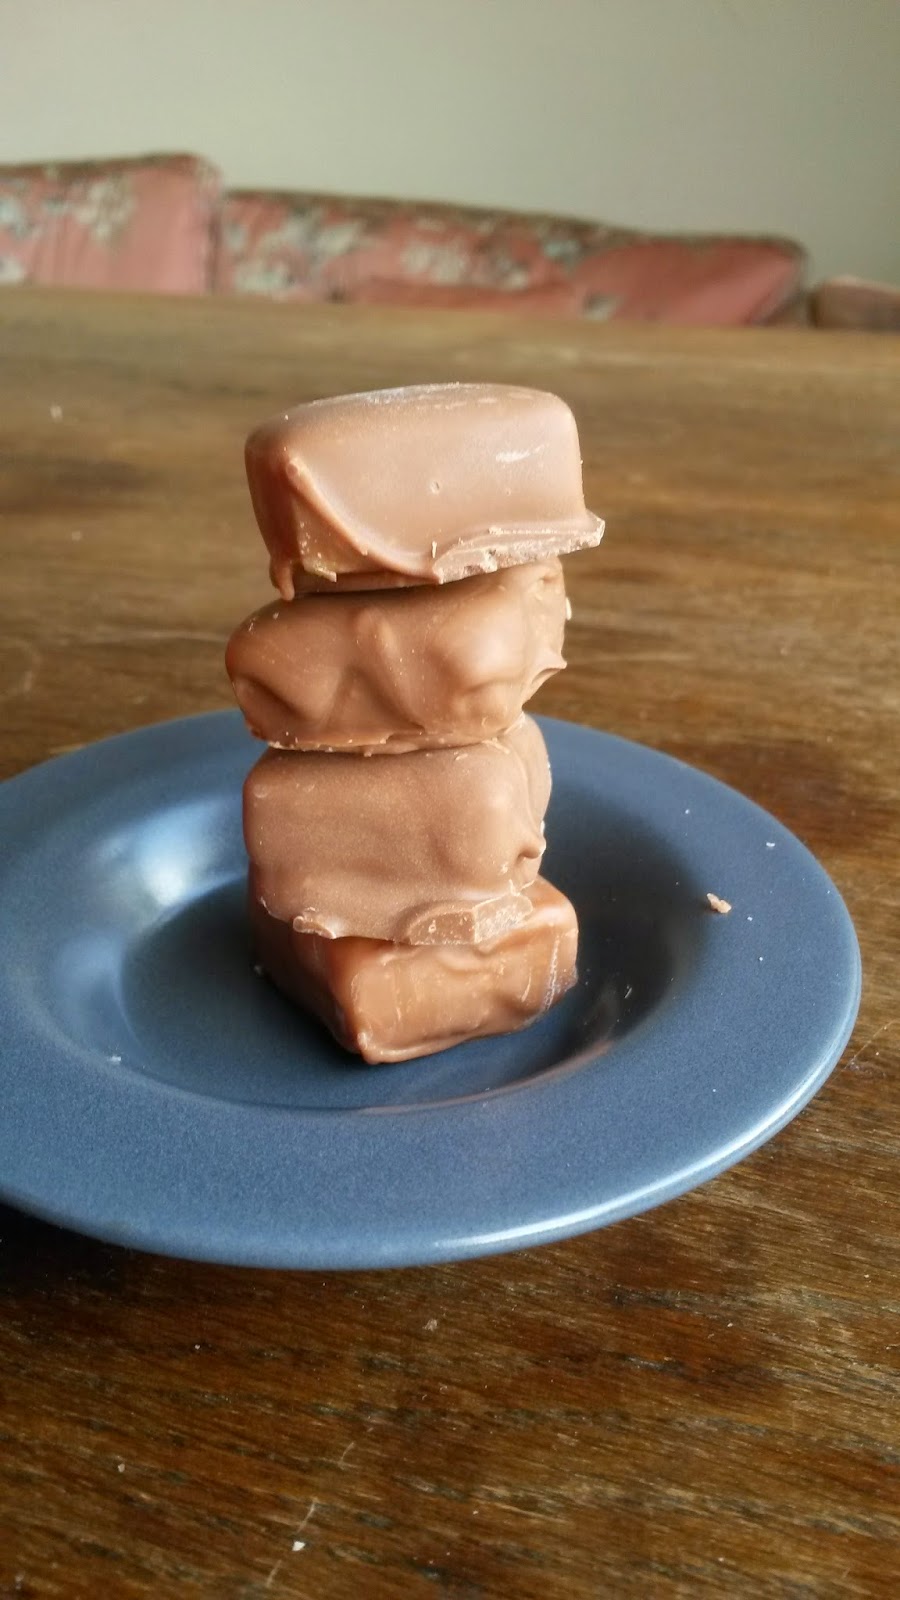
Christmas is the time for indulgence in all things rich and sweet, and as such I treated many people this year with bags of fudge. Fudge is basically sugar held together with dairy fat; what's not to like?


In a bid for greater efficiency, I made a giant batch of fudge using this recipe, and cut it up into one inch pieces. I then separated them into a few different cups so I could coat them all differently. Previously, I would have made many different batches, each of different flavours, but I decided this time to do what is done to jelly beans: make the centres all the same flavour, and then just flavour the coatings.


I decided that peppermint is a very Christmassy flavour, so lots of people got peppermint flavoured fudge. I made a few bags of fudge fully dipped in peppermint milk chocolate (I added a few drops of peppermint essence to the melted chocolate), and a few that were half dipped in peppermint white chocolate, decorated with sprinkles.


I also half dipped some in dark chocolate and sprinkled with coarse sea salt, which made for a rather interesting flavour and texture experience. I also gave away a few batches of plain old vanilla fudge, which was just the original fudge without any coating.


Overall, they were a big success. I think I still have some left over in my fridge to crack out if I have forgotten anyone!

Monday, 15 December 2014

Fairy Cakes with Buttercream (Gluten-, Dairy-, and Egg Free)

I have a lot of friends (and a mother) with a lot of allergies, and every friend has their own unique combination of allergies. So, I decided to kill all the birds with one stone by making an allergen free batch of fairy cakes, drawing on a few recipes I found online. It took a few attempts, but they turned out nicely!


These cakes are gluten-, egg-, and dairy free, meaning basically anyone can have them; the buttercream is made using vegetable margarine, too.


I did a lot of research before I made these. I remember last year sometime being introduced to the idea of American wacky cake, which was a recipe invented during the Depression era when butter and eggs were in short supply, making it suitable for dairy and egg allergy sufferers. I then decided to see if making wacky cake with gluten free flour would work, and it did. I followed the first recipe (which I found here) to the letter, but when made with gluten free flour it was a little greasy; I retried using a little more flour, and it was a success.


Now, I use self-raising gluten free flour, which has added raising agent and a touch of xanthan gum. If you can only find plain gluten free flour, per 6 ounces (170 grammes) of plain flour add in 2 teaspoons (10 millilitres) baking powder, and 1/4 teaspoon (2 millilitres) xanthan gum, and sieve together.


FREE FROM
☑ Soya (check for soya lecithin)
☑ Yeast
☑ Eggs
☑ Gluten

☑ Dairy

CONTAINS
☒ Refined sugar products


INGREDIMENTS:
  • 6 ounces (170 grammes) self-raising gluten free flour (I use Doves Farm brand)
  • 6 ounces (170 grammes) caster sugar
  • 3 tablespoons (45 millitres) cocoa powder
  • Pinch of salt
  • 1 teaspoon (5 millilitres) vanilla essence
  • 5 tablespoons (2½ fluid ounces; 75 millilitres) sunflower oil
  • 8 fluid ounces (240 millilitres) water

METHOD
  • Preheat oven to 180°c (350°F, Gas Mk. 4) and line a 12 hole muffin tin with paper cases.
  • Sieve the flour, sugar, cocoa, and salt together into a large mixing bowl; make a well in the centre, and add the vanilla, oil, and water.
  • Mix gently with a wooden spoon until the flour it just moistened. Don't over mix, or the cakes will by dense and dry.
  • Divide the mix between the cases, filling each case to three-quarters full. Bake in the preheated oven for 15 to 20 minutes, or until spongy to touch and a cocktail stick comes out clean when poked through the middle of a cake.
  • Allow to cool in the tin for about 5 minutes before moving the cakes to a wire rack. Allow to cool completely before icing.


I made some with the cocoa, and some without. The plain vanilla cakes I iced with raspberry buttercream, and the chocolate cakes I iced with chocolate buttercream. To make the buttercream, use the instructions inthis blog entry, and the ingredients listed below.

RASPBERRY BUTTERCREAM
  • 1 ounce (30 grammes) vegetable margarine
  • 1 ounce (30 grammes) raspberry jam
  • 4 ounces (115 grammes) icing sugar
  • 1 or 2 teaspoons warm water

CHOCOLATE BUTTERCREAM
  • 2 ounce (55 grammes) vegetable margarine
  • 4 ounces (115 grammes) icing sugar
  • 1 tablespoon (15 millilitres) cocoa powder
  • 1 or 2 teaspoons warm water


Fit a piping bag with a half-inch (1 centimetre) closed star tip, and fill with one of the buttercreams. Pipe roses onto the appropriate cakes, by starting in the centre of each cake, piping outwards in a tight spiral until you have covered the whole top of the cake. The result should look like a rose.

And there you are! Some delicious gluten free vegan fairy cakes. I am yet to experiment a bit more with this recipe and make some more adventurous concoctions, but these are a good start. I bought these really pretty boxes in the local Dealz (PoundLand) and they went down a real treat.


Monday, 8 December 2014

Gingerbread Stars (Egg and Wheat Free)

I went to visit some friends in Dublin the weekend before Christmas to give out some presents, and for each friend I made something quite small, more of a token than anything else. I thought I'd make one of my friends a small handful of decorated gingerbread stars, in the spirit of the season.


These stars use the same recipe as the gingerbread houses, which is a wheat- and egg free recipe for gingerbread, but I used royal icing to decorate them, which makes them not completely egg free. Because I don't really like having egg yolks left over from separating eggs for royal icing, I bought some instant royal icing, which does the job. It's not ideal, because it starts setting pretty much as soon as you make it, meaning that each biscuit you ice the icing gets firmer. But I digress.

I used red and white because I think it's a nice Christmassy combination of colours, and it also means I only had to divide it in two and colour one half, which makes it way less fussy. I piped them with a simple snowflake design, which uses the trick of feathering to add interest to the snowflake arms.

To make the snowflake design, pipe the outline of the star about an eighth of an inch (3 millimetres) from the edge of the biscuit, then fill in to make the base. While the base is still wet, pipe a line of the accent colour from the middle of the star up the centre of each arm; pipe two little lines going across each long line. Using a cocktail stick, drag through the middle of each long line from the tips of the arms to the centre. The result can be seen in the photographs.


Leave to set, exposed to the air, for at least 6 hours, overnight is best. You can use any colour combination you like, and these can be eaten any time of year really!

FREE FROM
☑ Soya (check for soya lecithin)
☑ Yeast
☑ Wheat
☑ Eggs

CONTAINS
☒ Gluten
☒ Refined sugar products
☒ Dairy

There was no blog this time last year.

Monday, 1 December 2014

Gingerbread Houses (Egg and Wheat Free)

As I mentioned in a previous blog post, I decided that this year I would make everyone's presents by hand, and make them edible, and that I did! This year is a completely handmade affair. Along with the usual mince pies and Christmas cake, there is:

 Gluten free fairy cakes, with vegan buttercream
 Chocolate coated fudge, in a variety of flavours
 Gingerbread houses and biscuits with icing
 Filled moulded chocolates
 Pecan nut shortbread biscuits
 Dairy free Irish cream liqueur

It has been very busy in the kitchen this December, and I'm very proud of myself! I have a lot of catch-up blogging to do, and you all have a lot of catch-up reading...


But without further ado, I present to you wheat- and egg free gingerbread houses! 


They certainly won't win any prizes for architectural integrity, but this recipe for gingerbread doesn't change spread in the oven, meaning the biscuits are the same shape going in as out, making for very easy construction.

I made little individual ones for my sister and her boyfriend, and decorated them with white chocolate, royal icing (which DOES contain egg, but you can use melted chocolate or glacé icing instead if you have an egg allergy), jelly beans, pecan nuts, and Smarties.


The biscuit itself is very tasty, but I have a lot to learn when it comes to constructing a house out of it.


I drew up my own templates, which was basically one 3 by 5 inch (7½ by 13 centimetre) rectangle, one 4 by 6 inch (10 by 15 centimetre) rectangle, and one 3 inch (7½ centimetre) square with a 2 inch (5 centimetre) triangular hat on. I cut two of each shape for the houses, but there are literally hundreds of templates available on Pinterest for you to have a perusal through!

FREE FROM
☑ Soya (check for soya lecithin)
☑ Yeast
☑ Wheat
☑ Eggs

CONTAINS
☒ Gluten
☒ Refined sugar products
☒ Dairy
  
INGREDIMENTS
For 2 houses (according to my measurements)

  • 2 ounces brown sugar
  • 1 ounce golden syrup or treacle
  • 4 ounces butter or margarine for a dairy free version
  • 8 ounces white spelt flour
  • 1 tsp ground cinnamon
  • 1 tsp ground ginger
  • ½ tsp ground coriander
  • Pinch ground cloves
  • Water, to bind

To decorate
  • Royal icing, or glacé icing or melted chocolate if you have an egg allergy
  • Melted chocolate
  • Sweets
  • Nuts, or not if you have a nut allergy


METHOD
  • Preheat the oven to 180°c (350°F/Gas Mk. 4); line a baking sheet with non-stick baking paper, or grease lightly with butter or margarine.
  • In a mixing bowl, beat the butter or margarine until soft and creamy with a wooden spoon. Mix in the syrup (or treacle) and the sugar and beat again until smooth.
  • Sieve in the flour and spices, then mix with the spoon again until fully mixed, but crumbly.
  • Add the water a teaspoon at a time until a soft dough is formed. Work briefly with your hands until it is smooth.
  • Dust the work surface with flour, dust the rolling pin also, then roll to a thickness of a quarter inch (5 millimetres). Using the template and a sharp knife, cut out two of each piece. If you like, you can cut out a door from one gable piece, and windows from the side walls.
  • Lie on a baking sheet and bake in the preheated oven for 10 to 15 minutes, or until very pale golden around the edges. These biscuits won't brown much, and they will still be soft when removed from the oven.
  • Allow to cool on the baking sheet for about 5 minutes, before moving to a wire rack to cool completely before assembly.


There are countless videos on YouTube and countless blogs about how to construct a gingerbread house, and as my knowledge of gingerbread house construction is rudimentary at best, but this video is fairly good at showing how to construct a little one. I fused my houses together with royal icing, because it sets rock hard, but as I mentioned earlier melted chocolate works as well, but it will need support (from jars, tins, mugs, spice bottles etc.) for longer, as chocolate is runnier than royal icing.


Friday, 28 November 2014

Dessert Mashup: Kołaczki Mince Pies (Wheat Free)

Here's another dessert mashup for ye! A blend of a British Isles classic, and a Polish traditional Christmas treat, Kołaczki mince pies!


Kołaczki (said co-watch-key) are little cream cheese pastry parcels filled with plum jam or poppy seed filling, that are formed out of a frilled square of pastry pinched at opposing corners, traditionally eaten in some parts of Poland around Christmas time (although one of my Polish friends had never heard of these, so it must be a regional thing). 


And for those of ye who don't know, mince pies are little shortcrust pastry morsels filled with mincemeat, which is a mixture of dried fruits, grated apple, citrus zest, shredded suet, brandy (or whisky), sugar, and spices. I decided this was the year that I'd mash them together, and they turned out really well.


It's more the shape that I nicked from the kołaczki, but everything else is traditionally mince pie-ish. I didn't use the kołaczki pastry, which is basically equal parts cream cheese and flour with a bit of butter thrown in for good measure, but instead I used something which I like to call "shortbread pastry", which is somewhere between shortbread and shortcrust pastry.

FREE FROM
☑ Soya (check for soya lecithin)
☑ Yeast
☑ Eggs
☑ Wheat

CONTAINS
☒ Dairy (use substitute in italics for dairy free)
☒ Gluten
☒ Refined sugar products

INGREDIMENTS:
  • 12 ounces (340 grammes) plain spelt flour
  • 6 ounces (170 grammes) butter, or margarine, room temperature
  • 2 ounces (55 grammes) icing sugar, or caster sugar
  • Cold water, to bind
  • 1 jar (450 grammes) mincemeat
  • Icing sugar and cinnamon, to decorate

HOW-TO:

  • Preheat oven to 200°c (400°F, Gas Mk. 6) and line baking sheet with non-stick baking paper.
  • In a mixing bowl, beat together the sugar and butter or margarine until smooth and creamy.
  • Sieve in the flour, and then get your hands in and mix it together, rubbing the butter and flour together with your fingertips. It'll get very crumbly.
  • Add in water, about a teaspoon (5 millilitres) at a time, mixing after each spoonful until you have a soft dough. It doesn't need to be chilled.
  • Dust the work surface with flour and roll out the dough to a thickness of a quarter inch (3 millimetres). Using a knife or a fluted pastry wheel, cut the dough into strips about 1½ (4 centimetres) wide vertically and horizontally to make squares. Any squares that are wonky or incomplete can by gathered and re-rolled.
  • Brush the squares with water, then put about a teaspoon of mincemeat into the middle of each square. Pinch the opposite corners together, and make sure to pinch them good and proper; they can fall open in the oven if they're not pinched properly, I've discovered. Alternatively, you can roll them up like tiny wraps.
  • Place on the baking sheet and bake in the centre of the oven for 15 to 20 minutes, or until lightly browned and the mincemeat is beginning to bubble. If you cook them for too long, the mincemeat will run out of the pastry shells and go everywhere, so keep and eye out.
  • Remove from the oven and allow to cool slightly on the tray before moving to a wire rack to cool. To decorate, dust with a little icing sugar and cinnamon. These are nice warm from the oven, or cold; actually, they're nice however you eat them.

These went down a real storm due to their daintiness, and they are way less hassle than the traditional mince pie, which needs the muffin tin lined with pastry then each one topped with pastry; it's a pain. It seems the Polish had the right idea for making their Christmas treats a little more efficient.

Monday, 24 November 2014

No Recipe Today: Life Gets in the Way

Apologies for my lack of recipe post today, I've been having an absolute week of it. I've been having some serious issues in my personal life, but once they are all cleared up I'll be back to my normal baking and blogging self.

I hopefully will have a recipe done my Friday, as is my wont, but if I don't my next recipe post will be next Monday (December 1st)

Thanks for your patience! ^_^

Friday, 21 November 2014

This Christmas Will Be a Handmade Christmas!

This weekend the Christmas lights will be officially lit in Limerick city, and as people run around town like blue-arsed flies getting their Christmas shopping done, I have a plan: this year I will hand make the presents and make them edible.

I got a wonderful chocolate mould from my local Dealz (PoundLand) that has tea cups and teapots and all wonderfully cute shapes, and I will use these to make filled chocolate boxes; and to shake it up a bit, some will get chocolates, others will get mini gingerbread houses. I can't decide whether the gingerbread houses should be filled with sweets, but they will definitely be miniature. I might also do some jars of hot chocolate mix with an iced lebkuchen, together in a little bag, and maybe also bags of peppermint creams or other fondant chocolates.

I cannot wait to get started on this project! It's going to be class!

I've been jotting down ideas in my sketchbook for the last few days, trying to design the chocolate fillings, draft blueprints for the houses, and come up with nice lebkuchen shapes. I'm actually really looking forward to it! Each of the five members of my family will of course get something different each, which adds another level of interest.

Stay tuned for my next post on the matter, which will include my sketches....

Friday, 14 November 2014

Salted Caramel Shortbread (Wheat Free)

So, today I decided to try out a classic: Millionaire's Shortbread! I don't usually go in for making plain and simple classics, but this week I got a serious hankering for some delicious caramel shortbread.


Recently I've been making a lot of condensed milk (using a new technique which I will share at a later date) and using it to make hot chocolate on these cold winter nights, and as such I used it to make some lovely buttery caramel for my shortbread. To shake it up a little, though, I sprinkled some coarse sea-salt on the top of the chocolate.


I made a small batch using a loaf tin, which is the recipe I will share with you.


INGREDIMENTS
Makes 1 4x7 inch (10x18 centimeter) rectangle, which cuts into roughly 18 pieces
  • 3 ounces (85 grammes) spelt flour
  • 1 ounces (30 grammes) cornflour or rice flour
  • 2 ounces (55 grammes) butter, at room temperature
  • 1 ounces (30 grammes) icing sugar

For the caramel topping

  • 1½ ounces (40 grammes) caster sugar
  • 1½ ounces (40 grammes) butter
  • 3 ounces (85 millilitres) condensed milk
  • Pinch of salt

For chocolate topping

  • One 3½ ounce bar (100 grammes) dark or milk chocolate
  • 2 tablespoons (30 millilitres) sunflower oil
  • Coarse sea salt

HOW-TO

  • Preheat your oven to 160°C (320°F, Gas Mk.2½, or very moderate) and line the sides of a loaf tin.
  • In a mixing bowl, beat the living daylights out of the butter until soft and creamy. Use a wooden spoon: it needs more elbow grease, but you have much more control over how soft you make your butter.
  • Pour in the icing sugar, and cream until light and fluffy. Sieve in the flours and salt and mix until the flour is combined. It will look crumbly, but this is exactly how you want it.
  • Press the dough evenly into the sandwich tin, smoothing the top with a spoon, and prick all over with a fork or skewer, and bake in the oven for 20 to 25 minutes, until set but still soft.
  • On removing from the oven, put on a wire rack and allow to cool in the tin completely.

Now, make the caramel:

  • In a small saucepan, melt the sugar and butter gently together over low heat. Once the sugar has dissolved, add in the condensed milk and salt.
  • Once fully melted and combined, bring to a rapid boil and cook for about 2 or 3 minutes until thickened.
  • Pour in on top of the shortbread. Allow to cool to room temperature before setting for about 30 minutes to an hour or until cool to touch.

Finish off with chocolate glaze:
  • Once set, prepare the chocolate glaze. Melt the chocolate and oil together either in the microwave on "Defrost", or in a bowl over simmering water.
  • Pour the chocolate over the top of the caramel, and allow to cool to room temperature before allowing to set in the fridge for at least 4 hours.
  • When fully set, remove from the tin and cut into square, chocolate side down, with a sharp knife.
And there you are! Delicious caramel shortbread. The caramel is soft and chewy, and the coarse salt gives little savoury bursts among the sweetness.


Monday, 10 November 2014

Pause in Video Making

Hi all!

So, as you have seen over the last month, I have been making tutorial videos about how to make the various things I write about here on my blog. I have enjoyed the experience of making the videos, and I have learnt a lot from the process both with cinematography and teaching.

However, in doing the videos, I've found I don't like making the videos as much as I thought I would. I gave it a go, and it didn't speak to me. I've found I prefer blogging and taking pictures. Making tutorial videos alone is a fairly noneventful experience, and I would like to re-try with other baking enthusiasts or performers in the future.

Also, I have started making short films with a group of fellow filmmakers, and that has been fulfilling all of my filmmaking needs!

I might return to Sweetie Pie Bakes Stuff TV in a different capacity in the future, but for now, I going to go back to blogging with a new found zeal.

Wednesday, 5 November 2014

Spelt Doughnuts Video Tutorial!


I made a tutorial video for the spelt doughnuts recipe that I published a few months ago, butI thought it would be pointless to have two blogs of the same recipe. So this blog post is literally just to say "Lookit ma new vidjo!"

Full spelt doughnuts recipe can be found here!


Friday, 31 October 2014

Peanut Butter Cup Mini Cheesecakes (Wheat Free)

Beannachtaí na féile Oíche Shamhna, gach duine! In other words, happy Halloween! I hope everyone has or is having a fantastic day, and that my recent spate of Halloween related recipes has you well prepared for feasting. And here's another one!

Yes, I'm still on my cheesecake buzz. After the success of the previous two mini cheesecake posts, why wouldn't I be? So here's my most recent offering: peanut butter cup cheesecakes.


The inspiration behind this one I'm sure is fairly obvious: more Halloweeny peanutty goodness, with an American style twist, It followed from the coconut lime cheesecakes because I wanted to see if the recipe still worked if I replaced the coconut milk with smooth peanut butter; I was not disappointed.


One must understand, my brain works in a fairly non-linear fashion. I constantly imagine better and different ways of doing recipes, and invent new possibilities in my mind on a minute to minute basis. When I make one thing, it doesn't stop with the final product; it spurs my mind into imagine new things, usually starting with the though "hang on, what would happen if I....?"


But enough of my ramblings. To make these, I simply made a shortbread style base my mixing 2 ounces (55 grammes) of icing sugar, 4 ounces (115 grammes) of butter, 4 ounces (115 grammes) of spelt flour, 3 tablespoons (45 millilitres) of cornflour, and 1 tablespoon (15 grammes) of cocoa powder together with a pinch of salt until you achieve a crumbly dough. Line a 12 indent muffin tin with cases and divide the crumble between, flattening down and spreading slightly up the sides. Bake in a preheated 150°C (300°F, Gas Mk.2, or very moderate) oven for 15 minutes.


Prepare the filling following this recipe, replacing the coconut milk with smooth peanut butter, and the lime zest and juice with 4 fluid ounces (120 millilitres) of whipping cream. Distribute between the baked bases, and return to the oven for a further 20 minutes. Allow to cool and then chill overnight.


The next day, make the chocolate glaze by melting together 4 ounces (115 grammes) of milk or dark chocolate, 1.5 ounces (40 grammes) sunflower oil, and 1.5 ounces (40 grammes) of butter with a pinch of salt. Pour on the cases, moving the cakes to evenly spread the glaze, and then tap on the work surface to smooth out and release any bubbles. Decorate with bashed roasted salted peanuts.


The consistency of these cheesecakes is absolutely perfect: super creamy yet not too dense. The peanut flavour is nice and subtle, and complimented well by the chocolate base and glaze. There is also a nice combination of textures with the creamy cheesecake and glaze, crumbly base, and crunchy peanut topping.


You could of course use crunchy peanut butter if you want more crunch, but I'm not a fan of crunchy peanut butter. I'm sure this could work just as well with any kind of nut butter, such as almond or hazelnut.

There was no recipe this time last year.

It's been a while! Happy 9th Anniversary!

  It's been a while. The past two years have been a helluva a ride. This year is gonna hold some big changes for this blog. I'm comp...