Sunday 26 February 2017

Shrove Tuesday: Semlor, Scandinavian Cream Buns (Wheat Free)

In keeping with the theme of Shrove Tuesday, here is another delicious offering, this time from the Subarctic realms of Scandinavia: semlor!


Originally, semlor (singular: semla) were eaten on Shrove Tuesday before the start of Lent, but once the Scandinavian countries had the Protestant Reformation, Lent was no longer as important. Nowadays, these cream buns are eaten throughout the year as a sweet treat. Traditionally, semlor are eaten in bowls of warm milk, like a pudding, but I'm not sure how often they are eaten like that anymore.


In Sweden, semlor are filled with whipped cream and almond paste made into a creamy filling by mixing with milk. In Finland, they are called laskiaispulla, and are made with raspberry or strawberry jam instead of almond paste filling. However, both are sold all over Scandinavia, and are differentiated by their appearance: almond semlor have almonds on top, and jam semlor are simply dusted with some icing sugar.

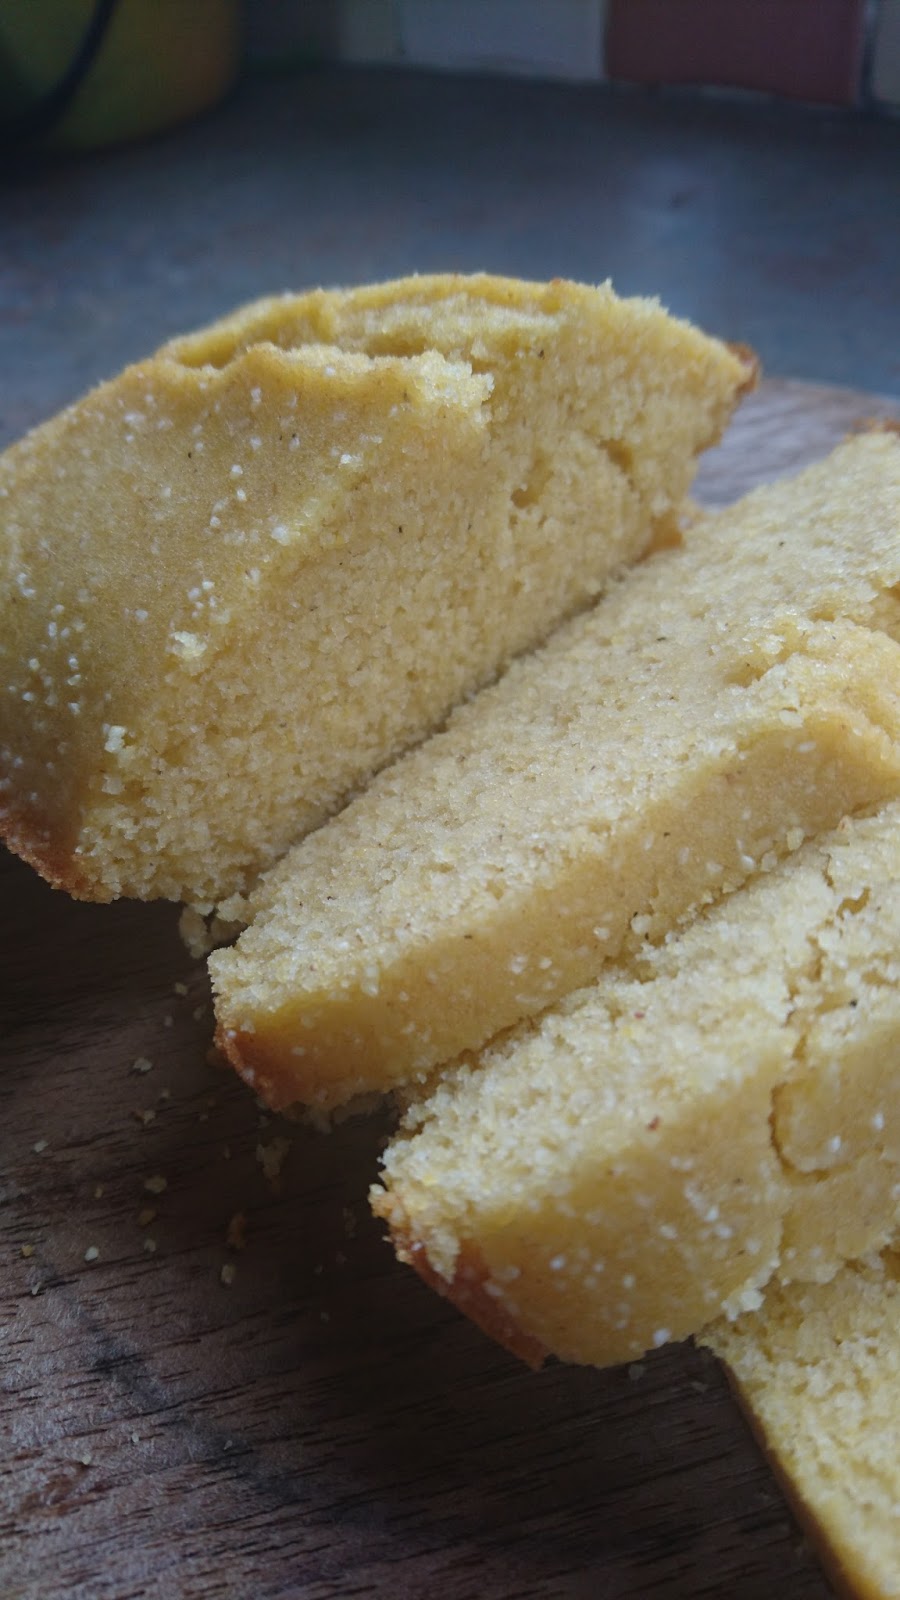
The bread dough is also subtly perfumed with some ground cardamom, which is a spice which I don't think is used anywhere near enough. However, if you don't like cardamom, you could use cinnamon, or just leave it un-spiced entirely.

I made both, but I preferred the jammy ones: I found the almond paste ones too heavy and cloying. But, make both and

INGREDIMENTS
Makes 16 or 20 buns, depending on size
  • One batch of sweet bread dough, seen here, with 1 teaspoon of ground cardamom added
  • 1 medium egg, beaten with 1 tablespoon (15 millilitres) of milk, or water
  • 17½ fluid ounces (500 millilitres) whipping cream
  • 2 tablespoons (30 millilitres) icing sugar
  • Optional: 1 teaspoon (5 millilitres) vanilla essence
For Finnish style buns
  • 5 or 6 ounces (140 or 170 grammes) raspberry or strawberry jam
  • Icing sugar, for dusting
For Swedish style buns
  • 5 ounces (140 grammes) marzipan*
  • Milk, for mixing*
  • Flaked almonds, for decorating
  • Optional: warm milk, for serving

HOW-TO
  • Prepare the dough according to this recipe, adding the cardamom, and once it has risen the first time, divide into 16 or 20 balls, roughly 2 ounces or 1½ ounces (55 or 45 grammes) each. Make sure the tops are nice and smooth and taught.
  • Lightly dust two large flat baking tray, and place the dough balls--8 or 10 on each tray--in a 3-2-3(-2) pattern, about two inches (5 centimetres) apart to allow them to double in size without touching each other.
  • Allow to rise in a warm place, loosely covered with some oiled cling film or a slightly damp clean tea towel, for about 30 to 40 minutes, or until doubled in size.
  • In the meantime, preheat your oven to 180°C (350°F, Gas Mk.4). Arrange the oven so two shelves are close to the centre of the oven.
  • Once the buns have risen, brush each bun gently with the egg beaten with milk or water. If you want some Swedish style buns, sprinkle the top of each one with some flaked almonds for decoration.
  • Place the trays in the oven and bake for 15 to 20 minutes, or until golden brown and risen nicely.
  • When they are baked, remove from the oven and transfer each bun to a wire rack to cool completely before filling.
  • To fill the buns, whatever style you choose, whip the cream with the icing sugar and vanilla, if using, to firm peaks.

To complete Swedish style buns,
  • Mix the marzipan with milk, a tablespoon (15 millilitres) at a time until a smooth paste is achieved. Be gradual with the milk as a little goes a long way and you don't want it too thin: it should be creamy. A fork is the best tool for this job.*
  • Cut the top off each bun, about an inch (2½ centimetres) from the top. Fill the bun with some almond paste, about a rounded teaspoon (7 millilitres), and a dollop of cream. You could put the cream in a piping bag fitted with a star shaped nozzle, if you prefer.
  • Place the top back on the bun, and serve either on a plate with a cup of tea or coffee, or for an authentic experience, serve in a shallow bowl of warm milk.

To complete Finnish style buns,
  • Cut the tops off the buns as before, but fill each bun with a rounded teaspoon (7 millilitres) or so of jam, and then some cream, replacing the top as before.
  • Serve individually on plates, dusted with icing sugar. Enjoy with tea or coffee.
These are best consumed immediately after preparing, or on the day they're made. The next day, they are alright, but by day three are best used for bird food.

* UPDATE (27/02/17): Instead of using pre-made marzipan, you can make your own almond paste filling. In a mixing bowl, mix together 3 ounces (85 grammes) ground almonds with 3 ounces (85 grammes) icing sugar and a pinch of salt, and add a few drops of almond essence. Add milk or water gradually, about a tablespoon (15 millilitres) at a time until it becomes creamy, as shown above.

Saturday 25 February 2017

Shrove Tuesday: "Crepelloni", Italitan Style Spinach and Cheese Rolls with Tomato Sauce (Vegetarian Friendly)

This is the last weekend before Lent, and that means only one thing: Shrove Tuesday is just around the corner! So to mark the occasion, I will be sharing a variety of recipes to try out this year. Starting with this one: Italian style 'Crepelloni'!


Here in Ireland, we celebrate Shrove Tuesday with pancakes, as such it's mostly called Pancake Tuesday. We generally speaking eat crêpe style pancakes, not American style thick pancakes (drop scones), and they work for sweet or savoury toppings. They are particularly nice with lemon juice and sugar, which is traditional in Ireland and Great Britain, for sure.

According to my mother, and her mother, and probably her mother too, to make pancakes you use quarter of a pound of flour, half a (UK) pint of milk, and an egg (which is 115 grammes, 285 millilitres, and an egg). So, that is how I've always made them for my whole life, and they've never done me wrong.

However, I thought I'd do something a little different this year, which is inspired greatly by the work of Delia Smith. On one of her cookery programmes from 20 odd years ago, Delia made some Italian cannelloni using pancakes rather than traditional tube pasta (in more recent books and programmes, she uses cooked lasagne sheets), and it works really well. When I tried to find a reference for the book or programme, I couldn't find the original publication, but I did find that a few other people have tried this and written about it. The only reference I could find is a 21 year old newspaper article from the British Independent.


There are so many things you could put in these, but this time I went for something vegetarian. Spinach and soft cheese filling with tomato sauce is one of my all time favourite Italian combinations, and good for veggie boys and girls, it contains no meat whatsoever.

This means you can have pancakes for breakfast and dinner on Shrove Tuesday!

INGREDIMENTS
Makes 6 cannelloni
  • 4 ounces (155 grammes) white spelt flour
  • ½ UK pint (1¼ cups, 285 millilitres) milk, or milk alternative
  • 1 egg, medium or large
  • Butter, or margarine, for frying
For the filling and sauce,
  • 6 ounces (170 grammes) spinach, cooked and finely cut
  • 8 ounces (225 grammes) soft low fat cheese, such as ricotta, cottage cheese, or quark
  • 1 medium egg
  • 2 ounces (55 grammes) grated mozzarella
  • Salt and pepper, to taste
  • 8 or so ounces (225 grammes) tomato pasta sauce of your liking
  • Grated mozzarella and cheddar cheese, for topping
  • Butter, or margarine, for greasing

HOW-TO

First, make the crepes,
  • In a mixing bowl, sieve the flour and make a well in the centre. Add the egg, and then mix in the milk a little at a time using a wire whisk until all the milk is added, making sure to mix well after each addition to get rid of any lumps.
  • Allow to the batter to sit on the work surface for about half an hour to relax.
  • When you want to fry them, heat a large frying pan over medium heat. Add about quarter of a teaspoon of butter, or margarine, and swirl it around the pan until it has melted.
  • Add about a third of a cup (85 millilitres) of batter to the pan and swirl it around the cover the base of the pan. Cook for about 45 seconds to a minute, until the top is dry and set, and underneath is lightly browned
  • Flip the pancake, and cook for a further 45 seconds to a minute, until it has browned also.
  • Continue cooking the pancakes until you have used all the batter. You should get about 6 or 7 large pancakes.
To complete the dish,
  • Grease a 6x8 inch (15x20 centimetre) baking dish lightly, and preheat the oven to 200°C (400°F, Gas Mk.6).
  • In a mixing bowl, mix all the spinach, soft cheese, egg, and grated mozzarella until smooth and well mixed. Season to taste with salt and pepper (you can skip this if you have a problem with eating raw egg).
  • Take a pancake, place a sixth of the filling in the middle. Fold in the sides a little, then roll the pancake around the filling to make a parcel.
  • Repeat this with six pancakes in total, then place the rolls in the dish. Pour as much sauce as you like on top of the the rolls, then top off with the cheeses to your liking.
  • Bake for 20 to 30 minutes, depending on the level of crispiness you want on top, then serve hot in warmed pasta bowls, or plates.

THIS TIME IN 2016: No blog
THIS TIME IN 2014: No blog

Sunday 19 February 2017

American Style Cornbread (Wheat Free, with Dairy Free Option)

I was feeling ill yesterday and avoiding college work, and still am right now! Although I have finished my 2000 word essay, I still have about a million blogs left over and a 20 second short animation. To say I feel overwhelmed is an understatement.


But yesterday, I was wrapped up in a blankie on the sofa, bingefesting Netflix true crime documentaries, and wishing I felt better. So, I decided to try something simple, a kind of mix-it-all-together-in-one-bowl simple.

I found inspiration in a strange place: recently, I moved in with my beloved companion, and had to move the contents of my kitchen cupboards. In the process, I rediscovered some ingredients that I hadn't had the change to use in my previous abode, one of which was a jar of fine cornmeal. I had actually bought it from the Polish shop, where it is called kasza kukurydziana, a year or so ago, and seeing as it was in a jar I had no idea of its sell-by date, but it didn't kill me so it must still be good.


The sight of the beautiful sunny golden hue of the cornmeal inspired me to make a Southern United States staple. It's something I always see in African American TV and films, and I've always been attracted to it as a food. So, I turned to one of my go-to cookery books, 1000 Recipes: From deliciously light snacks to fabulous gourmet dishes, by Martha Day (Anness Publishing Limited, London. 1997), however the recipe was pretty much exclusively butter. I improvised, using a few recipes I sourced on recipe forums (like AllRecipes UK) to make a version using sunflower oil, and much less than suggested.

Although it is called bread, don't be fooled! It's more like a cake, or a tea bread. I certainly wouldn't eat it like bread, but then again I have no idea how it's eaten by people in the Deep South where it originated.


INGREDIMENTS
For one loaf

  • 4 ounces (115 grammes) white spelt flour
  • 6 ounces (170 grammes) fine cornmeal
  • 2 ounces (55 grammes) caster sugar
  • 1 tablespoon (15 millilitres) baking powder
  • Pinch of salt
  • 6 fluid ounces (180 millilitres) milk, or milk alternative
  • 3 ounces (85 grammes) sunflower oil
  • 1 medium egg, beaten


HOW-TO

  • Preheat the oven to 200°C (4000°F, Gas Mk.6), and lightly grease and flour a loaf pan.
  • In bowl, mix together all the dry ingredients: flour, cornmeal, sugar, baking powder, and salt. Mix together thoroughly.
  • Make a well in the centre and add the milk, oil, and egg. Mix together gently until everything is just combined: no over-mixing!
  • Pour the mixture into the prepared baking tin, and bake in the centre of the preheated oven for 45 minutes to an hour, depending on doneness. Check for doneness at the 45 minute mark by poking a skewer into the thickest part of the bread, and if it comes out clean the bread is done. If it comes out sticky, continue to cook for another 10 minutes.
  • Once cooked, allow to cool in the tin on a wire rack for about 10 minutes before turning out gently and cooling completely on the rack.
  • Enjoy in slices with butter, or jam.

Seeing as we ate this over the course of three days, I actually don't know how long it keeps generally. However, it was still good on day three! I recommend keeping this in an airtight container and enjoying within a week.

THIS TIME IN 2016: No recipe
THIS TIME IN 2015: Dessert Mashup: Millionaire's Shortbread Ice-Cream (Egg and Wheat Free)
THIS TIME IN 2014: No recipe

Thursday 16 February 2017

I've Moved House!

I am happy to announce that I have moved out of my hell-hole in Galway, and have moved in with my wonderful companion; the first time I've ever lived with a significant other!

The place in Galway was atrocious: there was inadequate cooking facilities, no central heating, and the shower was always broken. I spent most of my time in my companion's house anyway, and by the end of 2016 most of my stuff was in his house. I spent so much money on top of my rent on trains and buses to spend as little time at home as was humanely possible. As such I decided to move in properly, and cancel my tenancy. It's turned out to be cheaper per week, as I no longer have rent, and just have bills to share with my companion, and a commuter ticket every week or so.

This is such an exciting time for me, as I have never lived with a partner full time before. It'll bring a completely new dynamic into the relationship, and eventually we hope to move back home to Limerick after I've finished college to find work together.

I'm looking forward to this brand new chapter in my life. I feel blessed and lucky to have found someone as wonderful as my companion: he is my best friend, and loyal confidant. I never thought happiness would come my way in the romantic department!

Now, I have an actual kitchen to use again! I promise that was not an ulterior motive.....

Tuesday 14 February 2017

Something Savoury: Japanese Style Curry with "Breaded" Chicken (カツカレー) (Gluten and Dairy Free with No Added Sugar)

Happy Valentine's Day! As you can probably tell, I've been on a meals buzz recently. Today, my offering is Japanese style curry, with breaded chicken!


Seeing as my birthday and Valentine's Day are quite close together on the calendar, my companion and I went to a Japanese restaurant around my birthday to combine the two events into one celebration. We both ordered something with curry: I got a curry chicken katsudon, and he got curry ramen. Japanese curry is essentially like what I'd call a chip shop curry, but much spicier and darker.

I decided I would try and make it at home, but with all natural ingredients, or at least as many as possible. I didn't want to use any refined sugar or processed stock cubes, to make it as clean eating as I could. In the same way I did for my tomato soup recipe, I use an apple in this for natural sweetness.


However, because it kinda involves making a stock from scratch, it's a little time consuming. I'd say the whole curry takes about 90 minutes to two hours to prepare from start to finish, including chopping. But, it's very flavourful, and you get to revel in the satisfaction of making a takeaway meal in a mostly healthy way. Don't be overwhelmed by the long list of ingredients: you probably already have most of them.

For a Valentine's day twist, I cut some of the pieces of carrot into heart shapes using a little fondant cutter. You could cut the vegetables into any shape.

And as for the "breaded" chicken, it's actually not bread at all: it's crusted used flaked almonds, which means it's completely gluten free! The almonds are naturally dry and crunchy, so when used as a coating they stay super crusty and crispy, and crunch like glass when you eat them. They don't go soggy after five minutes of frying. So satisfying. So dangerously addictive. I think I may make more recipes using the almond breaded chicken.... (whenever making gluten free food, always check ingredient labels for allergens).

INGREDIMENTS
Serves four people

For the base gravy,
  • 1 medium sized sweet green apple, peeled and diced
  • 1 large onion, white or red, diced
  • 1 small carrot, peeled and cut into small dice
  • 2 cloves garlic, peeled and crushed
  • 2 inch (5 centimetre) piece of fresh ginger, peeled and grated
  • 1 tablespoon (15 millilitres) tomato purée
  • 1 pint (2½ cups, 570 millilitres) water
  • 1 tablespoon (15 millilitres) cooking oil
  • ¼ teaspoon (1 millilitre) fine salt

For the curry,
  • Up to 4 teaspoons (20 millilitres) curry powder, spiciness of your choice
  • 1 tablespoon (15 millilitres) soy sauce, or tamari for gluten free option
  • 1 teaspoon (5 millilitres) white vinegar, or lemon juice
  • 1 small carrot, peeled and cut into thin coins
  • 1 medium potato, peeled and cut into one inch (2½ centimetres) chunks
  • Optional: Half a small onion, cut into slices
  • Optional: 1 or 2 teaspoons (5 or 10 millilitres) cornflour, depending on desired thickness

For the chicken schnitzel,
  • 4 chicken breasts, roughly 5 or 6 ounces (140 or 170 grammes) each
  • Cornflour, for dusting
  • 2 medium eggs
  • Roughly 5 ounces (140 grammes) flaked almonds, or crushed cornflakes if you cannot eat nuts
  • Salt and pepper

For serving
  • 4 servings of steamed white rice, long grain or Jasmine
  • Optional: Sesame seeds, for garnish
  • Optional: Thinly sliced spring onion, for garnish

HOW-TO

First, make the base gravy,

  • In a medium sized saucepan, heat the cooking oil over medium heat. Stir fry the ginger and garlic for about a minute or so until fragrant.
  • Add the onion, carrot, apple, and the salt, and continue to cook until softened. Add the tomato purée, and cook until caramelised and the bottom of the pan is slightly brown. Get a good brown layer—called a fonde—going on the bottom of the pan: this will add more flavour to the finished curry.
  • Pour the water over the top, stir briefly, and reduce the heat to low. Cover then simmer until all the vegetables and apple are tender, about 30 minutes.
  • Once cooked, allow to cool slightly and then blend in a blender or food processor until completely smooth. (What if I don't have a blender? Cook for a full hour until completely broken down, then push a little at a time through a sieve into a large bowl).
Then, complete the curry,
  • Return the gravy to the saucepan, and add the soy sauce and vinegar, or lemon juice. Mix the curry powder with a little water in a cup, a teaspoon at a time, then stir into the curry. Add as much curry powder as you like.
  • Add the carrots, then cover and simmer the sauce over low heat for about 10 minutes. Add the potato, and onions if using, cover and simmer again for another 15 to 20 minutes, or until the potato is tender but still maintaining its shape, and the carrot is tender.
  • The naturally occurring starch in the potato will thicken the curry a little bit, but if you want to adjust the thickness you can add cornflour. Start with mixing one teaspoon in a cup with a tablespoon of water, and adding to the curry. If you want it thicker, add another teaspoon mixed with water, and so on.
  • Keep covered until while you prepare the chicken, and it will keep its head very well.
To make the chicken schnitzel,

  • Place the almonds in a sandwich bag, and crush them gently with a rolling pin. Get a good range of texture, from fine crumbs to bigger flatkes: this will make it more crispy.
  • Put one chicken breast at a time into a sandwich bag, lie flat on the work surface, then bash with a rolling pin until it is roughly half an inch (1 centimetre) in thickness. Repeat with the other fillets. Place all the pieces onto a large plate or tray. You can use the same bag for all of them, unless is splits.
  • Set up two wide shallow bowls: place the almond crumbs in one, and beat the eggs with a tablespoon of water.
  • Sprinkle the fillets with cornflour on their tray and completely coat on both sides (a pastry brush is helpful here). Take one fillet at a time, dip both sides in the beaten egg, then cover both sides with the almond crumbs. After crusting, season on both sides with salt and pepper.
  • Heat a frying pan and add enough cooking oil to coat the bottom of the pan in a good layer. Test the heat with a spare almond flake: if it bubbles immediately, it's hot enough.
  • Fry one chicken fillet at a time—or two, if you have a large enough pan—for about three minutes on each side, or until golden brown on both sides.
  • As you fry the fillets, keep the cooked ones on a tray in the oven on the lowest temperature setting, to keep them warm.
To serve,
  • Divide the rice between four wide bowls and keep to one side. 
  • Cut each chicken fillet into strips and lie on top of the rice, then pour the curry onto the empty side of the bowl.
  • Sprinkle with a garnish of sesame seeds or spring onion, if you like.
I think I may do a few more recipes using the "almonded" chicken approach, because it was seriously tasty. Maybe a nice chicken burger? Or American style tenders? We'll see...

UPDATE 18/04/17: Instead of flaked almonds, you can use crushed cornflakes.

THIS TIME IN 2016: No recipe
THIS TIME IN 2014: No recipe

Saturday 11 February 2017

Valentine's Day: I ❤ Pizza! (Wheat-, Egg-, and Dairy Free Base)

What's sweeter than being able to share a couple sized meal with your sweetheart? Nothing, which is why I made these cute little pepperoni pizzas!


Whenever I think of romantic candlelit dinners, I always think of Italian food for some reason. Maybe it's because in The Lady and the Tramp the dogs eat spaghetti and meatballs, or because there was an advert for Ristorante pizzas on telly when I was a kid that showed a couple romantically eating pizza in a swanky Mediterranean open air restaurant, or because most of the high end restaurants in Limerick are Italian, I'm not sure. Although, it's not the most dignified or romantic thing to eat, and the fact it started life as peasant food makes it even more ironic.

However, I can tell you categorically, I love pizza. Especially Chicago style pizza with thick, fluffy bases.

I had promised in my bread rolls post that I'd do a pizza recipe, and I always deliver (well, sometimes)! So, I thought I'd try and do something nice and Valentine-y with pizza.

To make these you will need these ingrediments to make 3 individual pizzas, or one 9 inch (23 centimetre) pizza:

  • Half a batch of dough, made with this recipe, with half the directed amount of sugar
  • Sliced pepperoni, or salami
  • 3½ ounces (100 grammes) grated mozzarella cheese
  • 3 ounces (85 grammes) grated mild cheddar cheese
  • Half a bell pepper, colour of your choice, cut into quarter inch (5 millimetre) cubes
  • 5 ounces (140 grammes) passata with herbs and garlic, or plain pasta sauce
  • Optional: Quarter of a red onion, thinly sliced
And this equipment:
  • 2 large flat baking trays, or 12 inch (30 centimetre) pizza tray
  • Deep casserole dish with a lid, or a large mixing bowl and clingfilm
  • Rolling pin
  • Small saucepan

HOW TO:
  • Prepare the dough according to the recipe, which will take roughly two hours.
  • When it has finished its second proof, preheat the oven to 200°C (400°F, Gas Mk.6)
  • Make the pizza sauce by cooking the passata, or pasta sauce, in a saucepan over medium high heat and reduce it by half the thicken it.


  • Using a heart shaped cutter, cut hearts out of as many slices of pepperoni you want. Cut the scrap pepperoni into little pieces to sprinkle over the pizzas.
To make individual pizzas,
  • Divide the dough into three (roughly 100 grammes per portion), roll into balls, and leave the other two balls covered while you work with the first one.
  • Roll the dough ball out to about a quarter inch (5 millimetres) thick. Pick it up, and stretch it out a little: this will make the middle thinner and the edges thicker, to make a crust.
  • Place the pizza bases onto the baking trays before putting on the toppings, because they are difficult to move once decorated.
  • Spread a third of the sauce all over each pizza, leaving the crust clear, then sprinkle the mozzarella, chopped pepperoni, pepper, and onion, if using, all over the tops.
  • Sprinkle the cheddar on top of the other toppings, and then decorate the tops with a pepperoni heart each.
  • Cook in the oven for 15 minutes, swapping the trays half way through to allow each tray to get a trip near the top of the oven for extra crispiness. 
To make one large pizza,
  • Roll the full dough ball as above, then place on the round pizza tray.
  • Put the toppings on as above, decorating finally with pepperoni hearts.
  • Cook for 20 minutes, or until the bread is nicely browned, and the cheese is nice and crispy.

This recipe is quite adaptable and versatile, so you could put anything on the top. You could also make the pizzas heart shaped if you like, or use this recipe for any kind of celebration!

THIS TIME IN 2014: No blog

Thursday 9 February 2017

Valentine's Day: Chocolate Trifles (Gluten Free, with Dairy Free Option)

Nothing says Valentine's Day like chocolate, and the only thing better than one kind of chocolate is multiple kinds of chocolate. Behold, a chocolate trifle for you romantic candlelit dinner for two!


This, I will admit, is something I've wanted to try for a while. My companion and I are big fans of the Cadbury dessert pots, which are split into a pot of chocolate custard, and a little pot of sweets, kind of like a split pot yoghurt. Although it's not actually yoghurt, he calls is a chocolate yoghurt.


The only problem with these is that they are actually quite expensive, and I thought wouldn't it be great to try and replicate it at home! That means, I can make a load of it for my companion to enjoy without parting with eye-watering amounts of money for the twin pots in the shop. Also, when you make it at home, you don't have ingredient lists that look like this:

Like, what the actual hell are half of those ingredients.

When you make it at home, you have six ingredients. Six. Not thirty-six. It is best enjoyed immediately after the custard has completely chilled, and only assemble the desserts just before you want to eat them.


INGREDIMENTS
Makes 2 dessert cups

For chocolate custard,
  • 6½ fluid ounces (185 millilitres) whole milk, or milk alternative
  • 2 teaspoons (10 millilitres) cornflour
  • 1 tablespoons (15 grammes) sugar
  • 1 teaspoon (5 millilitres) vanilla essence
  • Good pinch of salt
  • 2 ounces (55 grammes) good quality milk chocolate, about 40% cocoa (or dairy free chocolate), chopped into pieces
  • 1 or 2 teaspoons (5 to 10 millilitres) cocoa powder, to taste
To assemble,
  • 5 ounces (140 grammes) chocolate cake suitable to your diet, cut into small cubes or crumbled into chunks
  • Whipped cream, or cream alternative, for decoration
  • Heart shaped sprinkles, for decoration
  • Optional: 2 tablespoons (30 millilitres) white rum, Baileys, or liqueur of your choice

HOW-TO

First, make the custard.
  • In a small saucepan, blend the cornflour, sugar, vanilla, and salt with a tablespoon (15 millilitres) of the milk until it it smooth and there are not lumps.
  • Add in the rest of the milk, stirring, then bring to the boil over medium heat, continuously stirring. Once it has reached the boil, continue to boil for about three minutes.
  • Remove from the heat, then add in the chocolate and stir thoroughly until completely smooth.
  • Return to the heat, and boil again for another minute or two.
  • Allow the custard to cool to room temperature, stirring frequently to prevent a skin from forming. This will take about half an hour.
Then assemble the desserts,
  • Using two wine glasses or pudding bowls, fill each glass about halfway full with crumbled cake. If you like, you can sprinkle with some alcohol for added interest.
  • Divide the custard between the glasses, then chill completely in the fridge for about an hour or two.
  • Decorate with whipped cream, either by dolloping or piping on top, then sprinkle with heart shaped sprinkles.

As previously mentioned, these are best enjoyed immediately. They don't keep very well: sometimes the custard goes runny if the cornflour is not cooked thoroughly enough into the custard. So eat straightaway on cooling, just in cases.

THIS TIME IN 2016: No blog
THIS TIME IN 2014: No blog

Tuesday 7 February 2017

Sweetie Pie's Top Baking Suggestions for Valentine's Day

So, the feast of St Valentine is upon us in a week's time. I have a few ideas of what to make this year to celebrate it, but due to college work, I can't get to a kitchen to bake until Friday the 10th to publish some more ideas.

In the meantime, I have compiled a list of ideas to try from the past few years of my blog for you to try! Here are my 5 top picks for Valentine's day 2017.


1. February Afternoon Tea Party: 3 Recipes!
In 2015, I hosted a series of afternoon tea parties in the community centre where I worked. Each one had a theme, and I did a Valentine's day one. In this blog post, there are 3 recipe ideas, and presentation ideas, also: cupcake rose bouquet, chocolate dipped berries, and heart-decorated millionaire's shortbread.


Although I had originally made this box of chocolates for Christmas, it's perfectly applicable to Valentine's day also. You could make it for your loved one, or for a social gathering. In this post are 8 chocolate ideas and ideas for presentation, but you could make any chocolate you like, even ones from the shop.


3. Ice Cream for Dessert
My blog has many ice-cream ideas, and I decided to make life easier by putting them all here in a list. They all use the 2 ingredient no-churn technique of whipping cream and condensed milk.

4. Cheesecakes
On this blog I also have a few recipes for mini cheesecakes that can be made in cake cases. Check these out for inspiration:

It wouldn't be a party without some booze, right? Here is a recipe inspired by Bailey's Irish Cream Liqueur, but without all the nasty dairy that you may not be able to digest.


So there you have it: a little list of things to try this Valentine's day! I will of course be working on new things over the next week.


Sunday 5 February 2017

Raspberry and Almond Cream Gȃteau (Wheat Free)

♪Happy birthday to me, 
Happy birthday to me, 
Happy birthday, dear Anna, 
Happy birthday to me!


Wednesday just past was my 682nd-ish birthday, and we celebrated this weekend with a family gathering. I was in college in Galway, and the family is all in Limerick, so a weekday gathering wasn't really possible. My brother came up on my actual birthday to see me, and my companion got me a little muffin with a candle on the day before because he couldn't see me on the day.

So, in order to properly celebrate, this weekend the clan gathered for a meal, followed by cake. I make my own birthday cakes usually, only because I enjoy baking. Last year for my big birthday bash, I made a strawberry cream gateau, because I particularly like that kind of cake and have had that one for a few years. But this year I thought I'd shake it up a big with some raspberries and almonds instead!

I really love cream gateaux: the combination of fluffy cake, rich cream, and fresh fruits is really pleasing. Of course, you can use any kind of berry for this, and any kind of jam. This time, I used raspberries.

I used a light and fluffy cake recipe, using the recipe I used to make the fondant fancies, but you can use any kind of plain sponge cake you like.


To make this cake you will need:

INGREDIMENTS
  • Two 8 inch (22 centimetre) vanilla sponge cakes
  • 9 fluid ounces (250 millilitres) fresh whipping cream
  • 2 to 3 tablespoons (40 to 60 grammes) icing sugar, to taste
  • 1 or 2 teaspoons (5 to 10 millilitres) vanilla essence, to taste
  • 4 ounces (115 grammes) raspberry jam, seeded or strained
  • About 4 ounces (115 grammes) flaked almonds
  • 12 fresh raspberries

EQUIPMENT
  • Cake board or serving platter
  • Palette knife, or table knife
  • Piping bag with a closed star nozzle, or a round nozzle
  • Long serrated knife, if needed
  • Balloon whisk

METHOD
  • Whip the cream with the sugar and vanilla until firm peaks. You can use an electric whisk if you like, but I strongly recommend doing it by hand to avoid overwhipping.
  • If the cakes have tall domes, level them using the serrated knife. Place one cake, cut side up, onto the board or plate.
  • Spread the jam on the cake layer, then about a third of the whipping cream.
  • Place the second cake on top, cut side down, and press gently to fix in place. Use half the remaining cream to coat the top and sides of the cake.
  • Press the flaked almonds into the sides of the cake until completely covered. Sweep away any excess for snacking.
  • Fit the piping bag with a star or round nozzle, to your preference, then fill with the remaining cream. Decorate the top edge with a border of your liking—I used a shell border—and pipe a rosette in the middle if you like.
  • Decorate the top with raspberries

As with anything that uses fresh cream, this cake won't really last longer than 3 days in the fridge, and is best enjoyed on the day it is made.

It's been a while! Happy 9th Anniversary!

  It's been a while. The past two years have been a helluva a ride. This year is gonna hold some big changes for this blog. I'm comp...