Showing posts with label fudge. Show all posts

Wednesday, 20 March 2019

Variation on a Theme: Cappuccino Fudge

Along with a cake, I made Stefi an edible present: I present to you Cappuccino Fudge!


As long term readers of my blog well know, I absolutely adore fudge. Over the years, I’ve found ways of refining my fudge recipes and process, and it has ranged from using condensed milk, to evaporated milk, to caster sugar, to brown sugar, to salted butter, to unsalted butter. I discovered a better way of making fudge when I made my Southern States Caramel cake, when I was looking for a good boiled icing recipe that wouldn't set too hard.

My current fudge recipe suits my tastes because it’s not sickly, crystal sweet, but round, rich, fatty, and smooth. The consistency is firm and can even be moulded like fondant if you treat it right! It reminds me of the high quality all-butter fudges you get from Thorntons or other chocolate shops. 

But another thing I really love about my current recipe is how easily it can be adapted to other flavours and combinations. Fat is a great vehicle for flavour, and seeing as nowadays I make fudge with copious amounts of butter and full-fat whipping cream, it holds flavours exceptionally well, even better than when I did that orange chocolate fudge video back in the early days of my YouTube channel. 


And so, I share with you my first proper venture into an unusual fudge flavour since I started using my updated recipe: cappuccino! This is essentially fudge with instant coffee added to taste, topped off with a stiff vanilla buttercream, and dusted with drinking chocolate powder. 

Find yourself a good quality finely ground instant espresso powder. It should be more like powder than granules. This can be mixed directly into the fudge mixture to taste, starting small and adding if you want it stronger. Alternatively, if you only have coffee granules, you can dilute them in the vanilla essence to get a concentrated coffee essence. That's what I did.

I made the topping using a fairly stiff buttercream flavoured with a splash of vanilla essence. I piped it on with a star nozzle, but you could equally as easily swoop it on to look more like milk foam. I used Cadbury drinking chocolate to dust it, but you could also use the chocolate topping that comes in boxes of instant cappuccino sachets. My dad loves that stuff, so there’s never any of it around me to use! 


INGREDIMENTS

1¼ pounds (570 grammes) caster sugar
8 fluid ounces (225 millilitres) whipping cream, slightly warmed
8 ounces (225 grammes) unsalted butter
¼ to ½ teaspoon (1 to 3 millilitres) fine salt
1 tablespoon (15 millilitres) vanilla essence

For the topping
3 ounces (85 grammes) unsalted butter
9 ounces (250 grammes) icing sugar
Milk, at room temperature, for mixing
Vanilla to taste
Hot chocolate powder, for dusting


HOW-TO
  • In a large saucepan with a metal or enamel interior (don't use a dark coated pan), add the sugar, cream, and half of the butter. Stir well over medium-low heat until everything has dissolved nicely and is a syrup with no gritty sugar on the bottom. Bring to a simmer.
  • When it begins to simmer, turn the heat to medium-low and simmer gently for up to 30 minutes, until it reaches soft-ball stage (112°C to 115°C (235° F to 240° F)). On reaching this temperature, remove from the heat immediately and allow to cool for 10 to 15 minutes, or until the bubbling has completely stopped.
  • Cut the remaining butter into small cubes, and then beat the syrup with an electric hand mixer on medium speed for about 2 minutes.
  • As the syrup begins to thicken and lose its gloss, taking on a matte appearance, start adding the butter, a cube at a time while beating, making sure to beat in each cube fully before adding the next. The whole process should take about 5 to 6 minutes.
  • Eventually, you will get a deliciously thick, fudge mixture. If the fudge begins to split, leaving oily patches or film, add in half a teaspoon of cold water and beat until it comes together again.
  • To flavour, dissolve the coffee granules in the vanilla essence and beat in thoroughly. Salt to taste: you'll need a surprising amount of salt.
  • Pour out into a 7 inch (20 centimetre) square tin, that has been lined with non-stick paper. You could use a silicone tin, which is what I do.
  • Allow the fudge to cool to room temperature before icing, then make a stiff buttercream with the icing ingredients, and pipe or dollop on top of the fudge. Dust with hot chocolate powder.
  • Allow the whole confection to set for at least 6 hours at room temperature before cutting into equally sized pieces. I recommend one inch (2.5 centimetre) squares.

Wednesday, 14 June 2017

Southern States Caramel Cake

Howdy, y'all! I present to you a Southern States style caramel cake.


 I've been wanting to do another American style cake for a while, and ever since I saw a post about caramel cake on Pinterest, I knew it would be that one. I know I do a lot of American style things, but I find the cakes and sweets so fascinating because we have nothing like them here.

My father recently went on a business trip to New York, which was his first time in the United States. He works for a multinational company that designs LED signs, and one of the signage systems in the subway system had gone a bit haywire. As such, he was flown from Ireland to New York to investigate the problem for a couple of days; luckily for his wanderlust, the problem took all of three minutes to fix. He showed us all the photos of his trip when he returned, and it looked to us like he had a whale of a time.

(I think it speaks volumes of the company's faith in my father's programming ability that they wanted him flown over from here! Well done, Daddeee!)


As such, hearing about my father's transatlantic adventures reignited my interest in American baking. So I decided to have a shot at the caramel cake.

From my research, there are many, many, many ways to make caramel cake, each purporting to be the authentic way. So, I turned to retro recipe hunting: how was this cake made by all American grandmas? The cake itself has to be a good firm cake, a lot of the recipes for which advise using sour cream to make the crumb dense. And, although many recipes use icing sugar, the way to make the icing is a traditional boiled sugar beaten fudge.


Now, boiling sugar is one of those things that sends bakers running in the opposite direction: there are so many things that can go wrong. However, please don't feel overwhelmed as this one is quite easy! I just tweaked one of my fudge recipes in response to my research to make the mixture more like an icing. If you've made fudge before, you can make this icing.

I have made a baby little 4 inch (10 centimetre) cake just to try the recipe out, and I've scaled up the icing recipe for a full 8 inch (20 centimetre) cake. If you want to make a mini cake like I did, just half the quantity and cooking time, making sure to test for what sugar stage you're at.

INGREDIMENTS
For one 8 inch two-layer round cake
  • One deep 8 inch (20 centimetre) round cake, vanilla flavour
  • 1¼ pounds (570 grammes) caster sugar
  • 8 fluid ounces (225 millilitres) whipping cream, slightly warmed
  • 8 ounces (225 grammes) unsalted butter
  • ¼ to ½ teaspoon (1 to 3 millilitres) fine salt
  • 1 tablespoon (15 millilitres) vanilla essence

HOW TO
  • Prepare your cake for layering by cutting off the dome and cutting it in half horizontally, keeping the layers equal.
  • In a large saucepan with a metal or enamel interior (don't use a dark coated pan), add two ounces (55 grammes) of the caster sugar and cook over medium heat, stirring constantly, until it turns a deep, deep brown. Don't be afraid of burning it: if it does burn, just start again with another 2 ounces of sugar.
  • Once the sugar has browned, add in the warm cream, the rest of the sugar, and half of the butter. Stir well until everything has dissolved nicely and is a golden brown syrup. Bring to a simmer.
  • When it begins to simmer, turn the heat to medium-low and simmer gently for up to 30 minutes, until it reaches soft-ball stage (112°C to 115°C (235° F to 240° F)). On reaching this temperature, remove from the heat immediately and allow to cool for 10 to 15 minutes, or until the bubbling has completely stopped.
  • Cut the remaining butter into small cubes, and then beat the syrup with an electric hand mixer on medium speed for about 2 minutes.
  • As the syrup begins to thicken and lose its gloss, taking on a matte appearance, start adding the butter, a cube at a time while beating, making sure to beat in each cube fully before adding the next. The whole process should take about 5 to 6 minutes.
  • Eventually, you will get a deliciously thick, caramel icing. If the icing begins to split, leaving oily patches or film, add in half a teaspoon of cold water and beat until it comes together again.
  • Fill and ice the cake with the icing quickly. If the icing begins to seize as you're using it, once again add a little water and beat to get a nice icing once more.
  • After icing the cake, allow to set for at least 2 full hours before serving. This cake is best served the day after preparation.

THIS TIME IN 2015: Sausage Rolls (Wheat Free)
No blogs on this day in 2016, 2014, nor 2013

Tuesday, 4 April 2017

Chocolate Cake with Beetroot, and Coconut Fudge Icing (Wheat and Dairy Free)

Happy 250th blog post! I can't believe I've written so many blogs.

And for this joyous occasion, I present to you my future sister-in-law's birthday cake! A dairy free chocolate extravaganza with a secret ingredient: beetroot.

(In fact, what she actually asked for was a chocolate cake with beetroot and avocado, but I thought adding one weird ingredient would be enough for my conservative tastebuds, and those of my family.)

I know what you're thinking: beetroot? In a cake?! I thought the same thing when she asked me to make one of these for her birthday. But, d'you know what, it's actually way nicer than it sounds.

I hate beetroot. So much. I cannot stand how it tastes or smells. So the thought of putting it into a cake which I would most likely be eating was, at first, abominable. However, having tried it, it's actually nowhere as bad as one might think. It just makes the chocolate taste darker, earthier, and a little more bitter.


I mixed the beetroot with a little carrot to take the edge off. If you like the taste of beetroot, you could use all beetroot.

The icing turned out really well also! I adapted my dairy-free truffles recipe from a few years ago to make a vegan ganache that I could make into a fudge icing. I also made a dairy-ful version when I made a well-done-for-finishing-college-without-killing-everyone cake for my colleagues for the last day of classes last week (I'll be sharing that recipe in a few days when I've written it up.

If one didn't add any water to adjust the texture of the icing, you could easily make some delicious dairy-free chocolate fudge with it too: it has just the right level of density and richness to make a nice sweet.

INGREDIMENTS:
For two round 8 inch (20 centimetre) sandwich cakes:
  • 2 ounces (55 grammes) cocoa powder
  • 6 ounces (170 grammes) white spelt flour
  • 2 teaspoons (10 millilitres) baking powder
  • 4 ounces (115 grammes) caster sugar
  • 1 teaspoon (5 millilitres) ground mixed spice
  • Pinch of salt
  • 4 medium eggs
  • 4 ounces (115 grammes) sunflower oil
  • 2 ounces (55 grammes) brown sugar
  • 4 ounces (115 grammes) finely grated raw carrot
  • 4 ounces (115 grammes) finely grated raw beetroot.You can adjust the ratio of carrot and beetroot to your taste, just make sure you have 8 ounces (225 grammes) of grated raw vegetable in total

For the dairy free chocolate icing,
  • 8 ounces (225 grammes) dairy free dark chocolate, such as cooking chocolate
  • 2 ounces (55 grammes) coconut oil
  • 3 ounces (85 grammes) golden syrup, or honey
  • 8 ounces (225 grammes) icing sugar
  • 2 to 3 tablespoons (30 to 45 millilitres) water, to adjust texture
To decorate:
  • Candy coated chocolate sweets, or any other decoration of your choice

METHOD

First, make the cakes.

  • Preheat oven 180ºC (350ºF, Gas Mk.4). Grease two 8 inch (20 centimetre) round sandwich tins with a little butter or margarine. 
  • In large bowl, sieve the cocoa powder, spelt flour, baking powder, spice, salt, and caster sugar. Take a spoonful of this mixture and use it to dust the tins, returning the excess to the bowl.
  • In a jug, beat together the brown sugar, sunflower oil, and eggs until fully combined. Mixing the brown sugar with the wet ingredients makes it easier to dissolve out the lumps.
  • Make a well in the dry ingredients and pour in the wet mixture. Mix with a spatula or wooden spoon until it is half mixed, and then add in the carrot and beetroot. Mix until completely combined and smooth.
  • Divide the mixture between the two tins and bake for 20 to 25 minutes, or until springy to the touch and a cocktail stick poked into the centre comes out clean.
  • Cool in the tins for about 10 minutes, then run a knife around the edges to loosen. Turn out the cakes and allow them to cool completely.
Second, make the icing.
  • In microwave proof mixing bowl, or a glass bow set over a pan of simmering water, melt together the chocolate, oil, and syrup. If using the microwave, heat in one minute intervals on the "Defrost" setting.
  • Stir well until fully melted and combined, then cool completely until it thickens.
  • Once thickened, beat the icing sugar in gradually using an electric mixer, alternating with a few teaspoons of water at a time, until you have a fudgy spreadably icing.
Finally, assemble the masterpiece.
  • Cut the domes off the cakes, and sandwich cut sides together with about a quarter of the icing. Use half to ice the top and sides, and then use the rest to pipe a border along the top and bottom edges of the cake. I used a star tip, but you can use whatever shape you like.
  • Decorate the top with the sweets, or any decoration of your choice.
Keep in an airtight container for up to two weeks, but it's best eaten within the first five days.


Sunday, 2 April 2017

College Classes are Over! Hoorah! (Chocolate Butter Cake with Simple Fudge Icing)

I have officially finished all my Masters degree classes! Now all that's left is the summer thesis (oh joy), and I marked the occasion with a delicious buttery chocolate cake!

 
I don't often make cakes using the creamed method. In fact, for the last four years of running this blog, I have almost exclusively made cakes using a sabayon (that is, eggs beaten with sugar). Over the years I have lauded the use of this method for producing lighter airier cakes....

Until I realised that all this time I've been creaming my butter incorrectly.

Yes, am now a creamed butter cake convert once more. The trick is beating the absolute bloody hell out of the butter, and slowly incorporating the eggs. So, it's like a sabayon in reverse: usually, I beat the eggs and sugar and gradually add the fat. This time I beat the fat and sugar, and gradually added the eggs.


Now, don't get me wrong. I like the lightness of a whipped egg cake. However, they're not as foolproof: they can shrink, not rise properly, be rubbery, etc., but I now understand why a butter cake, or traditional Victoria sponge, is the go-to for beginners.

Also, I am now also a convert to using icing sugar in fudge icing. For years I was a bit of a purist about using sugar syrup, but it's fiddly as Hell. This chocolate fudge icing uses four simple ingredients, and now fussing with boiling sugar.

The basic formula is 4 parts chocolate, 4 parts icing sugar, 2 parts butter, and 1 part milk. So, it's essentially a traditional buttercream icing, with as much chocolate as icing sugar added. It's really light and fluffy, but at the same time rich and thick.

So, let's get started!

INGREDIMENTS
Makes one two-layer 8 inch (20 centimetre) round cake

For the cake,
  • 4 ounces (115 grammes) butter, very soft
  • 6 ounces (170 grammes) sugar, light brown or caster
  • 4 medium eggs, beaten in their own jug or bowl
  • 7 ounces (200 grammes) white spelt flour
  • 1 ounce (30 grames) cocoa powder
  • 2 teaspoons (10 millilitres) baking powder
  • 2 fluid ounces (60 millilitres) milk
  • 2 teaspoons (10 millilitres) vanilla essence

For the icing,
  • 8 ounces (225 grammes) plain chocolate, minimum 45% cocoa
  • 4 ounces (115 grammes) butter
  • 2 fluid ounces (60 millilitres) milk
  • 8 ounces (225 grammes) icing sugar
  • 2 teaspoons (10 millilitres) vanilla essence

METHOD

First, make the cake.
  • Preheat the oven to 180°C (375°F, Gas Mk.4), and grease and flour the inside of a deep 8 inch (20 centimetre) round cake tin. Alternatively, you can use two sandwich tins of the same width.
  • In a mixing bowl, beat the butter with an electric mixer or wooden spoon until pale, light, and fluffy. This can take about 3 to 5 minutes.
  • Beating all the time, add the sugar in three additions, beating well between each addition. This can take a further 2 or 3 minutes.
  • Mix the vanilla essence into the beaten eggs, and add the eggs into the butter and sugar gradually—about four or five additions— beating very well until completely combined after each addition. The mixture shouldn't break, but if it does at any stage add a spoonful of the measured flour and continue beating.
  • Put the flour, cocoa powder, and baking powder into a sieve set over the bowl, and sieve in half of the dry ingredients. Fold them through gently with a metal spoon or wire whisk.
  • Add the milk and fold again, followed by the final addition of dry ingredients. Fold gently until fully combined.
  • Pour the mixture into the prepared tin, smoothing the top out as best you can with a metal spoon. Alternatively, split the mixture evenly between the two sandwich tins.
  • Place into the centre of the preheated oven and bake one whole cake for 35 to 45 minutes, or two sandwiches for 20 to 25 minutes. Check for doneness with the usual cocktail stick test at the lower time mark, and cook for a further 5 or 10 minutes if needed.
  • Once cooked, remove from the oven and cool in the tin(s) for about 10 minutes before cooling completely on a wire rack.

While the cake is baking, make the icing.
  • In microwave proof mixing bowl, or a glass bow set over a pan of simmering water, melt together the chocolate, butter, and milk. If using the microwave, heat in one minute intervals on the "Defrost" setting.
  • Stir well until fully melted and combined, then cool completely until it thickens, about two hours or so. You can speed up this process by cooling it in the fridge and giving it a mix every so often to cool evenly.
  • Once thickened, beat in the icing sugar gradually using an electric mixer until you have a fudgy spreadable icing. 
Finally, assemble the masterpiece.
  • Cut the domes off the cake and slice in half, and sandwich cut sides together with about a quarter of the icing. Use half to ice the top and sides, and then use the rest to pipe a border along the top and bottom edges of the cake. I used a star tip, but you can use whatever shape you like.
  • If using sandwiches, cut the domes off and sandwich cut sides together as above.
  • Decorate the top with the sweets, or any decoration of your choice. I iced the top with a simple icing sugar and milk glaze.
Keep in an airtight container for up to two weeks, but it's best eaten within the first five days.

THIS TIME IN 2016: Depression Is a Terrible, Terrible Thing
THIS TIME IN 2013: Different Sponge Cake Flavours (no April Fool, it's after 12pm)

Friday, 20 January 2017

Caramel Macchiato Ombre Gateau (Wheat Free)

This year's creation for my eldest brother's birthday is a caramel macchiato ombre gateau!


My eldest brother's birthday is the first in the year, which is convenient for the first born, and he--like our dad--likes coffee cake. And after years and years of simple old coffee cakes, you start to crave something a little different. As for the icing, I've never done an ombre, or gradient, effect cake before, so I thought I'd give it a go.


I took my inspiration from an American coffee shop classic: the caramel macchiato. Espresso mixed with some caramel syrup, topped off with a dollop of steamed milk foam. Although I could have done some white icing rosettes on the top of this cake to represent the milk foam, I decided to stick with my two tone pallet.

Using the caramel and coffee flavours and colours, I faded the two colours together nicely for a first attempt! There are countless tutorials on YouTube for ombre icing, and there is no point in reinventing the wheel: I will trust that you will find a tutorial online that best describes the process, because explaining it in writing is actually very challenging. I tried writing a few drafts, but I just couldn't quite capture it.

I used some delicious Lavazza coffee to make the cakes, and I mixed the brewed coffee with a little instant to up the ante and give it a super coffee kick, as well as including some ground beans in the cake itself.

I made the cake at my companion's house, where he had no fudge pieces to decorate it. Luckily, there were some in my Mum's house, where the celebration was held.


FREE FROM

☑ Soya (check for soya lecithin)

☑ Yeast
☑ Wheat
☑ Nuts

CONTAINS
☒ Eggs
☒ Dairy (dairy substitutes can be found in italics)
☒ Gluten
☒ Refined sugar products


INGREDIMENTS
For one large 8 inch (22 centimetre) round cake
  • 7 ounces (200 grammes) white spelt flour
  • 2 ounces (55 grammes) cornflour
  • ½ teaspoon (3 millilitres) baking powder
  • ½ teaspoon (3 millilitres) baking soda
  • 6 ounces (170 grammes) butter, at room temperature, or margarine
  • 6 ounces (170 grammes) caster sugar
  • 3 medium eggs
  • 2 teaspoons (10 millilitres) vanilla essence
  • 3 ounces (85 grammes) brown sugar
  • 6 fluid ounces (180 millilitres) very strong coffee, either brewed or instant
  • Optional: 1 level tablespoon (15 millilitres) ground coffee

For the caramel,
  • 6 fluid ounces (180 millilitres) evaporated milk, cream, lactose free cream or cream substitute
  • 6 ounces (170 grammes) light brown sugar
  • 3 ounces (85 grammes) butter, or margarine
  • 1 ounce (30 grammes) golden syrup
  • 1 teaspoon (5 millilitres) vanilla essence
  • ¼ teaspoon (2 millilitres) salt

For the buttercream,
  • 12 ounces (340 grammes) icing sugar, sifted
  • 3 ounces (85 grammes) butter, at room temperature, or margarine
  • 3 ounces (85 grammes) vegetable fat, at room temperature
  • 4 ounces (115 grammes) caramel, as prepared above
  • 1 to 2 tablespoons (15 to 30 millilitres) cream, or evaporated milk, or regular milk or milk substitute
  • 1 teaspoon (5 millilitres) vanilla essence
  • 1 tablespoon (15 millilitres) instant coffee
  • 2 tablespoons (30 millilitres) boiling water

For assembly,
  • Fudge or caramel sweets, cut into ¼ inch (5 millimetre) cubes


METHOD


First of all, make the caramel sauce.
  • Combine all the ingredients in a medium saucepan and heat together over medium-low heat, until all ingredients are melted and combined,
  • Once you achieve a smooth mixture, raise the temperature to medium-high and cook vigorously until the consistency becomes thick and creamy. This should take about 5 to 10 minutes, depending on your cooker.
  • Pour into a pre-warmed bowl--to prevent the ceramic from cracking, just swish some hot water around in the bowl and tip it out--and allow to cool to room temperature, which should take about an hour or two.
  • Once cool, chill in the fridge for about an hour until it becomes thick and spreadable.


While the caramel is cooling and thickening, make the cake.
  • Preheat your oven to 170ºC (325ºF, Gas Mk. 3), and grease and flour an 8 inch (22 centimetre) deep round cake tin.
  • Prepare the cake according to this recipe, using coffee instead of cocoa powder and hot water, and sifting the cornflour in with the flour, baking soda, and baking powder. Bake for 40 to 45 minutes, or until fully baked and a skewer comes out clean. Cool as instructed.

For the icing,
  • Dissolve the instant coffee into the hot water and allow to cool to room temperature.
  • Beat the vegetable fat until creamy with an electric mixer, then add the butter. Continue to beat until fully combined.
  • Beat in 4 ounces (115 grammes) of the prepared caramel until smooth and creamy.
  • Beat in half the icing sugar on a low speed until combined, then the rest of the icing sugar. Adjust the consistency with the cream, or substitute, if needed.
  • Split the icing into two batches, and mix the dissolved coffee into one of the batches.
To assemble:
  • Cut the dome off the cake, then slice in half horizontally. Attach the top half of the cake to its platter with a tiny smear of the filling to make the bottom layer. Spoon the remaining caramel sauce onto the cake layer and spread out with a palette knife (or butter knife) until it's about half an inch (1 centimetre) from the edge.
  • Using the caramel icing, ice the whole cake with a very thin crumb coat. Chill for a full hour.
  • Once chilled, you can ice in a gradient affect: ice the top normally with the caramel icing, then the top half of the sides with a very thick layer of caramel icing; you should use all of the caramel icing in this process. Ice the lower half thickly with half of the coffee icing. Then, smooth out the edges in confident strokes to create the gradient. There are hundreds of videos on YouTube about this, and watching is better than reading when it comes to these things.
  • Mix the excess icing with the remaining coffee icing, place into a piping bag with a large round tip, and pipe decorations around the bottom edge and top edge of the cake.
  • Sprinkle the top with the cut caramel or fudge.
  • You may have some icing left over from making this cake. If so, you can use it for another project, or freeze it for up to 3 months.

THIS TIME IN 2016: Coffee 'Cheesecake' Gâteau

Monday, 19 January 2015

Orange Mocha Gâteau (Wheat Free)

This week's unusual cake concoction is: orange mocha gateau! I know a gateau has a specific definition, but I think cake is not an appropriate word for such a confection.


Sunday the 18th was my brother's 30th birthday, and every year my brother asks for one of two same things: either cheesecake, or coffee cake. There's nothing better than a classic coffee cake when the time is right, but sometimes I do get a little tired of eating the same cake every year. This time, I thought I'd shake things up a little.

Recently I was a frequent sipper at a local café in Limerick city called "The Cellar Door", but it unfortunately closed down just before Christmas due to circumstances out of their hands. One thing they served, which I always enjoyed, was hot chocolate made with Terry's orange chocolate bars, blended with steamed milk. Orange and chocolate are a wonderful combination to me. The woman who co-owned the business tried mixing it with a shot of espresso, and a beautiful thing was created. Despite the fact that the hot chocolate with the added double shot of espresso is €4.80 ($5.60, or £3.70), I buy one every time and I nurse it.

I had come across the concept of orange flavoured coffee before; when I was a little girl, my father had found these sachets of flavoured coffees: orange, raspberry, and mint. He used them to show me how to use a coffee filter machine, and to introduce me to coffee; at the time, I thought it was gross, but later in life I revisited the idea, and at first invented my Coffee Raspberry slices. I had never really got back around to something orange coffee flavoured, but I thought this would be the perfect opportunity, but with the added goodness of a dash of cocoa.

Now, unfortunately, this recipe is not free from very much, but substituting all the butter and milk chocolate products for margarine and dairy free chocolate alternatives will make it dairy free.

Also, this recipe makes a four layered cake. My one in the photos has three layers, but that was due to an error I made: I didn't run the knife flush against the side of one of the tins, meaning one cake came out with the sides cut at an angle. The only way I could fix it was by cutting it in half and using only the full side. Although unfortunate, it meant I had a lot of extra cake and some filling icing left over... yum!


FREE FROM
☑ Soya (check for soya lecithin)
☑ Yeast
☑ Wheat

CONTAINS
☒ Cocoa
☒ Eggs
☒ Gluten
☒ Dairy
☒ Refined sugar products


INGREDIMENTS:
For two 8 inch (20 centimetre) round sandwich cakes:
  • 4 medium eggs, room temperature
  • 4 ounces caster sugar
  • 2 ounces soft brown sugar
  • 2 ounces weight of sunflower oil
  • 2 ounces butter, or block margarine, or extra sunflower oil
  • 2 fluid ounces espresso, or 2 fluid ounces of boiling water mixed with 3-4 teaspoons of instant coffee granules
  • 6 ounces white spelt flour
  • 2 ounces cornflour
  • 1 teaspoon baking powder
  • 1 tablespoon ground coffee
  • Pinch of salt
  • Grated zest of 1 large orange

For coffee cream filling
  • 6 ounces white chocolate, or dairy-free white chocolate
  • 3 ounces butter, or margarine
  • 3 fluid ounces espresso, or strong coffee prepared as above
  • 9 ounces icing sugar, sifted

For orange chocolate fudge icing:
  • 9 ounces milk chocolate, or dark chocolate
  • 3 ounces butter, or block margarine
  • Juice of 2 large oranges
  • 6 ounces caster sugar


METHOD
First, bake the cakes:
  • Preheat your oven to 180°C (350°F, Gas Mk.4, or moderate). Grease and flour two 8 or 9 inch (20 or 22 centimetre) round sandwich tins.
  • Make the cake mixture according to this recipe, using the coffee in place of the water and adding the orange zest with the eggs at the beginning. Keep your orange to juice later. Divide the mixture between the two tins and bake in the centre of your oven for 20 to 25 minutes, or until a cocktail stick or knife comes out clean when poked into the middle of the cakes. You made need to rearrange your oven shelves to get both in near the oven's centre.
  • Once cooked, run a knife around the edge to loosen the cakes, then leave to cool in the tins for 10 minutes before turning out and cooling on a wire rack.
While cake is cooling, prepare the icing and filling.

For the icing:
  • For the chocolate icing, juice the zested orange and the second orange into a small measuring jug. Top the orange juice up with water to make 6 fluid ounces (180 millilitres) of liquid altogether.
  • Pour the diluted orange juice and the sugar into a saucepan and heat together gently until the sugar has melted. Bring to the boil, then simmer for two minutes. Keep an eye on the clock!
  • After two minutes, remove from the heat and stir in the chocolate and butter, or margarine, and stir until melted or almost melted.
  • Return to the heat and cook for another minute, stirring continuously, until you have a smooth, shiny mixture. Remove from the heat and allow to cool to room temperature before chilling in the fridge for at least 30 minutes, or until thick and spreadable.

For the filling:
  • Melt together the butter, or margarine, white chocolate, and coffee together gently. You can do this in a bowl set over a pan of simmering water, or in the microwave in an appropriate bowl for 1 minute intervals on "Defrost", stirring after each interval.
  • Once the chocolate mixture is smooth and combined, add in the icing sugar and beat until creamy and there is not a lump in sight. Allow to cool to room temperature before chilling in the fridge for at least 15 minutes, or until it is a soft and spreadable consistency, but still only holds soft peaks when dropped from a spoon.

To assemble:
  • Cut the domes off both cakes (if they have domes), then slice each cake in half horizontally. Decide how you will assemble the layers, making sure the bottom layer of one cake, bottom side up, is on the top of the pile to make a flat top.
  • Attach your bottom layer to its platter with a tiny smear of the filling. Spoon one third of the filling onto the bottom layer, spread out with a palette knife (or butter knife) until it's about half an inch (1 centimetre) from the edge.
  • Pop the next layer on top, pressing it gently to secure it. Spoon another third of the filling on top and spread as before. Repeat with the last third of filling, and top off with a cake layer. Allow to sit in the fridge for about 10 minutes to firm a little.
  • Spread about a third of the icing on top of the cake, making a swirling zig-zag pattern for decorative effect, then ice the sides with the remaining icing. 
  • If you always spread on the icing only and never allow the knife to touch the cakes' crusts, then you ideally don't need a crumb coat. If you get the odd crumb in, it's not the end of the world, but if you want absolute perfection crumb coat the whole thing first, set in the fridge for about 10 minutes, then ice completely.
  • Once the cake is completely iced, decorated how you like with sprinkles, coffee beans, or fine strips of orange zest (like I used), then chill the cake for about 30 minutes to firm up. It should be served and stored at room temperature, however, so let it sit on the counter (or hidden in a cupboard) for about 20 minutes before serving.


And there you have it! Something nice for your next big birthday bash.

THIS TIME LAST YEAR: Ginger Ale (No Brewing Required)

Monday, 12 January 2015

Chocolate Brownie Icing

Over the course of my bakery days, I had tried a lot of recipes for chocolate fudge icing, which can double function as glaze. As a child I had a book called "I Can Cook", which was a little paper back book with about 16 pages of easy recipes, one of which was a chocolate fudge icing. It was basically chocolate, butter, sugar and milk, but it required making a simple syrup with the milk and sugar, and it used an inordinate quantity of sugar and milk. It makes a lovely sticky sweet fudgy icing that sets beautifully thick for spreading, but I don't think it really works well as a brownie glaze.

I then watched a great video (in German) about how to make American style chocolate cake, and in it she included a recipe for "Schokocreme", which is basically chocolate fudge icing. It is super, super, too rich, as it uses equal quantities of chocolate and butter. Here in Ireland, the commonest form of butter is salted, meaning the finished icing was quite salty as well. I then put my thinking cap on to see if I could find a middle ground between too much sugar and too much butter.

So, I tried a few variations on a theme, until I settled on this quite effective recipe:

  • 4 parts chocolate (dark, milk, or white)
  • 2 parts icing sugar
  • 2 parts butter (or margarine)
  • 1 part milk (or coffee works too)
To make, simply melt the butter, sugar, and milk together in a microwave safe bowl on 1 minute bursts on "Defrost", or in a bowl over a pan of simmering water; once melted, beat in the sugar. What's that I hear you say? Is that it? Yes. Yes it is.


For a tray of brownies, which is roughly a 10 inch (25 centimetre) square in my case, 4 ounces of chocolate, 2 ounces each of butter and sugar, and 1 fluid ounce of coffee works really well for me to pour on top of the brownies while they're still hot, and then the whole batch cools down together. This means that the frosting fuses nicely to the cake surface, preventing the set icing from peeling off in layers, which can sometime happen when hot icing is poured onto cold cake.

This makes a nice mixture that's both pourable as a glaze when hot (which I use for topping brownies, as pictured), and spreadable as an icing when cold. Also, you can use it as a whipped filling if you beat it when it is fully cold.

While its wet, you can sprinkle things into it and they set into it perfectly. This icing works really well also as a piped icing for fairy cakes, due to its decadent nature.


It has a slightly soft, impressionable texture when set, and is great for decorating tray bakes. This seems to work equally well with dark, milk or white chocolate, whereas other recipes I've tried in the past really don't work with white chocolate, given its high fat content.


Monday, 22 December 2014

A Multitude of Different Kinds of Fudge

Christmas is the time for indulgence in all things rich and sweet, and as such I treated many people this year with bags of fudge. Fudge is basically sugar held together with dairy fat; what's not to like?


In a bid for greater efficiency, I made a giant batch of fudge using this recipe, and cut it up into one inch pieces. I then separated them into a few different cups so I could coat them all differently. Previously, I would have made many different batches, each of different flavours, but I decided this time to do what is done to jelly beans: make the centres all the same flavour, and then just flavour the coatings.


I decided that peppermint is a very Christmassy flavour, so lots of people got peppermint flavoured fudge. I made a few bags of fudge fully dipped in peppermint milk chocolate (I added a few drops of peppermint essence to the melted chocolate), and a few that were half dipped in peppermint white chocolate, decorated with sprinkles.


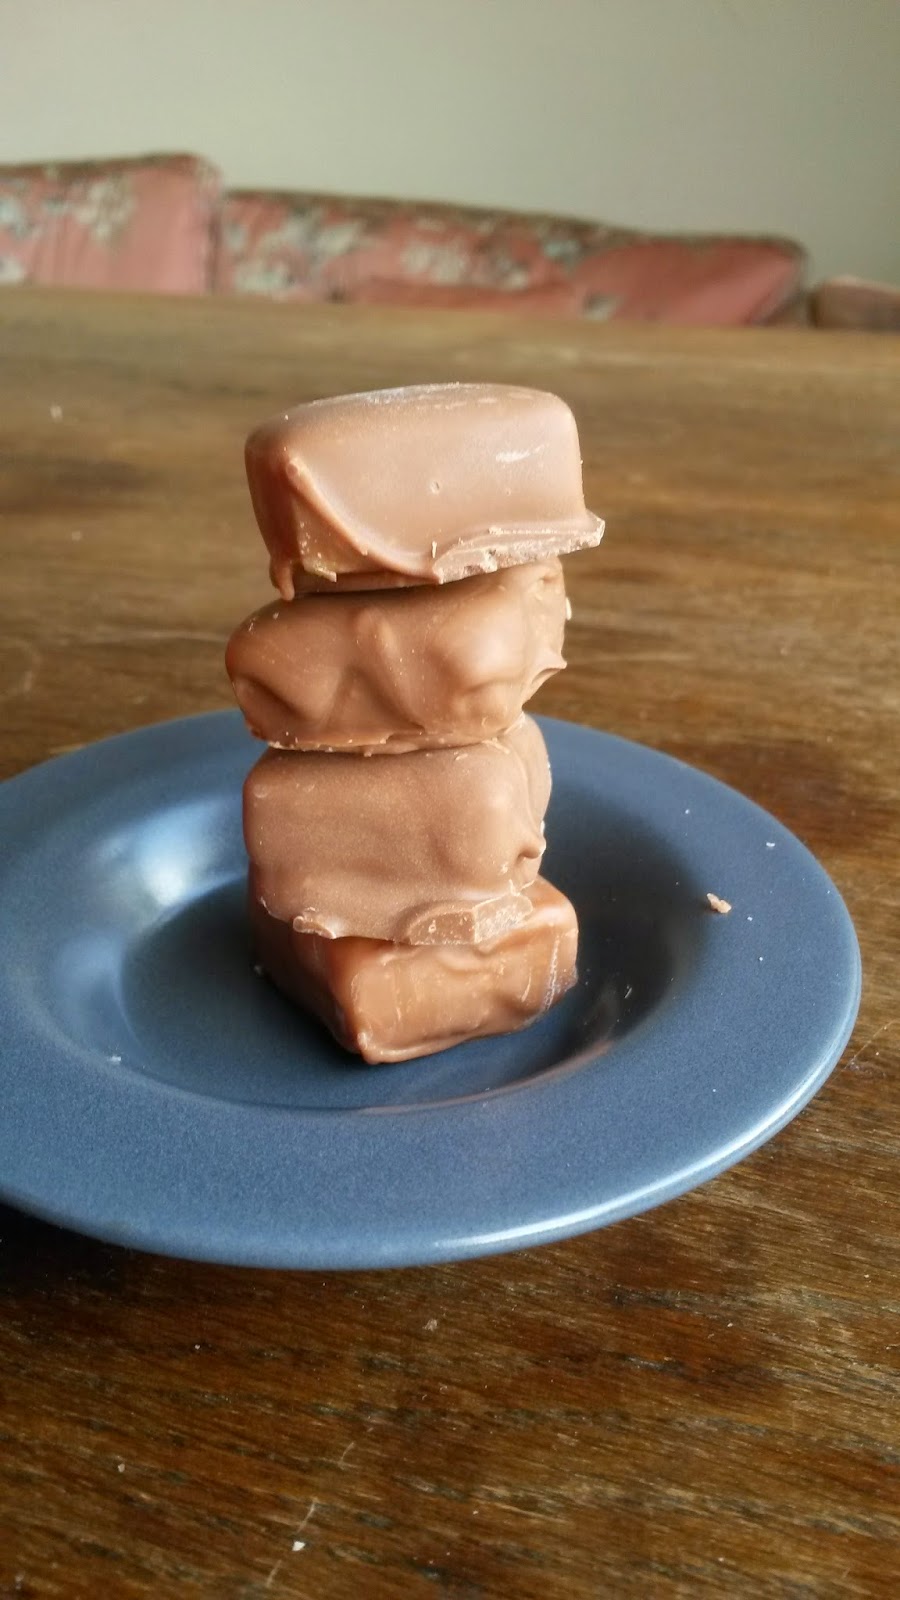
I also half dipped some in dark chocolate and sprinkled with coarse sea salt, which made for a rather interesting flavour and texture experience. I also gave away a few batches of plain old vanilla fudge, which was just the original fudge without any coating.


Overall, they were a big success. I think I still have some left over in my fridge to crack out if I have forgotten anyone!

It's been a while! Happy 9th Anniversary!

  It's been a while. The past two years have been a helluva a ride. This year is gonna hold some big changes for this blog. I'm comp...