Monday 22 December 2014

A Multitude of Different Kinds of Fudge

Christmas is the time for indulgence in all things rich and sweet, and as such I treated many people this year with bags of fudge. Fudge is basically sugar held together with dairy fat; what's not to like?


In a bid for greater efficiency, I made a giant batch of fudge using this recipe, and cut it up into one inch pieces. I then separated them into a few different cups so I could coat them all differently. Previously, I would have made many different batches, each of different flavours, but I decided this time to do what is done to jelly beans: make the centres all the same flavour, and then just flavour the coatings.


I decided that peppermint is a very Christmassy flavour, so lots of people got peppermint flavoured fudge. I made a few bags of fudge fully dipped in peppermint milk chocolate (I added a few drops of peppermint essence to the melted chocolate), and a few that were half dipped in peppermint white chocolate, decorated with sprinkles.


I also half dipped some in dark chocolate and sprinkled with coarse sea salt, which made for a rather interesting flavour and texture experience. I also gave away a few batches of plain old vanilla fudge, which was just the original fudge without any coating.


Overall, they were a big success. I think I still have some left over in my fridge to crack out if I have forgotten anyone!

Monday 15 December 2014

Fairy Cakes with Buttercream (Gluten-, Dairy-, and Egg Free)

I have a lot of friends (and a mother) with a lot of allergies, and every friend has their own unique combination of allergies. So, I decided to kill all the birds with one stone by making an allergen free batch of fairy cakes, drawing on a few recipes I found online. It took a few attempts, but they turned out nicely!


These cakes are gluten-, egg-, and dairy free, meaning basically anyone can have them; the buttercream is made using vegetable margarine, too.


I did a lot of research before I made these. I remember last year sometime being introduced to the idea of American wacky cake, which was a recipe invented during the Depression era when butter and eggs were in short supply, making it suitable for dairy and egg allergy sufferers. I then decided to see if making wacky cake with gluten free flour would work, and it did. I followed the first recipe (which I found here) to the letter, but when made with gluten free flour it was a little greasy; I retried using a little more flour, and it was a success.


Now, I use self-raising gluten free flour, which has added raising agent and a touch of xanthan gum. If you can only find plain gluten free flour, per 6 ounces (170 grammes) of plain flour add in 2 teaspoons (10 millilitres) baking powder, and 1/4 teaspoon (2 millilitres) xanthan gum, and sieve together.


FREE FROM
☑ Soya (check for soya lecithin)
☑ Yeast
☑ Eggs
☑ Gluten

☑ Dairy

CONTAINS
☒ Refined sugar products


INGREDIMENTS:
  • 6 ounces (170 grammes) self-raising gluten free flour (I use Doves Farm brand)
  • 6 ounces (170 grammes) caster sugar
  • 3 tablespoons (45 millitres) cocoa powder
  • Pinch of salt
  • 1 teaspoon (5 millilitres) vanilla essence
  • 5 tablespoons (2½ fluid ounces; 75 millilitres) sunflower oil
  • 8 fluid ounces (240 millilitres) water

METHOD
  • Preheat oven to 180°c (350°F, Gas Mk. 4) and line a 12 hole muffin tin with paper cases.
  • Sieve the flour, sugar, cocoa, and salt together into a large mixing bowl; make a well in the centre, and add the vanilla, oil, and water.
  • Mix gently with a wooden spoon until the flour it just moistened. Don't over mix, or the cakes will by dense and dry.
  • Divide the mix between the cases, filling each case to three-quarters full. Bake in the preheated oven for 15 to 20 minutes, or until spongy to touch and a cocktail stick comes out clean when poked through the middle of a cake.
  • Allow to cool in the tin for about 5 minutes before moving the cakes to a wire rack. Allow to cool completely before icing.


I made some with the cocoa, and some without. The plain vanilla cakes I iced with raspberry buttercream, and the chocolate cakes I iced with chocolate buttercream. To make the buttercream, use the instructions inthis blog entry, and the ingredients listed below.

RASPBERRY BUTTERCREAM
  • 1 ounce (30 grammes) vegetable margarine
  • 1 ounce (30 grammes) raspberry jam
  • 4 ounces (115 grammes) icing sugar
  • 1 or 2 teaspoons warm water

CHOCOLATE BUTTERCREAM
  • 2 ounce (55 grammes) vegetable margarine
  • 4 ounces (115 grammes) icing sugar
  • 1 tablespoon (15 millilitres) cocoa powder
  • 1 or 2 teaspoons warm water


Fit a piping bag with a half-inch (1 centimetre) closed star tip, and fill with one of the buttercreams. Pipe roses onto the appropriate cakes, by starting in the centre of each cake, piping outwards in a tight spiral until you have covered the whole top of the cake. The result should look like a rose.

And there you are! Some delicious gluten free vegan fairy cakes. I am yet to experiment a bit more with this recipe and make some more adventurous concoctions, but these are a good start. I bought these really pretty boxes in the local Dealz (PoundLand) and they went down a real treat.


Monday 8 December 2014

Gingerbread Stars (Egg and Wheat Free)

I went to visit some friends in Dublin the weekend before Christmas to give out some presents, and for each friend I made something quite small, more of a token than anything else. I thought I'd make one of my friends a small handful of decorated gingerbread stars, in the spirit of the season.


These stars use the same recipe as the gingerbread houses, which is a wheat- and egg free recipe for gingerbread, but I used royal icing to decorate them, which makes them not completely egg free. Because I don't really like having egg yolks left over from separating eggs for royal icing, I bought some instant royal icing, which does the job. It's not ideal, because it starts setting pretty much as soon as you make it, meaning that each biscuit you ice the icing gets firmer. But I digress.

I used red and white because I think it's a nice Christmassy combination of colours, and it also means I only had to divide it in two and colour one half, which makes it way less fussy. I piped them with a simple snowflake design, which uses the trick of feathering to add interest to the snowflake arms.

To make the snowflake design, pipe the outline of the star about an eighth of an inch (3 millimetres) from the edge of the biscuit, then fill in to make the base. While the base is still wet, pipe a line of the accent colour from the middle of the star up the centre of each arm; pipe two little lines going across each long line. Using a cocktail stick, drag through the middle of each long line from the tips of the arms to the centre. The result can be seen in the photographs.


Leave to set, exposed to the air, for at least 6 hours, overnight is best. You can use any colour combination you like, and these can be eaten any time of year really!

FREE FROM
☑ Soya (check for soya lecithin)
☑ Yeast
☑ Wheat
☑ Eggs

CONTAINS
☒ Gluten
☒ Refined sugar products
☒ Dairy

There was no blog this time last year.

Monday 1 December 2014

Gingerbread Houses (Egg and Wheat Free)

As I mentioned in a previous blog post, I decided that this year I would make everyone's presents by hand, and make them edible, and that I did! This year is a completely handmade affair. Along with the usual mince pies and Christmas cake, there is:

 Gluten free fairy cakes, with vegan buttercream
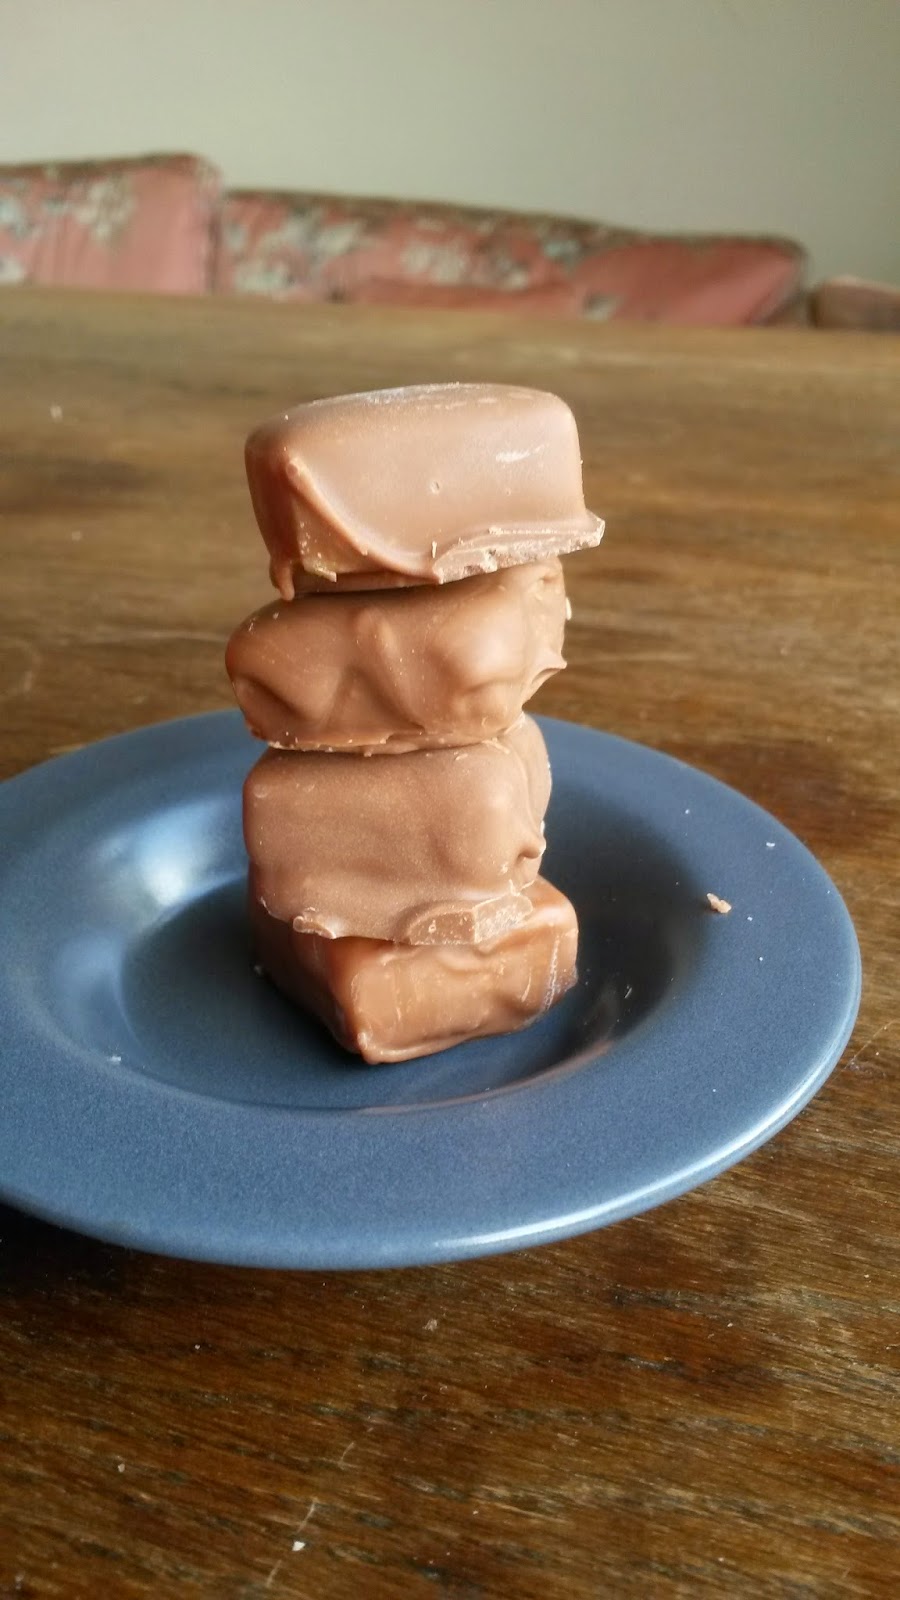
 Chocolate coated fudge, in a variety of flavours
 Gingerbread houses and biscuits with icing
 Filled moulded chocolates
 Pecan nut shortbread biscuits
 Dairy free Irish cream liqueur

It has been very busy in the kitchen this December, and I'm very proud of myself! I have a lot of catch-up blogging to do, and you all have a lot of catch-up reading...


But without further ado, I present to you wheat- and egg free gingerbread houses! 


They certainly won't win any prizes for architectural integrity, but this recipe for gingerbread doesn't change spread in the oven, meaning the biscuits are the same shape going in as out, making for very easy construction.

I made little individual ones for my sister and her boyfriend, and decorated them with white chocolate, royal icing (which DOES contain egg, but you can use melted chocolate or glacé icing instead if you have an egg allergy), jelly beans, pecan nuts, and Smarties.


The biscuit itself is very tasty, but I have a lot to learn when it comes to constructing a house out of it.


I drew up my own templates, which was basically one 3 by 5 inch (7½ by 13 centimetre) rectangle, one 4 by 6 inch (10 by 15 centimetre) rectangle, and one 3 inch (7½ centimetre) square with a 2 inch (5 centimetre) triangular hat on. I cut two of each shape for the houses, but there are literally hundreds of templates available on Pinterest for you to have a perusal through!

FREE FROM
☑ Soya (check for soya lecithin)
☑ Yeast
☑ Wheat
☑ Eggs

CONTAINS
☒ Gluten
☒ Refined sugar products
☒ Dairy
  
INGREDIMENTS
For 2 houses (according to my measurements)

  • 2 ounces brown sugar
  • 1 ounce golden syrup or treacle
  • 4 ounces butter or margarine for a dairy free version
  • 8 ounces white spelt flour
  • 1 tsp ground cinnamon
  • 1 tsp ground ginger
  • ½ tsp ground coriander
  • Pinch ground cloves
  • Water, to bind

To decorate
  • Royal icing, or glacĂ© icing or melted chocolate if you have an egg allergy
  • Melted chocolate
  • Sweets
  • Nuts, or not if you have a nut allergy


METHOD
  • Preheat the oven to 180°c (350°F/Gas Mk. 4); line a baking sheet with non-stick baking paper, or grease lightly with butter or margarine.
  • In a mixing bowl, beat the butter or margarine until soft and creamy with a wooden spoon. Mix in the syrup (or treacle) and the sugar and beat again until smooth.
  • Sieve in the flour and spices, then mix with the spoon again until fully mixed, but crumbly.
  • Add the water a teaspoon at a time until a soft dough is formed. Work briefly with your hands until it is smooth.
  • Dust the work surface with flour, dust the rolling pin also, then roll to a thickness of a quarter inch (5 millimetres). Using the template and a sharp knife, cut out two of each piece. If you like, you can cut out a door from one gable piece, and windows from the side walls.
  • Lie on a baking sheet and bake in the preheated oven for 10 to 15 minutes, or until very pale golden around the edges. These biscuits won't brown much, and they will still be soft when removed from the oven.
  • Allow to cool on the baking sheet for about 5 minutes, before moving to a wire rack to cool completely before assembly.


There are countless videos on YouTube and countless blogs about how to construct a gingerbread house, and as my knowledge of gingerbread house construction is rudimentary at best, but this video is fairly good at showing how to construct a little one. I fused my houses together with royal icing, because it sets rock hard, but as I mentioned earlier melted chocolate works as well, but it will need support (from jars, tins, mugs, spice bottles etc.) for longer, as chocolate is runnier than royal icing.


It's been a while! Happy 9th Anniversary!

  It's been a while. The past two years have been a helluva a ride. This year is gonna hold some big changes for this blog. I'm comp...