Showing posts with label condensed milk. Show all posts

Sunday, 17 March 2019

Dulce de Leche Cake (Wheat Free, with Gluten Free Option)

Happy birthday, Stefi! 


This month my brother’s partner celebrated her birthday, which gave me another excuse to make cake! Unlike my other family members, I still have room to experiment with her birthday cakes because her tastes aren’t as definite as my parents and siblings. She migrated to Ireland from Ecuador, where they celebrate birthdays differently, with different kinds of cake and sweets. 

However, I know she likes caramel! At home, she would make a caramel sauce by slow cooking milk, sugar, and baking soda together until dark brown and syrupy. When she and my brother went to Ecuador, they brought me back a big ol’ tub of dulce de leche, which was summarily consumed in banoffi pies and on ice cream. 

So, I thought I’d return the favour by making her a delicious caramel flavoured cake, with browned butter and buttery caramel icing. Browning the butter adds a delicious note of caramelly goodness to the cake mixture, and this non-crusting icing is more like a caramel cream than a buttercream. And I love jazzing things up with sugar confetti! 


I used my Madeira cake recipe, adding a little bit of lemon zest and almond essence. I also cooked the butter until it was a deep brown and then let it cool before adding it to the mixture. Take note, however, that when you brown butter it will evaporate a lot of water, which needs to be replaced. To do this, simply pop the cooked butter in a bowl on the scales and top it up with water until it’s its original weight. 

I made the icing by whipping unsalted butter and thick dulce de leche until light and whippy, and then I added salt and vanilla essence to taste. After sandwiching the cake with straight up dulce de leche, I iced the cake with swoops of caramel cream icing, and topped it off with colouredy sprinkles! 

Despite it being absolutely loaded with sugar, the fattiness of the butter in the icing and the warm zestiness of the lemon in the cake makes sure that the whole cake isn’t too sweet. Although, I still recommend eating it in small doses. You can also add lemon juice to any part of this to cut through the richness even more, if you like.


INGREDIMENTS

One 8 inch lemon Madeira cake, made with spelt or gluten free flour, cut in half for filling
About 14 ounces (397 grammes) of dulce de leche, either shop bought or homemade
2 teaspoons (10 millilitres) vanilla essence
6 ounces (170 grammes) soft unsalted butter
Colourful sprinkles


METHOD

  • Trim the dome off the cake and cut in half horizontally to get two layers. As you can see in the picture above, I didn't actually have enough cake to cut off the dome because I accidentally used a 9 inch tin when I only had enough mixture for an 8 inch. Lesson learnt!
  • Set aside 9 ounces (250 grammes) of the caramel for the icing, and use the remaining caramel to fill the cake in a nice thin layer. (You'll have some leftover, which you can eat secretly with sliced banana on digestive biscuits later)
  • In a mixing bowl, whip with butter with an electric hand mixer until light and fluffy. Add in the caramel and whip until creamy. Add more vanilla and salt, to taste: some people like saltier caramel than others.
  • Use the icing to coat the top and sides of the cake, and swoop and swirl the icing to make it look extra delicious. Decorate with sprinkles.

Homemade Dulce de Leche: 3 Different Methods

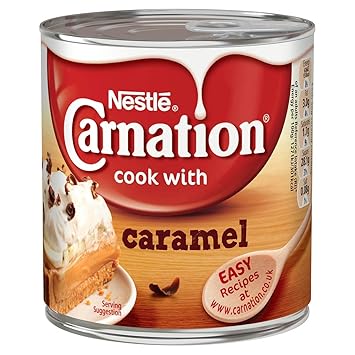
If you live in a part of the world where canned caramel (dulce de leche) is available to you, by all means walk to the shop and get some. Here in Ireland and UK, you can buy cans of Carnation Caramel that weigh 397 grammes (about 14 ounces), and in the States and Ecuador (only because Stefi tells me) you can buy Alpina Arequipe, that comes in larger packets:

Image result for carnation caramelRelated image

However, if you live somewhere where this is not available, here are lots of options open to you, so don't fret. You can make a quick, cheat caramel on the stove stop, or you can do a long, slow caramel on the stove top or in the oven.

The cheat caramel is the fastest, but it's not an authentic, true dulce de leche (hence cheat). It's also the easiest to overcook and completely wreck. Sometimes in life, good things really do come to those who wait.

The stove-top method is the most traditional and widely used, so it's obviously a fairly consistent and reliable way of doing it. However, I find that it's impossible to tell if your caramel is dark enough for your liking if it's hidden inside a completely hermetically sealed can.

By far my favourite way is to cook the condensed milk in the oven. It's a nice halfway house between cheat caramel and and boil-in-the-can, as it only takes 90 minutes, as opposed to three hours, and doesn't have as narrow a margin for error as the cheat method.


Quick Cheat Caramel

2 ounces (55 grammes) caster sugar
One 14 ounce (400 gramme) can of condensed milk
Vanilla essence and salt, to taste
  • Caramelise the caster sugar in 2 tablespoons of water in a small heavy saucepan. Once dark brown, remove from the heat and stir in the condensed milk. 
  • Return to a medium low heat and cook, stirring constantly, until it has thickened and is a rich brown colour. Do not allow to boil.
  • Pour the caramel into a bowl and allow to cool completely to room temperature. Once cool, add a teaspoon of the vanilla and some salt to taste

Stove-Top Slow Caramel

One 14 ounce (400 gramme) can of condensed milk
Vanilla essence and salt, to taste
  • Take the label off the can and leave it completely closed. Place the can in a saucepan of cold water, making sure it is completely submerged. Bring to the boil on the stove top.
  • Once boiling, reduce the heat and simmer the can for 3 hours, topping up the water as necessary.
  • After 3 hours, allow the water and can to cool completely to room temperature. Once cool, refrigerate overnight.
  • When ready to use, salt and flavour to your own taste.

Oven-Baked Slow Caramel

One 14 ounce (400 gramme) can of condensed milk
Vanilla essence and salt, to taste
  • Preheat the oven to 220C (450F, Gas Mk.9).
  • Clean an 8 inch (22 centimetre) round cake tin very well. Make sure it has a solid bottom, not a removable one.
  • Pour the condensed milk into the tin and cover the top tightly with tin foil. Place the tin in a large roasting dish and fill with hot water, until the level of the water reaches halfway up the side of the metal cake tin.
  • Place the water bath and tin onto the centre shelf of the oven and bake for 90 minutes. After 90 minutes, remove from the oven and check: if it's the brown-ness you want, then it's ready! If you want it darker and thicker, cook for a little longer, but no more than 30 minutes in total.
  • Once cooked, remove the tin from the water bath gently, and place on a wire rack to cool. Allow to cool completely before chilling. When it's ready to use, salt and flavour to taste.

Friday, 14 November 2014

Salted Caramel Shortbread (Wheat Free)

So, today I decided to try out a classic: Millionaire's Shortbread! I don't usually go in for making plain and simple classics, but this week I got a serious hankering for some delicious caramel shortbread.


Recently I've been making a lot of condensed milk (using a new technique which I will share at a later date) and using it to make hot chocolate on these cold winter nights, and as such I used it to make some lovely buttery caramel for my shortbread. To shake it up a little, though, I sprinkled some coarse sea-salt on the top of the chocolate.


I made a small batch using a loaf tin, which is the recipe I will share with you.


INGREDIMENTS
Makes 1 4x7 inch (10x18 centimeter) rectangle, which cuts into roughly 18 pieces
  • 3 ounces (85 grammes) spelt flour
  • 1 ounces (30 grammes) cornflour or rice flour
  • 2 ounces (55 grammes) butter, at room temperature
  • 1 ounces (30 grammes) icing sugar

For the caramel topping

  • 1½ ounces (40 grammes) caster sugar
  • 1½ ounces (40 grammes) butter
  • 3 ounces (85 millilitres) condensed milk
  • Pinch of salt

For chocolate topping

  • One 3½ ounce bar (100 grammes) dark or milk chocolate
  • 2 tablespoons (30 millilitres) sunflower oil
  • Coarse sea salt

HOW-TO

  • Preheat your oven to 160°C (320°F, Gas Mk.2½, or very moderate) and line the sides of a loaf tin.
  • In a mixing bowl, beat the living daylights out of the butter until soft and creamy. Use a wooden spoon: it needs more elbow grease, but you have much more control over how soft you make your butter.
  • Pour in the icing sugar, and cream until light and fluffy. Sieve in the flours and salt and mix until the flour is combined. It will look crumbly, but this is exactly how you want it.
  • Press the dough evenly into the sandwich tin, smoothing the top with a spoon, and prick all over with a fork or skewer, and bake in the oven for 20 to 25 minutes, until set but still soft.
  • On removing from the oven, put on a wire rack and allow to cool in the tin completely.

Now, make the caramel:

  • In a small saucepan, melt the sugar and butter gently together over low heat. Once the sugar has dissolved, add in the condensed milk and salt.
  • Once fully melted and combined, bring to a rapid boil and cook for about 2 or 3 minutes until thickened.
  • Pour in on top of the shortbread. Allow to cool to room temperature before setting for about 30 minutes to an hour or until cool to touch.

Finish off with chocolate glaze:
  • Once set, prepare the chocolate glaze. Melt the chocolate and oil together either in the microwave on "Defrost", or in a bowl over simmering water.
  • Pour the chocolate over the top of the caramel, and allow to cool to room temperature before allowing to set in the fridge for at least 4 hours.
  • When fully set, remove from the tin and cut into square, chocolate side down, with a sharp knife.
And there you are! Delicious caramel shortbread. The caramel is soft and chewy, and the coarse salt gives little savoury bursts among the sweetness.


Thursday, 10 October 2013

Homemade Condensed Milk

Like I said in my post on homemade ice cream, I make my own condensed milk, you know... because I can.

I attempted to make condensed milk many years ago when I went through my last hunt for the perfect ice cream, and also when I learnt about making vanilla fudge and butter tablet using the glorious stuff, but it wasn't successful. It caught on the saucepan and burnt, and left me with little brown bitter bits in the finished product. It wasn't nice.

However, this time around I found this recipe, which is much simpler than many of the slow-cooking methods I've found online. However, it is high-maintenance. This was my starting point, but when I made it I found it didn't have exactly the right consistency.


The recipe I developed from this uses a tad more sugar, but only to make it mathematically work. The recipe I use now is simple: 1 ounce weight of sugar for every 4 fluid ounces of full-fat milk.

You may have guessed, I'm a fan of formulas, and also a fan of the imperial system. This works out as 30 grammes of sugar for every 120 millilitres of full-fat milk.

So, here she goes!


FREE FROM
☑ Soya
☑ Yeast
☑ Wheat
☑ Eggs
☑ Gluten

CONTAINS
☒ Dairy (obviously)
☒ Refined sugar products

INGREDIMENTS
  • 1 pint (570 millilitres) full-fat milk
  • 5 ounces (140 grammes) caster sugar
  • 1 pinch baking soda (sodium bicarbonate)

HOW-TO
  • In a large, heavy bottomed saucepan, bring the milk to a boil.
  • Once boiling, add in the sugar and soda in one go and stir until dissolved. Reduce the heat to low when it reaches the boil again, and simmer gently.
  • Simmer on a low heat for about 20 minutes, stirring very frequently. Don't leave it un-stirred for any longer than 2 minutes at a time. This is quite time consuming, but necessary.
  • Cook until it has reduced to a third of its original volume. If you want to be pendantic, you can weigh it, subtracting the weight of the saucepan: it should weigh 9 ounces (250 grammes).
  • Another way to test its doneness is to keep a saucer in the fridge. When it comes close to being ready, drop a teaspoonful of the milk onto the chilled saucer, and tilt it. If it runs like it should - thick but still pourable - it's done.
  • Allow to cool completely, then pour into a sterilised jar. Store in the fridge for up to a week.

Apologies for the photo, it looked in focus on the little camera screen! Oopsies...

Thursday, 3 October 2013

My Research into Machine Free Ice Cream Continues...

So, instead of allowing my  funk to get between me and my first love, I've been researching culinary delights to make when I'm feeling better.

A few posts ago I mentioned that I was searching in vain for the perfect no-machine homemade ice-cream. While the hurling was on I thought I'd try a few methods and recipes that I'd found, but none of them worked. I tried the whole rock-salt and ice insulation method but that didn't work, I tried the freeze and beat every two hours method but that didn't work either. I think the most recent lurid creation is still languishing in the freezer...

I thought I would turn to my favourite research tool to further my discoveries, and rediscovered a recipe that I'd found a long time ago. Back when I was in college I found this recipe for ice cream that used whipping cream and condensed milk, and needed no mixing during churning. However, using the method in this video, it came out separated and icy.

Needless to say, I never thought to try it again.


It took a few years for me to get around to trying homemade ice cream again. I once again tried several different methods and recipes, none of which worked. However, in the few years I wasn't trying, there were a few people who ad uploaded more successful attempts at the condensed milk and cream technique.


These two used the same ingredients as the first video, but in slightly different quantities and with a slightly different method. Having made this discovery (especially the first video: that stuff looks sinful!), I think I might give it another try...

I'm one for giving second chances!

It's been a while! Happy 9th Anniversary!

  It's been a while. The past two years have been a helluva a ride. This year is gonna hold some big changes for this blog. I'm comp...