Showing posts with label German style. Show all posts

Monday, 24 December 2018

Frohe Weihnachten! Part 5: Gingerbread Village Cake

Want a showstopping centre piece, but you're not a fan of traditional Christmas fruit cake? Here I present to you a Gingerbread Village Cake, in our fifth and final installment of my German-style biscuits series.


A delicious and mildly spicy golden syrup sponge, smothered in cream cheese icing, and decorated with gingerbread gables and a little gingerbread house, this is definitely a treat. However, it's not difficult to make: of course, there are a few steps, but none of them is a challenge.

This is a nice bit of fusion cuisine: a golden syrup sponge, of course, is not a very German style confection. Also, this particular style of gingerbread is very English: German gingerbread, known as lebkuchen, has a much much higher proportion of sugar to fat than its English cousin. Some recipes may only contain a few tablespoons of butter to half a pound of flour.

This cake stays beautifully moist for several days, just make sure it's well wrapped and airtight.


INGREDIMENTS

For one eight inch (20 centimetre) round cake

3 medium (US large) eggs
3 ounces (85 grammes) brown sugar
3 ounces (85 grammes) golden syrup
1½ ounces (40 grammes) sunflower oil
1½ ounces (40 grammes) melted butter
3 fluid ounces (85 millilitres) black tea, or warm water
6 ounces (170 grammes) plain white flour: spelt, wheat, or gluten-free
¾ teaspoon (4 millilitres) baking soda
2 teaspoons (10 millitres) ground cinnamon
2 (10 millilitres) ground ginger


Gingerbread Village dough

4 ounces (115 grammes) salted butter
4 ounces (115 grammes) soft brown sugar
2 ounces (55 grammes) golden syrup, warmed
1 medium (US large) egg
8 ounces (225 grammes) plain white flour: spelt, white, or gluten-free
 ½ teaspoon (3 millilitres) baking soda
2 teaspoons (10 millilitres) ground cinnamon
1 teaspoon (5 millilitres) ground ginger
¼ teaspoon (1 millilitre) ground cloves

To decorate

1¼ pounds (570 grammes) cream cheese icing
Sweets
Desiccated coconut
Icing sugar, for dusting

~ ^_^ ~

METHOD

First, make the biscuits

  • In a saucepan, melt the golden syrup, sugar, and butter over medium-high while stirring. Once it starts to bubble, take it off the heat and allow to cool.
  • Once cool, beat in the egg. Sieve in the dry ingredients with a wooden spoon and stir until there is no more dry flour visible.
  • Pour the mixture onto a sheet of cling film, and wrap well. Chill in the fridge for at least 2 hours, preferably overnight.
  • When you're ready to cook, preheat the oven to 180°C (350°F, Gas Mk.4) and line two baking trays with non-stick paper.
  • On a floured surface, roll the dough out to just under a quarter-inch (4 millimetres) and cut into one small gingerbread house, and using the rest make some gingerbread house-fronts. I freehand all my gingerbread house pieces and house-fronts, but if you have templates, you can use that.
  • Bake the biscuits for 8 to 10 minutes, depending on how soft or crunchy you like your gingerbread. Once cooked, cool completely on a wire rack.

Secondly, make the cake
  • Preheat the oven to 170C, and grease the bottom of an eight inch (20 centimetre) round tin and line with non-stick baking paper. Leave the sides ungreased to help the cake rise.
  • In a jug, melt the butter, golden syrup, and oil in the microwave on Defrost. You don't want it hot, just melted.
  • Separate the eggs, putting the whites into a large roomy bowl with a pinch of salt, and mix the yolks into the jug of butter and syrup. 
  • Whip the egg whites with an electric mixer on medium speed until the eggs have soft peaks. Gradually whip in the brown sugar, bit by bit, until you have firm peaks.
  • Take a spoonful of the meringue and stir into the jug to lighten the mixture. Pour this back into the meringue and fold through gently with a balloon whisk or a metal spoon.
  • Sieve in the flour, baking soda, spices, and a pinch of salt in two additions, alternating with the tea (or warm water). Fold the mixture thoroughly until you have a nice, flowing batter.
  • Pour into the tin and make on the centre shelf for 45 minutes to an hour, or until nice and springy to the touch, and a skewer poked into the centre of the cake comes out clean.


Now, assemble the masterpiece
  • Use some icing to assemble the gingerbread house: I decorated mine with mini Smarties and some desiccated coconut.
  • Slice the cake in half, keeping the dome. Sandwich and coat the cake with icing, keeping the dome on top.
  • Arrange the gingerbread house-fronts around the edge of the cake and secure with a bit of twine while it sets. Place the house on top of the cake.
  • Allow the whole cake to set before serving, about an hour.

Friday, 21 December 2018

Frohe Weihnachten! Part 4: Marzipan Slices

Frohe Weihnachten! I present to you the fourth part in a series on German-style Christmas biscuits: delicious marzipan filled biscuit slices!


From my personal observation, Germany loves Christmas, and Germany loves marzipan. It makes perfect sense, then, that Germans would combine the two to make delicious Christmas marzipan biscuits.

These started off life as a different concept, but evolved. Here, you see they are individually sliced biscuits, in a slice-and-bake style. However, my first attempt at these was based on German recipes that I read online, that instructed the baker to cook the whole filled log and slice it after baking. This technique was unsuccessful; twice. I found that chilling the log entirely then slicing it made for much nicer looking biscuits. Maybe I just wasn't using the right kind of pastry, or the correct oven temperature. Either way, I prefer the slice and bake method.

As you can see on mine, the marzipan isn't entirely in the centre. Be careful when you're wrapping the biscuit pastry around the marzipan log.


INGREDIMENTS

6 ounces (170 grammes) salted butter, at room temperature
6 ounces (170 grammes) caster sugar
1 medium egg
12 ounces (340 grammes) plain white flour: spelt, wheat, or gluten-free
2 tsps vanilla essence
1/2 tsp almond essence
A pinch of salt
1 pound (455 grammes) white marzipan, tinted in different Christmassy colours

METHOD
  • In a mixing bowl, cream the butter and sugar together until light and fluffy. Beat in the egg yolk and essences until fully incorporated.
  • Sieve in the flour and salt and mix in by hand or with a wooden spoon until the dough comes together. It will be slightly dry, but don't worry: that's what gives them such a delicate, sandy texture.
  • Flatten into a disc and wrap in cling film, and chill for half an hour, until it's firm to the touch.
  • Divide the marzipan into two or more Christmassy colours, and roll into ropes. Use the coloured ropes to make a larger twisted rope about an inch (2.5 centimetres) thick. Just play with it until it's the right thickness.
  • On a floured surface, roll the dough to a quarter-inch (5 millimetres) thick, and as wide as the marzipan rope is long, trimming the edges if needed. Brush the marzipan rope with water and place on the edge of the dough sheet. Roll up the marzipan with the dough until is it evenly wrapped; trim the excess. Depending on your shaping and sizing, you might have enough dough leftover to make a few cut-outs.
  • Wrap up the whole roll in cling film and chill completely, at least 2 hours or even overnight. 
  • Once the dough is chilled, preheat the oven to 160°C (325°F, Gas Mk.2). Line one or two flat baking trays with non-stick baking paper.
  • Slice the dough log into half-inch (1 centimetre) slices and place on the baking sheet(s) about an inch (2.5 centimetres) apart.
  • Bake for 12 minutes, turning the tray(s) around halfway through cooking. Remove from the oven, and allow the biscuits to cool for 5 minutes before transferring the biscuits to a wire rack: the marzipan filling is very soft and sticky immediately after coming out of the oven, so it will get completely messed up if you try to transfer them immediately.

Monday, 17 December 2018

Frohe Weihnachten! Part 3: Meringue Jam Rings (Butterplӓtzchen mit Baiserringen)

Frohe Weihnachten! I present to you the third part in a series on German-style Christmas biscuits: buttery biscuits, with a delicious filled meringue rings!


I came across this idea when I was surfing the web for different kinds of biscuits. I saw one small picture of these in a sea of Google images. As such, I couldn't really find a good reliable recipe, not even on any German websites (yes; I speak a little German). So, I kinda had to wing it: I added a little more sugar than usual to a basic meringue mixture to get it to crisp faster in the oven, and surprisingly it actually worked.

Sweet and buttery almond-hinted biscuits, crowned with a ring of vanilla meringue, and filled with a variety of jam, lemon curd, chocolate and caramel. What's not to like? Even people who don't really like meringue, including my fiancé, have admitted to liking these when I have fed them with the promise of "I swear it doesn't taste like meringue!" The lemon ones are particularly nice, because it's like single serving of lemon meringue pie.


DIFFICULTY
Intermediate: has a few fiddly steps

INGREDIMENTS
Makes 12 biscuits

For biscuit dough

2 ounces (55 grammes) caster sugar
2 ounces (55 grammes) butter, at room temperature
1 medium egg yolk
4 ounces (115 grammes) plain white flour: spelt, wheat, gluten-free
1/2 tsp vanilla essence
A few drops of almond essence
A pinch of salt

For meringue rings

1 medium egg white
3 ounces (85 grammes) caster sugar
A few drops of lemon juice
A pinch of salt
1/2 tsp vanilla essence
Fillings of your choice: fruit jam, lemon curd, caramel, chocolate ganache, vanilla custard, frangipane etc.


METHOD

First, make the biscuits
  • In a mixing bowl, cream the butter and sugar together until light and fluffy. Beat in the egg yolk and essences until fully incorporated.
  • Sieve in the flour and salt and mix in by hand or with a wooden spoon until the dough comes together. It will be slightly dry, but don't worry: that's what gives them such a delicate, sandy texture.
  • Flatten into a disc and wrap in cling film, and chill for half an hour, until it's firm to the touch.
  • Preheat the oven to 160°C (325°F, Gas Mk.2). Line one or two flat baking trays with non-stick baking paper.
  • On a floured work surface, roll the pastry to just under a quarter-inch (about 4 millimetres) thick and cut out 3-inch (7.5 centimetre) rounds, re-rolling the scraps. You should get about 12 biscuits.
  • Bake in the centre of the preheated oven for 10 minutes, turning the trays halfway through. The biscuits should just be starting to turn golden around the edges.
  • Remove from the oven and transfer to a wire rack to cool completely before starting the meringues.

To make the meringues

  • Lower the oven temperature to 100°C (210°F, Gas Mk.½).
  • In a heat proof bowl over a pan of hot water, stir the egg white, sugar, salt, and lemon juice until the sugar has completely dissolved and the mixture is warm to the touch.
  • Remove from the heat and whip on high speed with an electric mixer to make a meringue which holds stiff peaks and is cool to the touch. Beat in the vanilla essence
  • Fit a piping bag with a star-shaped nozzle and pipe a ring of meringue on the top of every biscuit. Place back on the baking tray and bake for 1 hour on the centre shelf.
  • Halfway through cooking, fill the centres with half a teaspoon of filling (except for chocolate ganache, which should be added after cooking, and never cooked in the oven). This will help the filling set a little.
  • Remove from oven and cool completely on a wire rack before serving.

STORAGE
Store in an airtight container at room temperature, or in the fridge, for up to a week.

Tuesday, 4 December 2018

Frohe Weihnachten! Part 2: Pinwheels

Frohe Weihnachten! I present to you this second part in a series on German-style Christmas biscuits: two-tone pinwheels!


Everyone knows how to make biscuit pinwheels, so this isn't a demo; this is merely me sharing one of my creations that I made. These are made using chocolate and vanilla flavoured doughs, but you could use anything you like.


One thing I will say though, is that I think it looks prettier if the outer layer is slightly longer than the inner layer, giving it an enclosed look. Also, having one very thin layer and a thicker layer adds a degree of visual interest.


These are made using the exact same dough as the sandwiches, which is a lovely versatile dough mixture of 6 ounces (170 grammes) each of caster sugar and butter, beaten together, followed by 1 medium egg, and 12 ounces (340 grammes) of plain flour and whatever flavouring you like. The chocolate dough has one eighth of the flour replaced with cocoa powder.

Sunday, 25 November 2018

Frohe Weihnachten! Part 1: Sandwich Biscuits

Frohe Weihnachten! I present to you the first part in a series on German-style Christmas biscuits!


Last year I planned on doing a whole series of German-inspired Christmas biscuits, but I never got the opportunity. So, this year I'm gonna put that to rights! I'm kicking off the season of biscuits with a delicious selection of sandwiches.

This is just a show-and-tell because making biscuit sandwiches is something pretty much any home cook can make. You just choose your favourite buttery cut-out biscuit recipe, like shortbread or plain biscuits, make some tiny cut-outs, and fill them with some icing, ganache, caramel, or jam.


As you can see in this picture, I made a variety of shaped tiny biscuits: these are only about an inch (2½ centimetres) or so wide and about quarter of an inch (5 millimetres) thick, and I have hearts, fluted rounds, snowflakes (even though they look like stars), flowers, and bells. I made a small batch of biscuit mixture of 3 ounces (85 grammes) caster sugar, 3 ounces (85 grammes) salted butter at room temperature, half a medium egg, and 6 ounces (170 grammes) plain white spelt flour. I flavoured it with vanilla essence and almond essence. This amount made about 48 biscuits, or 24 pairs. One pair was sacrificed to quality control before filling....

Each shape was supposed to have a different flavour of filling inside, but after a few biscuits that went out the window. I used chocolate buttercream, lemon curd buttercream, vanilla buttercream (using real vanilla pods), some Araquipe dulce de leche (yes, it's still leftover since my brother got back from Ecuador in August), and some good old fashioned strawberry jam.


After a little trip in the fridge, I dipped the tops of every flavour bar the caramel and jam ones in chocolate. I mixed a little sunflower oil into some white and dark chocolate, and some vanilla seeds into the white chocolate. Once I had dipped some of chocolate-filled ones in dark chocolate, and all the vanilla- and lemon filled ones in white chocolate, I marbled the remaining chocolates together to dip the remaining chocolate filled ones. I dusted the lemon ones with edible gold dust just for visual interest.

So there you have it! A special little treat for someone special in your life this Christmas, or even just for the table after dinner. Keep an eye out for the next few creations! :)

Monday, 22 October 2018

German Witches' Brew: Buttergrog (Contains Alcohol)

Es ist fast Winter! Und für euch, ich habe ein leckeres Wintergetränk: Buttergrog!


The nights are getting darker, the outside world is getting colder and more stark, and inside we're all starting to stock up on our heating fuel and warming, comforting food. In Ireland, winter starts on November 1st, which is a month before the rest of the western world, which marks December 1st as the first day of winter.

The four main Celtic festivals in the year mark the start of a new season. Samhain, the first day of winter, is celebrated on November 1st, which is the day after Oíche Shamhna, which means "Samhain Eve". Oíche Shamhna is our native name for Halloween.

Of course, we don't have the monopoly on wintertime celebrations! In fact, the homeland of our Celtic ancestors is central Europe, who absolutely go to town on autumnal and winter feasting. Germany, Austria, Poland, and many other countries throughout the European heartland have absolutely wonderful arrays of warming food and drinks.

All throughout Germany, Austria, and Poland there are a variety of warm, spiced alcoholic drinks. There's glühwein, which we know in English was mulled wine; there's the strange concoction grzaniec, which is hot spiced beer (which I really want to try so watch this space); and of course this blog's subject, the German delight buttergrog.


The word "grog" conjures an altogether, and much less classy, image of booze swilling pirates, but this drink is a delicious hot cider, flavoured with spices and aromatic citrus, spiked with rum, and finished off with a smooth hit of rich, buttery goodness. This is comfort in a glass.

For anyone who has made mulled wine in the past, you might be put off by the fiddliness of finding raw spices such as cinnamon sticks, whole cloves, and star anise. However, I have a cheat:

Image result for loyd warming tea

Most Polish shops, and various healthfood shops, in Ireland sell spiced teabags. They often have a mixture of cinnamon, cloves, cardamom, ginger, and sometimes orange zest, and are the perfect short-cut to a delicious aromatic spice blend for mulled drinks.

The brand I use is Loyd, but there is also Pukka. Both of these brands sell a variety of spiced teabags, but the one I used for this recipe was Loyd Warming Tea.


DIFFICULTY
Easy!


INGREDIMENTS

For 2 servings

1 can (500 millilitres) dry cider, about 5%
2 shots (60 millilitres) rum: white or spiced. You could also use some homemade spice infused rum
4 teaspoons (20 grammes) unsalted butter, cold
1 spiced teabag
2 slices of lemon or orange
1 or 2 tablespoons (15 to 30 grammes) brown sugar or honey, to taste


HOW-TO
  • In a small saucepan, heat the cider with the lemon or orange slices and the teabag. Don't let it boil, but let it get steaming hot. Let the teabag infuse with the cider for about 10 to 15 minutes.
  • Stir in the rum, and then add sugar or honey to taste. Allow to come back to temperature. I used some homemade spiced rum, infused with cinnamon, vanilla, and cloves. You could also use shop bought spiced rum.
  • Put two teaspoons (10 grammes) of the butter in the bottom of each beer mug.
  • Pour half the drink into each mug, stirring constantly to properly incorporate the butter and let it emulsify. 
  • Serve hot with sweet or savoury snacks

Tuesday, 5 December 2017

Fröhliche Weihnachten! Individual Sacher Tortes (Wheat Free)

Glücklicher Internationaler Sachertorte-Tag!


Our festive tour continues throughout central Europe, stopping off in Austria for a slice of their famous chocolate and apricot jam sponge: Sachertorte!

December the 5th is international Sachertorte day, coincidentally, so what better way to celebrate than sharing my own version of this iconic dessert. Invented by Franz Sacher in 1832 in Vienna, this cake has been an Austrian speciality ever since. Traditionally, it is made with two light and soft cocoa sponge layers, sandwiching sweet sour apricot jam, with two outer layers: one of apricot jam, and one of chocolate icing, made with sugar syrup and dark chocolate.

There is a lot of dispute over which is the definitive Sachertorte, and some recipes even include a double layer of apricot jam under the chocolate icing--which is iced on, rather than glazed on as is typical nowadays--and other versions use melted chocolate in the sponge itself, resulting in a denser, moister cake more like a brownie. But, I personally prefer a simple chocolate creamed sponge with a ganache coating made with chocolate and butter, rather than chocolate and syrup.


As you can see in the pictures, I'm not 100% amazing at glazing cakes: using pourable icing is not my forte. If I were to do this again, I'd wait until the icing is spreadable and ice it onto the cakes over the apricot layer. I also used a wax seal stamp to make individual chocolate decorations, inspired by this Honey Fondant Cakes with Chocolate Wax Seals blog by Heather Baird at Sprinkle Bakes. She explains the entire process of making chocolate wax seals, and I dusted mine with gold fondant dust.

~~ ^ _ ^ ~~

DIFFICULTY
Each step is simple, but there are a lot of steps

TIME
About 2 or 3 hours

RECIPE RATING
Intermediate

~~ ^ _ ^ ~~

INGREDIMENTS

Makes roughly 8 small cakes

2 medium (US Large) eggs
4 ounces (115 grammes) butter, or baking margarine
6 ounces (170 grammes) caster sugar
5 ounces (140 grammes) flour
1 ounce (30 grammes) cocoa
2 teaspoons (10 millilitres) baking powder
4 fluid ounces (115 millilitres) milk, or milk alternative
 1/8 teaspoon (1 millilitre) salt

To decorate

Roughly 4 to 6 fluid ounces (115 to 170 millilitres) apricot jam
6 ounces (170 grammes) plain chocolate, or dairy free chocolate
3 ounces (85 grammes) unsalted butter, or baking margarine
4 tablespoons (60 millilitres) whole milk, or milk alternative
8 chocolate coins, or stamped chocolates (shown below)
Gold fondant dust

~~ ^ _ ^ ~~

FREE FROM
Wheat, yeast, nuts

CONTAINS
Eggs, spelt, dairy (dairy free option in italics), refined sugar

~~ ^ _ ^ ~~

METHOD

Before you begin the cakes, make the chocolate decorations
  • Prepare the wax seal chocolates as instructed in Sprinkle Bakes' article, and set in the fridge. Use a soft brush to dust the chocolates with dry gold fondant dust. If you don't have the means to make chocolate seals, simply unwrap some chocolate coins and dust with gold.
Then, make the cake
  • Preheat the oven to 180ºC (350ºF/Gas Mk.4) and grease and flour a 4½ by 8 inch (11 by 20 centimetre) loaf tin, or you can use a silicone one which doesn't need greasing or flouring. Try to use one with fairly straight sides.
  • In a mixing bowl, or food processor, cream the soft butter and sugar together until light and fluffy. Add in the eggs one at a time, making sure to beat well between each egg, and continue beating (or running the blade) until the mix is well incorporated.
  • Sieve in half of the flour, baking powder, salt, and cocoa powder, fold through until mostly mixed, then add in the milk. Again, fold through until mostly mixed before adding the rest of the dry ingredients and folding through completely.
  • Pour the mixture into the tin and bake on the centre shelf for 25 to 30 minutes, until the surface is springy to the touch and a cocktail stick comes out clean when stuck in the centre of the cake.
  • Allow the cake to cool for 15 minutes before turning out and cooling completely on a wire rack.
  • When cold, level the cake by cutting off the dome, then cut in half into two layers. Spread a layer of apricot jam, roughly 4 tablespoons (60 millilitres), onto the bottom layer, then sandwich on the top layer. Turn the entire cake upside down, so the flat bottom of the cake is now the top. Chill for about 30 minutes.
  • Once the cake is chilled, trim the crusts off and cut into 8 small cakes. Spread a layer of apricot jam over the tops and sides of each cake. Return to the fridge for 30 minutes to an hour.
Now, make the ganache glaze to finish the masterpieces!

  • Break the chocolate up into small pieces, or cut up with a sharp serrated knife. Heat the butter and milk together in a jug in the microwave until the milk is hot and the butter is melted.
  • Add the chocolate to the jug and allow to sit for 3 minutes before mixing with a small whisk or fork. Beat vigorously until it becomes a thick ganache. If needed, heat in the microwave for about 20 seconds to help the chocolate melt.
  • Put the cakes on a wire rack and set the rack over a baking tray or large square cake tin. Pour the ganache over each cake, paying particular attention to the square corners.
  • While the ganache is still wet, decorate each cake with a gold chocolate seal, or coin. Allow to set completely in the fridge before serving.

STORAGE
Keep these cakes in an airtight container in the fridge for up to one week. Alternatively, freeze for up to 3 months.

Monday, 15 May 2017

Success, at Last! Hazelnut Ice Cream (No Churn, Egg Free)

Mögen Sie Haselnuss-Eis? Ich mag!


I'm sure throughout the four years that I have been blogging, and you have all been reading and supporting, I have mentioned my trips to Germany often. In 2008 and 2012, I visited North and East Germany, travelling to Lübeck, Ratzeburg, Magdeburg, Hamburg, Leipzig, Berlin, Bernburg, and many other villages in the mountains whose names I never knew. Both times were to visit my good friend who I met in secondary school, whom I've known ever since.

I will admit it has been way, way, way too long since I was in Germany, and I often find myself missing it dearly. My companion and I hope to go over this year for the Christmas markets in Berlin, and I want to promise myself that from hereon in I'll go at least once every two years. Hell, if I could afford to, I'd divide my year between living in Ireland and living in Germany.

There are many flavours of Germany I miss—from their delicious meat dishes, like hamburgers and sausages, to their incredible doughnuts and cream cakes—but of all of them it's the ice cream I miss the most.

When I was last in Germany, I was in Berlin on what was possibly one of the worst holidays I've ever had: I went with my companion at the time, and our relationship was cracking. It wasn't long after we returned that our partnership dissolved. We both wanted very different things out of life, and we especially wanted very different things from that holiday!

The only thing that made that holiday bearable was the ice-cream: at pretty much every corner in Berlin was an ice-cream stand that sold scoopable ice-cream of many flavours. Not only was it delicious, but it was also very cheap: even in the capital, which was more expensive on the whole, a cone with a scoop of ice-cream was €1.50, and each additional scoop ranged between 80c and €1. Here in Ireland, ice-cream parlours charge a hefty €2.60 per scoop!


When I was there, I always got any nut flavoured ice-cream—hazelnut and pistachio are particularly tasty—or coconut; and also a German speciality, Waldmeister!

Since then, I have tried to recreate some of my favourite flavours, but to no avail. Nut flavoured ice-cream always alluded me, until now! This is my take on a no-churn hazelnut flavoured ice-cream, that isn't Nutella.

I still have to work on getting my Waldmeister ice-cream right. Keep your eye out for any upcoming attempts!

INGREDIMENTS
Makes about 2 UK pints (1 litre) of ice cream

  • 16 UK fluid ounces (455 millilitres) whipping cream, about 35% fat, plus extra if needed
  • 12 UK fluid ounces (340 millilitres) condensed milk, cold
  • 3 to 6 ounces (85 to 170 grammes) hazelnuts, to taste
  • 2 teaspoons (10 millilitres) vanilla essence
  • Generous pinch of salt
  • Roughly chopped hazelnuts, to decorate

METHOD
  • In a food processor, or with a large plastic bag and a rolling pin, crush the hazelnuts to a fine powder. 3 ounces (85 grammes) will give you a mild nutty flavour, whereas the full 6 ounces (170 grammes) will produce an intense nutty flavour. Grind as much as you think you'd like.
  • In a dry frying pan, gently toast the ground hazelnuts over medium heat. Cook only until the nuts become fragrant and take a little bit of colour. Be careful, because nuts burn easily.
  • Pour the hazelnuts into a medium saucepan, and add the whipping cream and salt. Place the saucepan over medium low heat, and bring to boiling point. Once it begins to boil, remove from the heat and allow to cool completely before chilling for at least 2 hours to steep. The cream needs to be good and properly cold.
  • Strain the cream through a fine sieve to remove the ground hazelnuts; discard the ground hazelnuts. In the process of straining, you may lose some cream, as such you might need to top the cream level back up to 16 fluid ounces (455 millilitres).
  • In a large bowl, beat the infused cream, condensed milk, and vanilla essence together until it becomes light and moussey.
  • Pour into a 2 pint (1 litre) container and decorate the top with hazelnuts, if you like. Freeze overnight.
No blogs on this day in 2014, 2015, nor 2016.

Tuesday, 28 March 2017

Recipe Revision: Baked Cheesecake, but a large one this time! (Gluten Free Option)

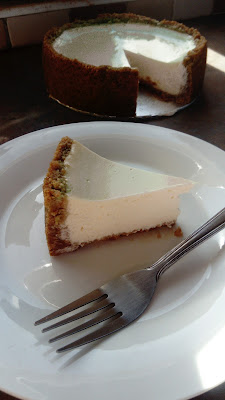
I know I shouldn't be tempting you all during Lent, but here is a particularly luscious and decadent treat: baked cheesecake!


I love cheesecake, and I particularly like baked cheesecake. I've never been a huge fan of chilled cheesecake because the texture is too jellyish, and I really detest the feeling of jelly. Baked cheesecake has a super rich, dense texture with a smooth finish that's irresistible.

I have done many baked cheesecakes over the years, from peanut butter and chocolate, to coconut and lime, to black forest style, to tiramisù, to my most popular Millionaire's cheesecake, but you have noticed that they are all small. And some of them are made with a meringue base, which has high likelihood of shrinkage, which has always irked me, despite lauding the development at the time. 


But not only have I had difficulty with making little cheesecakes, which are supposed to be easier, I've always found it incredibly difficult to get large cheesecakes to work: they are plagued with cracks, sunken surfaces, or shrinkage. They never had the lusciousness I wanted.

However, over the last year or so, I have been experimenting with more recipes that use baked custard style fillings. I did a pumpkin pie, which is a custard based on mashed pumpkin, evaporated milk, and eggs, which made me realise that cheesecake filling is essentially a glorified cream cheese custard.

It all made sense all of a sudden.

Custard bases are cooked at a low temperature to set, rather than bake like a cake. And the enemy of all custard fillings is the unnecessary addition of air.

I modified the ratio of the pumpkin pie recipe, which essentially uses one egg to set about half a pound (225 grammes) of purée and four fluid ounces (120 millilitres) of evaporated milk, and simply did a swap. I also used the same baked biscuit crumb base as I did in my Key Lime pie and Mississippi Mud pie recipes.

It all seems so simple now! (Of course, all people's ovens an ingredients are different, so a success for me won't automatically convert to success for others. But don't be discouraged!)

INGREDIMENTS
For one 8 inch (20 centimetre) round cake

For the crust,
  • 8 ounces (225 grammes) plain biscuits, crushed, such as digestives, or gluten free variety
  • 3 ounces (85 grammes) butter, melted
  • 2 ounces (55 grammes) brown or white sugar
For the filling (all ingredients must be room temperature for the best results,
  • 1 pound (455 grammes) full fat cream cheese (you can also replace half with marscapone for even smoother results)
  • 4 ounces (115 grammes) caster sugar
  • 6 fluid ounces (180 millilitres) natural yoghurt (for a thick, dense cheesecake), or whipping cream (for a lighter, more custardy cheesecake)
  • 2 medium eggs, beaten
  • 2 teaspoons (10 millilitres) vanilla essence, or lemon juice, or any essence you like
  • Optional: 1 teaspoon (5 millilitres) lemon zest, or zest of any citrus fruit you like

HOW-TO

First, make the base
  • Preheat the oven to 180°C (350°F, Gas Mk.4), and line the sides of an 8 inch (20 centimetre) round loose-based cake tin, and wrap the loose bottom with foil. Put the bottom back into the tin and set aside.
  • Crush the biscuits finely, and mix in a large bowl with the butter and sugar. Mix until the crumbs are all damp with the melted butter, until it looks like wet sand.
  • Pour the crumbles into the cake tin, and press the mixture into the base and sides of the tin, about two inches (5 centimetres) up. Make sure it's packed good a tight: you can use a flat bottomed glass to get the corner nice and sharp.
  • Bake in the centre of the preheated oven for 5 to 7 minutes, or until the surface of the biscuit base is set.
  • Once cooked, remove from the oven and reduce the heat to 150°C (300°F, Gas Mk.2), or turn it off until you want to use it again.
  • Allow to cool completely before you fill it; about half an hour.

Then, make the filling,
  • Preheat the oven to 150°C (300°F, Gas Mk.2).
  • In a large mixing bowl, beat the cream cheese until smooth with a wooden spoon. Avoid the temptation to use an electric mixer, as that will introduce too much air.
  • Add the sugar in a little at a time, mixing well between each addition. I add it gradually because sometimes if you add all the sugar it can make the cream cheese go runny.
  • Mix in the yoghurt, vanilla essence, and lemon zest, if using, and then add the eggs one at a time, mixing well between each one.
  • Once all the ingredients are well mixed together, gently pour the mixture into the base. Tap it gently on the work surface to rise all the little air bubbles to the surface. If you want to eliminate as many bubbles as possible, run a knife through the mixture.
  • Place in the centre of the preheated oven and bake for an hour. Keep an eye on it after 45 minutes, just in case your oven runs hot.
  • After 45 minutes, check the cheesecake: gently slide the oven shelf out, and--making sure to protect your hand with an oven glove or tea towel--gently shake the cheesecake. The outside two inches (5 centimetres) or so should be completely set, and the centre should wiggle like a jelly. If you touch the top of the cake with a clean fingertip, the surface should be dry, not sticky.
  • If the cake doesn't pass the test, cook for a further ten minutes before testing again.
  • When the cake is cooked, turn off the oven and open the door. Cool the cake to room temperature in the oven, then move to the fridge to chill for at least 4 hours. Overnight is best.

VARIATIONS
  • You can replace up to half of the cream cheese with peanut butter, coconut cream (which is the firm bit in a can of separated coconut milk), or chocolate hazelnut spread.
  • You can add in ground spices or cocoa powder also, making sure to sieve it in to prevent lumps.
  • Switch up the essences, or citrus juice, if you like.
  • You could also swirl in some syrup, lemon curd, or jam for a pretty marble effect with a good flavour.
  • If you like, you can change the kind of biscuits you use in the base. You could use chocolate biscuits, or spiced biscuits, or a mixture of any biscuits you like.

No blogs on this day in 2014, 2015, or 2016
THIS TIME IN 2013: Wheat Flour Alternatives

Monday, 11 January 2016

Rondos: Almond "Fingers" (Wheat Free with a Dairy Free Option)

Happy 2016, readers! I had a nice break, but as soon as I got back to my home, after having been at my childhood home for the Christmas celebrations, I got back into the kitchen and made some delicious almond 'fingers'!


Admittedly, they're not finger shaped. They would be if I had the special mould, but I had to improvise and use a muffin tin instead. For those of you who aren't familiar with an almond finger, this is what I'm talking about:

These were always a favourite of mine when we went to the shop to get cakes as a kid, so it was a joy to recreate them. When I was researching the recipe to make these childhood favourites at home, I discovered that their native Dutch name is 'kanos', or 'rondos' for round ones.

FREE FROM
☑ Soya (check for soya lecithin)
☑ Dairy (use substitute in italics for dairy free)
☑ Wheat

CONTAINS
☒ Refined sugar products
☒ Nuts (almonds)
☒ Gluten
☒ Egg


INGREDIMENTS
For the pastry,
  • 9 ounces (255 grammes) white spelt flour
  • 6 ounces (170 grammes) butter, room temperature, or block margarine
  • 3 ounces (85 grammes) icing sugar
  • 1 medium egg
  • Zest of half a lemon

For the filling,
  • 5 ounces (140 grammes) ground almonds
  • 3 ounces (85 grammes) icing sugar
  • 1 medium egg
  • A few drops of almond essence

For finishing,
  • 1 medium egg, beaten with a little water, for glazing
  • 6 almonds, halved with skins removed

HOW TO
First, make the pastry.
  • In a large mixing bowl, cream the butter with a wooden spoon until soft. Add in the sugar and lemon zest and cream again until smooth and fluffy. 
  • Add in the egg and mix until fully incorporated, and then sift in the flour. Mix gently until you get a nice soft and slightly sticky dough. You might need to resort to your hands if the mixture is too stiff for the spoon.
  • Divide the dough in half equally, using a scale, and then wrap each half in cling film, flattening it to make it chill faster. Chill in the fridge for at least 60 to 90 minutes, or in the freezer for about 20 to 30 minutes.

Next, make the filling and assemble.
  • Preheat your oven to 160°C (320°F, Gas Mk.2½, or very moderate).
  • In a mixing bowl, stir together the ground almonds and icing sugar until fine and free of any lumps. Add in the egg and almond essence, and mix until it becomes a paste.
  • Sprinkle the work surface with flour, and roll out the first half of the dough to just under a quarter inch (3 millimetre). Using a round cutter, or glass, or mug, cut out rounds to line a 12 hole patty tin, or muffin tin. Keep the trimmings aside.
  • Fill the cases with a rounded teaspoon of filling. Don't go mad: you want a gap of a few millimetres at the top of each case. I discovered the hard way that too much filling leads to cracked tops.
  • Roll out the second half of the dough and cut into slightly smaller circles for the lids. Brush the underside with water and use them to close each little cake. Pressing with the fingers is fine; no need for a fork.
  • Brush the top of each cake with beaten egg wash, prick with a fork to let air out, and press half an almond into the top.
  • Gather the trimmings together and squish into another dough ball. Wrap and keep for another project: you will have a little left over.
  • Bake in the preheated oven for 25 to 30 minutes. If they puff up too much and crack, it's no biggy: just put less filling in them next time.
  • Remove from the oven, allow to cool slightly in the tray, and then lift them out with the assistance of a blunt, thin bladed knife (like a palette knife). Move to a wire rack to cool completely.


Wednesday, 5 November 2014

Spelt Doughnuts Video Tutorial!


I made a tutorial video for the spelt doughnuts recipe that I published a few months ago, butI thought it would be pointless to have two blogs of the same recipe. So this blog post is literally just to say "Lookit ma new vidjo!"

Full spelt doughnuts recipe can be found here!


Friday, 29 August 2014

Spelt Doughnuts (Wheat Free)


For those who have been missing the taste of doughnuts since discovering their allergies, here's a nice recipe so that you can be reacquainted!


I have always found doughnuts very visually appealing: fluffy cakey rings covered in caster sugar, or glazed with icing or chocolate and doused in illegally brightly coloured sprinkles. Usually the reality of eating a doughnut from the bakery isn't as nice as looking at them on the shelf, as here in Ireland there are only two or three kinds of doughnut, all of which are rather plain. I always considered the doughnut a second rate confection until in 2008 I visited Germany. 


While on holiday in Hamburg, I went to a bakery with a friend and was amazed not only by how popular the doughnut is, but also how many different kinds of doughnut you could buy! Jam filled, Nutella filled, custard filled, long ones split and filled with whipped cream and jam, spherical ones glazed completely in glacé icing, ones dusted with icing sugar, cocoa, cinnamon... and ring doughnuts glazed in every colour imaginable. It was a veritable doughnut wonderland!

I didn't think about them again until I visited Germany for a second time in 2012, and in Hauptbanhof in Berlin my boyfriend at the time and I found a "Dunkin' Doughnuts" shop. Yes I know it's an American chain, but once again I was fascinated by the sheer variety and imagination of some of the flavours.

Of course, this doughnut recipe that I developed through a few trials and errors is a fairly plain recipe, but hopefully as time goes on I will come up with some nice flavour and colour combinations.

So, here's the recipe:


FREE FROM
☑ Soya (check for soya lecithin)
☑ Yeast
☑ Wheat
☑ Nuts

CONTAINS
☒ Gluten (unless you use gluten-free bread flour)
☒ Refined sugar products
☒ Dairy dairy free options in italics
☒ Eggs


 INGREDIMENTS
Makes about 12 3 inch doughnuts, and 12 doughnut holes
  • 6 ounces (170 grammes) spelt flour
  • 2 ounces (55 grammes) cornflour
  • 1 tablespoon (15 millilitres) baking powder
  • 2 ounces (55 grammes) caster sugar
  • Pinch of salt
  • Optional: 1 teaspoon of cinnamon
  • 1 medium egg
  • 3 to 4 tablespoons (45 to 60 millilitres) warm milk, or warm water
  • 1 ounce (30 grammes) sunflower oil
  • 1 teaspoon (5 millilitres) vanilla essence, or the seeds of 1 vanilla pod

To coat:
  • Caster sugar
  • Icing sugar
  • Cinnamon
  • Glacé icing
  • Chocolate glaze
  • Sprinkles


HOW-TO 
  • In a heavy saucepan, heat about 3 inches (8 centimetres) of flavourless oil to 180°C (350°F), measuring with a sugar thermometer. Alternatively you can use a deep fryer, if you have one. The temperature is important so make sure your thermometer is accurate.
  • Sieve the flour, baking powder, salt, and caster sugar (and cinnamon, if using) into a large mixing bowl.
  • In a separate bowl, mix together the egg and the oil. Make a well in the centre of the flour and add in the egg mixture. Mix a little until messy but not combined.
  • Add 3 tablespoons of milk or water to start with, and mix until combined. If it's not coming together properly, add up to 1 more tablespoon of liquid.
  • Once the dough is formed, turn out onto a work surface and knead lightly until smooth, about 3 minutes.
  • Roll the dough out on a floured surface to a half inch (1 centimetre) thickness. Using a 3 inch (8 centimetre) round cutter, cut as many doughnuts as you can. Using a 1 inch round cutter (2½ centimetre), or the screw top from a wine bottle, punch holes out of the middle of the doughnuts. When cutting them, press the cutter into the dough then twist as you take the cutter away.
  • Gently drop the doughnuts into the oil in batches of 2 or 3. Cook the doughnuts for about 3 to 4 minutes, flipping once.
  • Lift the doughnuts out with a slotted spoon or tongs and drain on kitchen paper. Allow to cool.
  • To coat, dip them in caster sugar or icing sugar, or you can ice and decorate them.


THIS TIME LAST YEAR: Free-From Gingerbread Men


It's been a while! Happy 9th Anniversary!

  It's been a while. The past two years have been a helluva a ride. This year is gonna hold some big changes for this blog. I'm comp...