Friday 31 October 2014

Peanut Butter Cup Mini Cheesecakes (Wheat Free)

Beannachtaí na féile Oíche Shamhna, gach duine! In other words, happy Halloween! I hope everyone has or is having a fantastic day, and that my recent spate of Halloween related recipes has you well prepared for feasting. And here's another one!

Yes, I'm still on my cheesecake buzz. After the success of the previous two mini cheesecake posts, why wouldn't I be? So here's my most recent offering: peanut butter cup cheesecakes.


The inspiration behind this one I'm sure is fairly obvious: more Halloweeny peanutty goodness, with an American style twist, It followed from the coconut lime cheesecakes because I wanted to see if the recipe still worked if I replaced the coconut milk with smooth peanut butter; I was not disappointed.


One must understand, my brain works in a fairly non-linear fashion. I constantly imagine better and different ways of doing recipes, and invent new possibilities in my mind on a minute to minute basis. When I make one thing, it doesn't stop with the final product; it spurs my mind into imagine new things, usually starting with the though "hang on, what would happen if I....?"


But enough of my ramblings. To make these, I simply made a shortbread style base my mixing 2 ounces (55 grammes) of icing sugar, 4 ounces (115 grammes) of butter, 4 ounces (115 grammes) of spelt flour, 3 tablespoons (45 millilitres) of cornflour, and 1 tablespoon (15 grammes) of cocoa powder together with a pinch of salt until you achieve a crumbly dough. Line a 12 indent muffin tin with cases and divide the crumble between, flattening down and spreading slightly up the sides. Bake in a preheated 150°C (300°F, Gas Mk.2, or very moderate) oven for 15 minutes.


Prepare the filling following this recipe, replacing the coconut milk with smooth peanut butter, and the lime zest and juice with 4 fluid ounces (120 millilitres) of whipping cream. Distribute between the baked bases, and return to the oven for a further 20 minutes. Allow to cool and then chill overnight.


The next day, make the chocolate glaze by melting together 4 ounces (115 grammes) of milk or dark chocolate, 1.5 ounces (40 grammes) sunflower oil, and 1.5 ounces (40 grammes) of butter with a pinch of salt. Pour on the cases, moving the cakes to evenly spread the glaze, and then tap on the work surface to smooth out and release any bubbles. Decorate with bashed roasted salted peanuts.


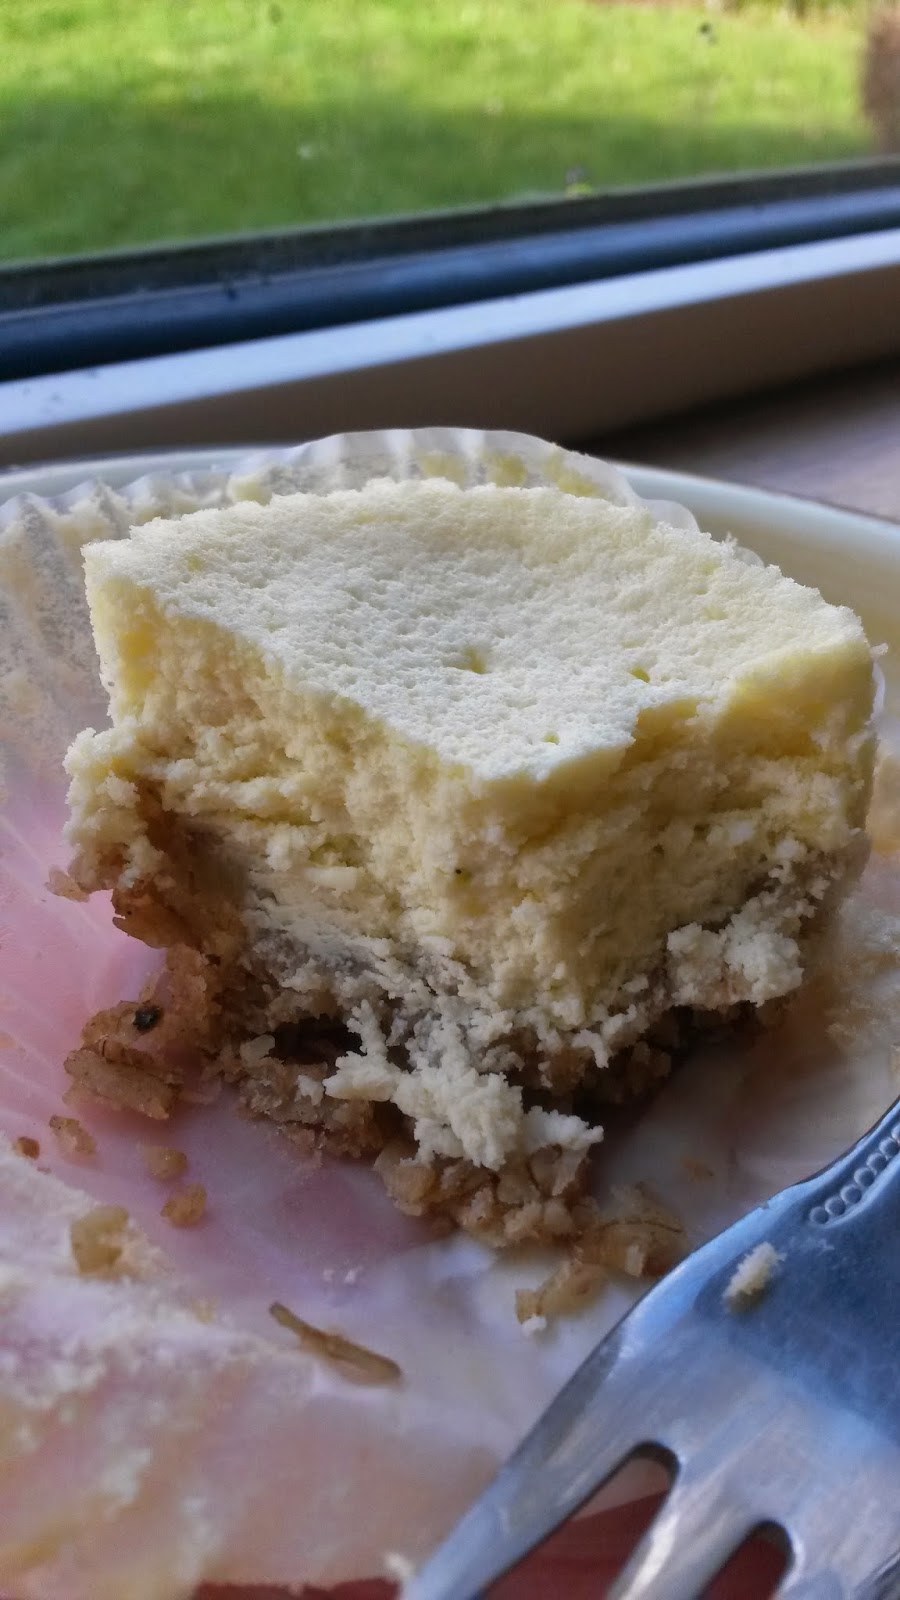
The consistency of these cheesecakes is absolutely perfect: super creamy yet not too dense. The peanut flavour is nice and subtle, and complimented well by the chocolate base and glaze. There is also a nice combination of textures with the creamy cheesecake and glaze, crumbly base, and crunchy peanut topping.


You could of course use crunchy peanut butter if you want more crunch, but I'm not a fan of crunchy peanut butter. I'm sure this could work just as well with any kind of nut butter, such as almond or hazelnut.

There was no recipe this time last year.

Monday 27 October 2014

Recipe Mashup: Apple Treacle Tart (Wheat Free)

Sometimes one can get a little bored in this kitchen of doing the same things, and that leads to experimentation. Sometimes experiments go very wrong, sometimes they work perfectly: this was a bit of both. So readers, I present to you the apple treacle tart!


This evolved over quite a thought process. I was trying to think of ways to make the concept of a toffee apple into a dessert, and see where that inspiration led me. I thought of toffee apple pudding, which is fairly standard, but then was led onto the concept of mixing together an apple tart and a treacle tart.

For those of you who don't know, a treacle tart is a British traditional tart made with a shortcrust case filled with a mixture of breadcrumbs, golden syrup, treacle and lemon zest; some versions include an egg,which is the one I know.


I thought I'd spruce it up by adding some apple slices on the top, thus introducing the toffee apple aspect. It tasted lovely, but the only issue was that the apples cooked too dry, and the filling was still a little unset in the middle, which led to big problems cutting the tart, There's nothing more annoying than an unset tart when it comes to cutting as it's just messy.

But, my brother and his guest really enjoyed eating it after dinner, and then the leftovers were promptly eaten by everyone else as well. So it wasn't a total disaster.


I wish I had more photos of it when it was cut, but I don't want to be that person who sacrifices sitting down and enjoying a meal with family for taking super stylish photos and bugging the Hell out of everyone.

I will be making another attempt at this recipe in the week to share properly. This is the recipe I used for this attempt, and it will be tweaked in further attempts:


For crust:
2 ounces (55 grammes) icing sugar
4 ounces (115 grammes) butter
4 ounces (115 grammes) spelt flour
2 ounces (55 grammes) cornflour
Pinch of salt

For filling:
4 ounces (115 grammes) breadcrumbs
5 ounces (140 grammes) golden syrup
1 ounce (30 grammes) treacle
1 medium egg
Pinch of salt
1 medium eating apple, sliced finely

Stay tuned for further attempts. I won't include the full recipe and method because it was a trial run.

THIS TIME LAST YEAROn Holiday until Next Monday

Friday 24 October 2014

Coconut Lime Mini Cheesecakes (Wheat-Free)

Seeing as my Millionaire's Cheesecake recipe is my blog's most popular post, accruing over 100 views as of this day, I kinda gathered that people like cheesecake. So, I thought I'd share with you another delicious, Caribbean inspired recipe, Coconut and Lime Mini Cheesecakes!


I've always loved the combination of coconut and lime, sometimes with ginger and sometimes with rum and brown sugar, but the richness of the coconut and the freshness of the lime go so well together. In fact, outside the world of sweets, it's a fabulous combination for flavouring white rice as a side dish for marinaded chicken recipes, such as jerk chicken or barbecue chicken.


But back to sweets, which is why you're all here. I have long experimented with different kinds of baked cheesecake recipes, but I think I've come across a method that makes cheesecakes with a fantastic texture. The idea came to me when I was watching a fellow YouTube cook's channel, Ania's Kitchen, where she makes a vanilla cheesecake (sernik waniliowy) by whipping the egg whites separately and folding into the rest of the mixture.

I tried this out in my go-to baked cheesecake recipe, which I've been using for ages now, and it worked amazingly! The resulting dessert was so light and fluffy, and in no way dense or heavy liked baked cheesecakes can sometimes be. I thought it was a massive improvement. However, it made the mixture much more voluminous and as such it made about 50% more cakes than I was expecting: my original batch made 18 mini cakes!


So, without further ado, let's get on with the recipe! This has been amended to make a more realistic batch of 12 mini cakes.

FREE FROM
☑ Soya (check for soya lecithin)
☑ Yeast
☑ Wheat
☑ Nuts

CONTAINS
☒ Gluten
☒ Refined sugar products
☒ Dairy
☒ Eggs


 INGREDIMENTS

For the base:
  • 4 ounces (115 grammes) rolled oats
  • 2 ounces (55 grammes) wholegrain spelt flour
  • 2 ounces (55 grammes) dessicated coconut
  • 2 ounces (55 grammes) brown sugar
  • 2 fluid ounces (60 millilitres) sunflower oil
  • 2 tablespoon (30 millilitres) water
  • ½ teaspoon (3 millilitres) ground ginger
  • Pinch of salt

For the cheesecake mixture:
  • 10½ ounces (300 grammes) cream cheese, room temperature
  • 5½ ounces (150 grammes) coconut cream (What's this? See notes below)
  • 3 ounces (85 grammes) caster sugar
  • Zest and juice of 1 lime
  • 2 medium eggs
  • Pinch of salt

HOW-TO
To make the biscuit base:
  • Preheat your oven to 150°C (300°F, Gas Mk.2, or very moderate). Line a 12 indent muffin tin with large cake cases (muffin cases).
  • Mix all the ingredients for the base together in a mixing bowl very thoroughly until fully blended. It'll take a while, but you want a moist, loose and consistent mixture. It's sort of like a crumble.
  • Put a rounded tablespoon (about 20 millilitres) of crumble into each case. Press it down with the spoon, spreading some up the sides a little.
  • Bake for 10 to 15 minutes in the oven while you prepare your filling.
For the cheesecake:
  • In a large mixing bowl, beat the cream cheese, set coconut milk and salt until light and smooth. Beat in the sugar until creamy. Fold in the lime juice and zest.
  • Separate the eggs, putting the yolks in with the cream cheese mix and putting the whites in a separate mixing bowl. Beat in the yolks.
  • Using clean beaters on an electric mixer, whip the egg whites until they form stiff peaks.
  • Fold a third of the whipped whites into the cream cheese until half mixed. Add the remaining whipped whites and gently fold in until completely incorporated.
  • Remove the bases from the oven and divide the mixture between the cases. Shake the tray lightly to smooth out the tops of the cakes, and give it two or three firm taps off the counter.
  • Return to the oven and bake for 20 minutes. When the cooking time it elapsed, turn off the oven, crack the oven door, and allow the cakes to cool in the oven.
  • Once cooled, chill for at least 4 hours; I find it's best to leave them overnight.

NOTE
What is coconut cream, I hear you ask (or imagine hearing you because this is a computer)? Sometimes when you leave a can of coconut milk sitting in the press for ages it separates into coconut cream and coconut water. When you open the can, the solid cream has risen to the top and set, and when you scoop it out, the water it sitting at the bottom. This separation usually happens when coconut milk hasn't been tampered with and pumped full of nasty preservatives or gums to lengthen its shelf life.

For this recipe, you'll need to scoop out the cream; you can discard the coconut water if you like, but it's good for your skin, hair and nails if you drink it.

And there you are! It's a little fiddly, and probably NOT a beginner's recipe, but my Lordy are they delicious. I brought some to a friend's house and they were demolished; her 2 year old ate about 3 of them...

There was no recipe this time last year.

Wednesday 22 October 2014

Traditionl Irish Barmbrack (Wheat and Dairy Free)

There is nothing that transports me back to Halloween as a child than a traditional barmbrack: a dense, fruity bread enjoyed toasted with slatherings of real butter and raspberry jam.


Traditionally, it's a leavened bread with mixed dried fruits soaked in tea mixed throughout it, but I try to avoid cooking with yeast as much as I can. Why? Because it is a) really fiddly, and b) gives me a sore stomach if I eat too much.


This is also eaten in Wales, where it is called bara brith.

FREE FROM
☑ Soya (check for soya lecithin)
☑ Yeast
☑ Wheat
☑ Nuts
☑ Dairy

CONTAINS
☒ Gluten (spelt)
☒ Eggs

 INGREDIMENTS
For 1 8 inch (20 centimetre) cob


  • 13 ounces (375 grammes) dried mixed fruit
  • 2 ounces (55 grammes) brown sugar
  • 1 medium egg
  • 6 fluid ounces (180 millilitres) warm strong tea
  • 8 ounces (225 grammes) wholemeal spelt flour
  • 1 teaspoon (5 millilitres) cinnamon or mixed spice
  • 1 teaspoon (5 millilitres) baking soda
  • Pinch of salt


Tuesday 21 October 2014

Halloween's Just Around the Corner, and Work is Killing Me

Hi all! Apologies for the lack of recipe today, but I have just been so run off my feet at work recently that I haven't had time to eat or sleep let alone cook something worthy of blogging about; having said that, I made an awesome curry for Sunday lunch.

But I will just do a little update for all who are interested. As you can all see, I've begun doing cookery videos! I'm very pleased to have finally got the bits together to do it, and now I'm looking at refining it. I also have a few interested collaboration projects in the pipeline for you all, and a few little videos in kitchen tricks, and trying out new food and recipes.

But above all this excitement, Halloween is just over two weeks away, and I'm uber excited! Halloween is my favourite celebration in the year, but I always find it difficult to afford decorations, and also not all landlords are happy with decorating the rooms. But I'll do what I can to be as Halloweeny as I can!

I just wish I didn't have to have a day job so I could do the cookery blogging and videoing all the time. But, I have food to buy and bills to pay and parents to please.

New video out on Wednesday, as usual.

Friday 17 October 2014

Banoffee Fairy Cakes (Wheat Free; Dairy Substitute)

Introducing my latest creation: wheat-free, dairy-free banoffee fairy cakes! Tada! 


I have a confession to make: I don't like bananas. I'll only eat a banana in a very specific set of circumstances, when the banana is exactly the correct ripeness and presented to me in exactly the right form. There's something about the texture: it's fine until you chew, then it just gets weird. But, that's just me.
I do however really like the flavour of banana, if indeed its texture is too odd for my taste, and one banana thing I truly love is banoffee pie. Originally from East Sussex but now famous world over, banoffee pie is traditionally made of a pastry case covered with sliced banana, topped off with toffee sauce and decorated with whipped cream and shaved chocolate.
The concept of mixing buttery pastry, banana and toffee together has now spread into other kinds of desserts, such as ice cream sundaes and cakes. This inspired me to make some nice little banoffee fairy cakes.

These are not in anyway complicated, just a banana flavoured sponge fairy cake, topped with toffee flavoured glacé icing, and decorated with a little banana chip.

FREE FROM
☑ Soya (check for soya lecithin)
☑ Yeast
☑ Wheat
☑ Nuts


CONTAINS
☒ Gluten (oats and spelt)
☒ Dairy (you can use margarine instead of butter)
☒ Eggs

 INGREDIMENTS
For 12 fairy cakes


  • 3 ounces (85 grammes) white spelt flour
  • 1 ounce (30 grammes) cornflour

  • ½ teaspoon baking powder
  • 2 medium eggs, at room temperature
  • 3 ounces (85 grammes) caster sugar
  • 1 teaspoon vanilla essence (preferably the pure and natural kind)
  • 2 ounces sunflower oil
  • 1 medium banana, mashed
  • 1 tablespoon (30 millilitres) warm water
For the icing:
  • 4 ounces (115 grammes) icing sugar
  • 1 ounce (30 grammes) butter or margaine
  • 1 ounce (30 grammes) golden syrup
  • 1 ounce (30 grammes) brown sugar
  • 2 tablespoons (30 millilitres) water
  • 12 banana chips


METHOD
  • Make the batter following this recipe, adding the mashed banana with the water. Distribute among 12 large fairy cake cases and bake as instructed.
  • Once baked, allow to cool completely before icing.
  • To make the icing, melt together the butter (or margarine), golden syrup, and brown sugar together with the water in a saucepan over medium heat. Once the sugar has dissolved, remove from the heat and beat in the icing sugar until smooth.
  • Pour the icing over the cakes, and while still wet press a banana chip into each cake.
  • Allow to set before eating, roughly 30 minutes.


THIS TIME LAST YEAR: No-Churn No-Cook Strawberry Cheesecake Ice-Cream (EGG FREE, WHEAT FREE)


Wednesday 15 October 2014

Orange Chocolate Fudge

When designing my second Halloween dessert, the concept of something orange just flew into my mind, as orange is a very Halloweeny colour: whether it's the imagery of stripy witch's tights, or a crispy fallen leaf, orange - along with green, purple, black, and grey - rank highly in my mind when it comes of Halloween colour associations.


Another inspiration that came to me was the idea of celebratory food. Halloween is Celtic new year's eve, and all the traditional celebrations we have as part of Halloween stem from ancient Irish new year's eve customs. Traditionally, a lot of nice food, beer and mead would be consumed as part of the festivities. Nowadays, celebration food looks very different to how it did in pre-Christian Ireland, but the vibe is still there.


To me, Halloween is all about sweeties, chocolate and autumn fruits and nuts, so I thought I'd design a sweetie worthy of any trick or treat bucket: Orange Chocolate Fudge.

There is no finer combination in the world than orange and chocolate: it's just a match made in heaven. The warmth of the orange oil lends itself as a perfect match for the dark earthy quality of chocolate, and when both are wrapped up in fat and sugar what's not to like?


FREE FROM
☑ Soya (check for soya lecithin)
☑ Gluten
☑ Wheat
☑ Nuts
☑ Eggs

CONTAINS
☒ Dairy
☒ Cocoa
☒ Refined sugar products

 INGREDIMENTS

For the orange chocolate layer:
  • 8 ounces (225 grammes) condesned milk
  • 8 ounces (225 grammes) light brown sugar
  • 4 ounces (115 grammes) butter
  • 2 fluid ounce (60 millilitres) milk
  • 1 teaspoon (5 millilitres) vanilla or other essence
  • 1 to 2 tablespoons cocoa powder, depending on how dark you want it
  • Zest of 1 orange
  • Pinch of salt

For the coloured topping layer:
  • 3 ounces (85 grammes) condensed milk
  • 3½ ounces (100 grammes) white chocolate
  • Pinch of salt
  • Orange food colouring


THIS TIME LAST YEAR: Wheat Free Ice Cream Cones

Wednesday 8 October 2014

Spelt Peanut Chocolate Chip Cookies (with Video)

Woot, woot! I have finally launched my new baking series! After extensive screen tests, I have finally found a style and system of recipe design that I'm pleased with, and you get to enjoy the results. New videos will be uploaded every Wednesday.


So, why peanut chocolate chip? As I touch on briefly in the video, as a child I always got a few monkey nuts in my trick or treat bucket, and Halloween has always been a time of over indulging in sweeties of many kinds. Also, Halloween is celebrated extensively in the United States. All these factors combined inspired me to make some American style soft cookies, chipped with candy coated chocolate peanuts. They're sweet and soft and colourful, and every so often you bite into a peanut enrobed in delicious milk chocolate.

This is the first in my four-part series of Halloween inspired recipes, airing over the next four Wednesdays in October.


FULL INGREDIENTS LIST:
Makes 25 to 30 biscuits, depending on size

  • 7½ ounces (215 grammes) white spelt flour
  • 1 teaspoon baking soda
  • Pinch of salt
  • 4 ounces (115 grammes) butter, at room temperature
  • 2½ ounces (70 grammes) caster sugar
  • 3 ounces (85 grammes) brown sugar
  • 1 medium egg
  • 1 teaspoon vanilla essence
  • 7 ounces (200 grammes) candy coated chocolate peanuts, chopped or bashed slightly with a rolling pin


THIS TIME LAST YEAR: The Mystery of Perfect Homemade No-Machine Ice Cream: SOLVED!

Friday 3 October 2014

Experiments with Natural Food Colouring: Beetroot

It's Friday the 3rd of October, which here in Ireland is "Paint it Pink" Day, where the Irish public is encouraged to do something pink and upload photos to social media, hastagged with #PINKPICS, to raise awareness for breast cancer patients, and fund raise through text donations. More information can be found at www.irishcancersociety.ie.

As such, I thought I'd use this as an excuse to do something which I've been thinking about for ages: experiment with beetroot as a natural food colouring!


Sadly, the above cakes were not coloured with beetroot, and I'll tell you why.

I bought some pre-cooked beetroot to purée and use as food colouring, and I puréed one whole cooked beetroot and added it to my batter. The batter was hot neon pink before entering the oven, and as such I was filled with excitement. But once they came out of the oven they looked like this


Not very pink at all, as you can see. I wonder if using pre-cooked beetroot was the issue, as I have done a bit of research and found that most recipes use raw beetroot to colour by grating it in to the batter. I think I'll give this a go next.

But still managed to make something pink my covering them in some nice buttery glacé icing, made by mixing 1 tablespoon (15 millilitres) of melted butter with 2 ounces (55 grammes) of icing sugar, adding water in drop by drop until a nice glazing consistency is achieved.

I then dyed it pink, obviously. And sprinkled some likkle hearts on top...


Has anyone else experimented with using beetroot as a natural dye? If so, let me know what you discovered and I might learn something new!


It's been a while! Happy 9th Anniversary!

  It's been a while. The past two years have been a helluva a ride. This year is gonna hold some big changes for this blog. I'm comp...