Showing posts with label american style. Show all posts

Thursday, 6 February 2020

Pretty Pink Inside-Out Whoopie Pies: One Recipe, Two Results

You may have guessed: I love pink, and I love cake. So why not mix the two in these lovely little handheld cakes? Here's my most recent experiment: inside-out whoopie pies!


A few months ago, I discovered a great American cups recipe for whoopie pies, and at the time I thought it was all sorted out. However, over the past few months, as I made the recipe a few times it didn't turn out the same way every time after all. I feel that that is to do with how humid Ireland gets in winter, which makes the flour more damp, which in turn skews things in the recipe.

So, I went back to the drawing board and worked with the ratios found in that recipe and found a good recipe using weights. It took about 11 or 12 failed attempts, but I finally got something that's pretty similar to the original Amish recipe I was using.


This recipe can be made two ways and it has two different results: if you make the cake with oil, it makes whoopie pie cakes that can be sandwiched; if you make it with butter, it makes little cakes that can be frosted on top like cakey cookies, or "cupcake tops".


I made them with raspberry buttercream to make them all pink, but you can put any topping or filling with these: lemon curd, or whipped cream, or flavoured buttercreams. The cakes can also be flavoured with different essences or zests; whatever you like!

INGREDIMENTS

2 medium eggs
4 ounces (115 grammes) salted butter for cupcake tops, or oil for whoopie pies
9 ounces (255 grammes) caster sugar
12 ounces (340 grammes) plain white flour: wheat or spelt*
1 teaspoon (5 millilitres) baking soda
¾ teaspoon (4 millilitres) fine salt
6 fluid ounces (170 millilitres) buttermilk
2 teaspoons (10 millilitres) vanilla essence


HOW TO MAKE CUPCAKE TOPS
  • Preheat the oven to 180C (350F) and line two flat baking trays with non-stick paper.
  • In a large mixing bowl, cream the butter and sugar together until mixed well: there's a lot of sugar, so it won't cream fully until you add the egg.
  • Beat in the egg, vanilla essence and salt until you have a nice fluffy mixture.
  • Mix together flour, soda, salt, and sugar into another bowl. Sieve half of this mixture into the butter mix and fold in fully.
  • Fold in the buttermilk, followed by the remaining dry ingredients. Mix well until smooth, but do not overmix.
  • Spoon teaspoonfuls of batter onto the trays, about 2 inches apart, or you can use a piping bag to shape the cakes.
  • Bake in the centre of the preheated oven for 8 to 12 minutes, depending on the size, or until they have puffed up and are springy to the touch.
  • Remove the cakes from the oven and cool for about 5 minutes before transferring to a wire rack to cool. On cooling, they will be a little crunchy; however, they will be soft and flexible after a few hours.
  • Top the cakes with icing of your choice: buttercream, glacĂ©, whipped cream, etc.

HOW TO MAKE WHOOPIE PIES
  • Preheat the oven to 180C (350F) and line two flat baking trays with non-stick paper.
  • Mix the egg, oil, buttermilk, and vanilla essence in a jug. Beat very well, and set aside.
  • Sieve the flour, soda, salt, and sugar into a large mixing bowl. Make a well in the middle and pour in the liquid.
  • Fold the liquids into the dry ingredients to make a smooth but thick batter. Spoon teaspoonfuls of batter onto the trays, about 2 inches apart, or you can use a piping bag to shape the cakes.
  • Bake in the centre of the preheated oven for 8 to 12 minutes, depending on the size, or until they have puffed up and are springy to the touch.
  • Remove the cakes from the oven and cool for about 5 minutes before transferring to a wire rack to cool. On cooling, they will be a little crunchy; however, they will be soft and flexible after a few hours.
  • Pair up similarly sized cakes and sandwich together with a filling of choice: jam, buttercream, whipped cream, etc.

Saturday, 4 January 2020

American Style: Snickerdoodles (Cup Measurements)

Happy New Year! My first offering of 2020 is a delicious cinnamony treat: the Snickerdoodle!


I meant to make these in the lead up to Christmas, as these are traditionally a holiday biscuit. But sadly for me I spent from December 19th to 31st in and out of bed with a horrible viral illness. So, a lot of my plans went right out of the window with my ability to breathe properly or eat. So, I made these during the week instead as my first baking venture of 2020.

As you know, last September I discovered the strange and enigmatic wonders of working with American cup measurements when I made whoopie pies. When I made those I thought to myself: could I design my own recipe with cups instead of ounces or grammes? That led me to this delicious creation, which was the result of much foostering and tweaking.

One thing I will impress upon you, however, is that you measure the ingredients correctly: there is, indeed, a way to properly use cups when measuring flour, caster sugar, and brown sugar.

I use Jill Selkowitz's guide to measuring flour on her website This Old Gal, where she stresses that flour must be nice and airy before measuring to get consistent results. Also, brown sugar must be compacted into the cup measurements nice and tightly to get the right results. Brown sugar is a little softer than white sugar, so the cupfuls are slightly lighter.

So, without further ado, here is the first recipe that I have ever designed to be made using American cup measurements!

INGREDIMENTS

2 cups (240 grammes) plain flour: wheat, or spelt, spooned and leveled
½ cup (105 grammes) soft light brown sugar, packed
½ cup (115 grammes) caster sugar
½ cup (115 grammes) butter
1 medium (US large) egg
½ level teaspoon (2.5 millilitres) baking soda
1 level teaspoon (5 millilitres) ground cinnamon
¼ teaspoon (1 millilitre) fine salt
Optional: 1 level teaspoon (5 millilitres) ground ginger
Cinnamon sugar, to coat


METHOD
  • Line one or two baking trays with non-stick baking paper, and preheat the oven to 180°C (350°F, Gas Mk.4). Make sure the oven racks are in the centre of the oven.
  • In a mixing bowl, cream together the butter and sugars. Beat in the egg to get a fluffy mixture.
  • Sieve in the dry ingredients and work by hand into a soft dough that is a little bit tacky.
  • Divide the mixture into 12 balls, rolling each ball in cinnamon sugar to coat. Arrange the dough balls on the sheets about 2 inches (5 centimetres) apart to allow for spreading. I only have small trays so I can only fit 6 to 8 cookies on mine.
  • Bake the cookies for 10 to 12 minutes, depending on how crispy or chewy you want them: shorter cooking makes chewier cookies, longer cooking makes them crispier.

Wednesday, 20 November 2019

Dessert Mashup: Phish Food Cake (Chocolate, Caramel, and Marshmallow Layer Cake)

Looking for a show-stopping dessert for your party table! Try this decadent chocolate, caramel and marshmallow layer cake: the Phish Food gateau!


I like to take inspiration from unusual places, and this time it's from a flavour of ice-cream! Phish Food flavoured Ben and Jerry's is a chocolate ice-cream with little chocolate fishies, a marshmallowy swirl, and a caramelly swirl. I thought it'd be great to interpret his in cake form.

This cake was a big hit at the opening of the play my husband was in this week, and was devoured in minutes. I wish I had got some better pictures, but maybe I'll make another one of these in the future to get better pictures.


INGREDIMENTS

For the cake

7½ ounces (210 grammes) white spelt flour, or gluten free flour
1½ ounces (40 grammes) cocoa powder
¾ teaspoon baking powder
½ teaspoon baking soda
3 medium eggs
9 ounces (250 grammes) caster sugar, divided in two
3 fluid ounces (90 millilitres) sunflower oil
3 ounces (85 grammes) butter, at room temperature, or margarine
6 fluid ounces (180 millilitres) buttermilk, or milk alternative mixed with 2 teaspoons of lemon juice or white vinegar; or dairy-free yoghurt thinned down with water to buttermilk consistency
2 teaspoons (10 millilitres) vanilla essence


For the filling

3 ounces (85 grammes) dulce de leche, homemade or shop bought
1½ ounces (40 grammes) salted butter


For the marshmallow topping

1 egg white
1 tablespoon (15 millilitres) water
1 ounce (30 grammes) glucose syrup, or white corn syrup
3 ounces (85 grammes) caster sugar
A few drops of lemon juice
½ teaspoon vanilla essence
Pinch of salt


For the choco fudge icing

8 ounces (225 grammes) plain chocolate, about 45-50% cocoa
4 ounces (115 grammes) salted butter
6 fluid ounces (170 millilitres) whole milk
2 fluid ounces (60 millilitres) evaporated milk, or just use all whole milk instead
8 ounces (225 grammes) caster sugar


METHOD

  • Bake the cake according to these directions.
  • Make the filling by beating the caramel and butter together. Set aside
  • Make the choco fudge icing by boiling the milks and sugar together for about 5 minutes or until it reaches 105C (220F) on a sugar thermometer. Remove from the heat and stir in the chocolate and butter until smooth and melted. Allow to cool for about an hour, or until spreadable.
  • Make the marshmallow topping: mix all the ingredients in a heatproof bowl. Gently heat over simmering water until the sugar dissolves and it’s hot to the touch. Take it off the heat and whip it with an electric hand mixer for a full 7 minutes, until it is marshmallowy light and cool to the touch. For extra accuracy, you can use a thermometer to check the temperature of the egg white syrup, which should reach 70C (160F) before whipping.
  • Trim the cake dome, slice in half and sandwich with the caramel filling. Ice the sides with the choco fudge icing, and pipe a decorative border around the edge of the top.
  • Either pipe or dollop the marshmallow icing onto the top of the cake, keeping within the border.
  • As an extra touch, you can dust some cocoa powder on the top through a fish shaped stencil. I made one out of the cardboard from a cereal box.

Friday, 18 October 2019

"Marvellous Creations" Muddie Buddies [BACK-DATED]

Looking for a delicious snack for your party entertaining! Try this American style treat with an English twist: "Marvellous Creations" Muddie Buddies!


Muddie Buddies, also known as Puppy Chow, is a Mid-Western American treat which involves coating Chex cereal in melted chocolate (and often peanut butter) and dusting the whole thing in icing sugar. Sometimes, other sweets are mixed in to make a themed puppy chow, like M&Ms or Andes Mints. The origin of this sweet treat isn't known for sure, but Chex cereal was invented in the late 1930s so it's a fairly recent creation.

Now, I know this treat is served normally at Christmas, but I think it'd be good for any large gathering, including birthdays or Halloween!

As for the "Marvellous Creations", you ask? That's where England comes into it! Cadbury has a Dairy Milk chocolate bar that has popping candy, cherry jelly beans, and coloured crispy shelled chocolates. I thought combining these two things together would make for a delicious mix and it did!


We can't get Chex in Ireland, so I used chocolate frosted Shreddies (Aldi's knock off finest!). I mixed 4 ounces (115 grammes) of these Shreddies and tossed them in 8 ounces (225 grammes) melted plain chocolate and about a tablespoon (15 millilitres) of popping candy. I mixed together 1 ounces (30 grammes) each of icing sugar and cocoa powder, and tossed the cereal until each individual piece was coated. I allowed it to set for about an hour.

I mixed small portions of the snack mix with crispy M&Ms, a variety of pink jelly beans, and sprinkled extra popping candy on top. It was lovely!

I feel that if this were tossed in icing sugar alone it would be too sweet, but if that's what you're used to knock yourself out!

Tuesday, 10 September 2019

Traditional Amish Whoopie Pies: The Secret Is Revealed.....

Today's offering is these deliciously soft and squishy chocolate whoopie pies with their traditional whipped buttercream filling! And these cakes really taught me a huge lesson.


Now, I now I've made whoopie pies before, but this time it's different. Sometimes an old dog can learn new tricks, and sometimes a metric person can be surprised by American cups. For my entire cooking career, I have measured baking ingredients in mass (weight) measurements: pounds, ounces, kilos and grammes have been part of my everyday kitchen practise. In my opinion, the accuracy of measuring things in weight makes the recipes easily repeatable with the same results every time.... in theory.

I've always been put off cups because the idea of having to dirty a cup when one could just measure all the ingredients in the same bowl on a scale makes no sense to me. Also, every cup of flour -- no matter how carefully you try to measure the cup exactly the same way every time -- weighs differently. An Australian cup is different to an American cup, and what do you do if you don't have a set of cups?


For all of these reasons, I have spent my entire baking career avoiding them. However, from personal experience, translating or converting cup measurements to weight measurements can fail absolutely miserably.

When I decided to make these whoopie pies, I found a traditional Amish recipe and, of course, it was measured in cups. I made the recipe using cups, and it worked perfectly! As I was scooping the cups of ingredients I was weighing them exactly. Having noted how much each cup of each ingredient weighed, I noted it for perfectly replicable results! Or, so I thought.

When I made them again using my painstakingly measured weights, they were an absolute failure. I was so confused: surely, it should have worked perfectly? I did it again with the cups, again measuring the weights of the cups, and even though this times most of the weights were completely different it still turned out perfectly like the first time.

So my main take away is: if the recipe is designed for cups, use cups. And if the recipe is designed for grammes, use grammes.


I believe now, after this wonderfully humbling experiment, that weights are not the be all and end all, and that recipes should be made using the measurements they were designed with. I'm just glad I had a set of measuring cups!

For those who are interested in making these beauties, I used Family Favourite's recipe Traditional Amish Chocolate Whoopie Pies to make these. They are moist, soft, sweet, and deeply chocolatey. The addition of egg white in the icing makes it super light and fluffy. I heartily recommend this recipe! If you want plain vanilla cakes, I have discovered that simply replacing the cocoa powder cup for cup with flour works a charm.

Tuesday, 26 February 2019

Kitchen Experiment: "White Velvet" Cake

One of my personal favourite recipes on this blog is the red velvet cake I made back in 2017 when living in Roscommon with my fiancé. It's my go to recipe for chocolate cake, but normally when I want a plain cake I use my normal sponge recipe or the super fluffy sponge I used in the Japanese shortcake. So, I wondered: can I use the red velvet recipe for plain cake?


From my superficial research on Pinterest (which, to be fair, is all the research I have time for these days) American bakers make something called white cake, which essentially has the same constituent parts as the red velvet (without the cocoa and red colouring, obviously) but added together slightly differently. The main difference is that white cake uses only egg whites.

I tried making this cake the American way without egg yolks, but it always turned out too gummy. I think one needs the emulsifying nature of yolks to keep everything together. So, this is essentially the same as my red velvet recipe, only the butter is replaced entirely with oil and the egg whites are whipped separately for lots of volume.


I made a small rectangular cake by whipping 1 egg white with 1½ ounces (40 grammes) of caster sugar to medium peaks. In another jug, I mixed another 1½ ounces (40 grammes) of caster sugar with the egg yolk until smooth, then mixed in 2 ounces (55 grammes) sunflower oil, 1 teaspoon of vanilla essence, and a few drops of almond essence until evenly blended. I folded the yolk mixture into the white mixture gently until fully mixed. I then alternately added 3 ounces (85 grammes) of sifted white flour and raising agents with 2 fluid ounces (55 millilitres) of buttermilk. For this amount of cake, I added ¼ teaspoon baking powder, ⅓ teaspoon baking soda, and ¼ teaspoon of fine salt. I then baked it in a 180C oven for 20 minutes.

After baking and cooling, I filled and iced the cakes with the same kind of cooked milk frosting as the red velvet cake. This time, however, I made it by cooking half a pint of milk, 5 teaspoons of cornflour, and 8 ounces of sugar into a custard. I then whipped the custard with 8 ounces of unsalted butter. Cooking the sugar into the custard made for a much nicer mouthfeel. I only used half of this amount of icing for this small cake, before packing the sides with slivered almonds.

Now, was this cake any fluffier than just using the regular recipe and swapping out the cocoa and food colouring? No. Even though this was paler than a normal vanilla butter cake, I have other recipes that would be just as good for making a pale, fluffy sponge.

Saturday, 20 October 2018

American Style: Corn Dogs (Wheat Free, with Gluten Free Option)

Fancy an American style party treat? Here's my take on a favourite, whether bought from the freezer section of the 'market or from food-carts in the street: corn dogs!


I was inspired to make this treat because around this time of year, in the short-term run up to Halloween and the long-term run up to Christmas, our local supermarkets will start selling party finger food in the freezer section. One of which, is mini corn dogs, designed to be cooked in the oven for twenty minutes before serving the hungry party guests.

I have never set foot in the U.S.A., but my father and brother have both been to New York City. My brother Patrick loved the hot dog treats sold on the street; he particularly liked the regular hot dogs in a split bun covered in mustard. American style fast food is extremely popular here in Ireland (because we have had a strong relationship with the U.S.A. for generations through migration), but I've always wondered if our Irish palate approximations taste anything like they do in their homeland.


Here in Ireland, you can buy Frankfurters (also known as Wieners) from any supermarket, but they are always the German style sausages. One day I hope to traverse to New York City, not only to visit my cousin who lives there, but to find out what an American hot dog is supposed to taste like....

Now, the concept of a sausage dipped in batter and deep fried isn't foreign to people of these parts: battered sausages are available in most fish-and-chip shops around Ireland and Great Britain. But dipping them in corn batter is something different entirely. I hope that this rendition is faithful to the original American recipe!


DIFFICULTY
Intermediate: HOT OIL!


INGREDIMENTS

For 10 full sized corn dogs, or 20 mini dogs

10 Frankfurters, about 12 ounces (350 grammes)
3 ounces (85 grammes) fine cornmeal
1 ounce (30 grammes) plain flour: spelt, gluten free, or wheat
1 teaspoon (5 millilitres) baking powder
Pinch of salt
2 teaspoons (10 grammes) caster sugar
1 tablespoon (15 grammes) melted butter
1 egg, made up to 5 fluid ounces (140 millilitres) with milk, or milk alternative
Thick wooden skewers for whole dogs, or thick cocktail sticks for mini dogs


HOW-TO
  • Set some flavourless oil in a deep fat fryer, or heavy saucepan on a rear hob, to heat to 190°C (375°F), or until the handle of a wooden spoon bubbles quickly when submerged in the hot oil. Make sure you have at least two or three inches (5 to 7 centimetres) of oil in the pan, because if there is too little oil the sausages will sink and stick to the bottom of the pan. While the oil is heating, prepare the corn dogs.
  • Leave the Frankfurters whole, or cut each one in half. Dry the sausages with a paper towel, and dust with a little plain flour to help the batter stick. Pop a stick in each piece of sausage, trying to insert the stick as far into the sausage as possible, while leaving a handle.
  • Sieve cornmeal, plain flour, baking powder, salt, and sugar into a mixing bowl. Mix egg, milk, and melted butter together in a jug.
  • Using a wire whisk or metal spoon, make a well in the dry ingredients. Pour the wet ingredients in a mix with the whisk or spoon. Mix only until the batter is smooth and there is no dry flour.
  • Dip the sausages in the batter, coating thoroughly, and let the excess drip off. Cook the battered sausages in the oil for 3 to 4 minutes, flipping halfway, until the batter is puffed and deliciously golden.
  • Drain the cooked corn dogs with kitchen paper, and serve immediately with mustard, ketchup, or mayonnaise.

Thursday, 18 October 2018

American Style: Deep Pan Pizza (Egg Free with Wheat Free Option)

Looking for a hearty, comforting dinner? Why not try this recipe for deep pan pizza! (It comes with my fiancé's approval, as seen below)


Autumn and Winter are full of party occasions and opportunities: in my family, even without the traditional holiday events, there are three birthdays in October and November. This time of year is a real season of festive eating!

When we were kids, we had normal kids' party food at all these kinds of occasions: sausage rolls, cocktail sausages, chips, and either hamburgers, or pizza. In the 1990s, supermarkets where I lived began to stock cook-from-frozen pizzas, and normally they had big, fluffy bread bases. I didn't see a thin and crispy based pizza until I was in my mid-late teens.


The most commonly eaten brand was Goodfellas, but there were many others, including supermarket own branded pizzas. I have very fond associations with thick based pizzas, even though when I eat shop bought ones now my adult taste buds aren't able to taste what was so amazing to my childhood taste buds....

I've been meaning to try a deep pan pizza for a very long time: I popped it on my list of projects to try about this time last year, I just never had the opportunity to try it. I was reminded to try it when I was watching Chef John's Detroit style pizza video on Youtube earlier last week.


My pizza differs from his, insofar as it's just a regular (well, what I consider regular) pizza with a thicker base. I use a completely different dough recipe to his, and different toppings. But, I was inspired by his idea to rise the bread dough in the tin it will be cooked in, rather than in a bowl.


DIFFICULTY
Intermediate


INGREDIMENTS

For the bread dough

6 fluid ounces (170 millilitres) warm water
One ¼ ounce (7 gramme) sachet of dry active yeast
1 tablespoon (15 grammes) caster sugar
½ teaspoon (3 millilitres) salt
1 ounce (30 grammes) light olive oil, or sunflower oil
12 ounces (340 grammes) plain flour: wheat or spelt
½ teaspoon (3 millilitres) baking powder

For the topping

Roughly 5 or 6 tablespoons (2½ or 3 fluid ounces; 75 or 90 millilitres) tomato pasta sauce, with herbs and garlic
Pinch of sugar
Salt and black pepper
Roughly 4 or 5 ounces (115 to 140 grammes) grated mozzarella cheese
Sliced meat of your choice: pepperoni, salami, ham, chicken, sausage, etc.
Thinly sliced vegetables of your choice: pepper, tomato, mushroom, courgette, etc.


HOW-TO
  • Grease a 9 by 7 inch (23 by 18 centimetre) deep baking tin with a tablepoon (15 millilitres) of sunflower or light olive oil. Set aside for later
  • In a large mixing bowl, mix the yeast, sugar, oil, and warm water together. Add in about half of the flour and mix into a sticky paste. Cover, and leave to rise in a warm place for about 30 minutes, or until doubled in size and very spongy in appearance.
  • Once risen, tap the bowl sharply on the counter top to release the air. Sieve in the half of the remaining flour, the baking powder, and salt and mix together with a wooden spoon until combined.
  • Sprinkle some of the remaining flour on the work surface, scrape out the dough in the bowl, and sprinkle some more flour on top. Knead the dough, adding flour only if you need to, until you have a smooth, tacky dough. You may not need all the flour, so don't add it all in at the beginning.
  • Knead the dough for a good 10 minutes until smooth and elastic. Press the dough into the bottom of your oiled tin and allow to rise for 30 to 40 minutes, or until doubled in size once more.
  • Once it has doubled, press the air out with floured hands and spread the tomato sauce on top, leaving a half-inch (1 centimetre) border around the edge of the pizza. Decorate with your toppings.
  • Set the oven to preheat to 190°C (375°F, Gas Mk.5) and allow the pizza to puff slightly while the oven is heating. Once the oven is hot enough, bake the pizza on the centre shelf for 30 to 25 minutes. If the toppings are browning too fast, cover the pizza with a piece of tin foil.
  • When fully cooked, remove from the oven and gently transfer the pizza to a wire rack. This will stop the crust from getting soggy with condensation.
  • Serve hot from the oven with side salad, or chips.

Monday, 8 October 2018

Variation on a Theme: Chili Double Chocolate Cookies

For my first strange and unusual recipe for October, I offer you chili double chocolate cookies!


As I mentioned in my candied chili recipe, this idea was born out of a conversation I had with my brother's girlfriend, Stefi, who is originally from Ecuador. She was eating a gingernut biscuit, and wondered whether a hot and spicy chocolate variety could be achieved.

She said the main characteristic that she liked in gingernuts was how well the different flavours coalesced in a smooth and harmonious way. She wondered if such a harmony of tastes could be achieved in chilli chocolate cookies, where the cocoa and chilli would come together well, and that the spiciness would be consistent throughout the eating experience, instead of hitting you suddenly at the beginning, or growing on you as you chew.

I found the best way to balance instant heat and gradual heat is to use two different kinds of spiciness: cayenne pepper, for the gradual, burning heat; and white pepper for the insta-burn. I also decorated the tops with little tiny pieces of candied chilli pepper, picked from Stefi's own chilli plant (which were exceedingly hot).

DIFFICULTY
Easy!

~ ^_^ ~

INGREDIMENTS

7½ ounces (210 grammes) plain flour: spelt, wheat, or gluten-free
½ ounce (15 grammes) cocoa powder
½ teaspoon bicarbonate of soda
¾ teaspoon ground cayenne pepper
½ teaspoon ground white pepper
Pinch of salt
4 ounces (115 grammes) caster sugar
4 ounces (115 grammes) light brown sugar
4 ounces (115 grammes) butter, very soft
1 medium egg
8 ounces (225 grammes) chocolate chunks or chips: I use a mixture of equal parts dark and milk chocolate chunks
Optional: 1 tablespoon finely chopped candied chilies

~ ^_^ ~

METHOD

  • Preheat the oven to 180°C (350°F, Gas Mk.4) and line one or two flat baking trays with non-stick baking paper.
  • In a mixing bowl, cream butter and sugars until creamy with a wooden spoon. Add in egg and beat vigorously until light and fluffy.
  • Add in chocolate chunks and mix thoroughly. You can add any combination of milk, dark, or even white chocolate chunks or chips. I buy bars of chocolate and cut them up, but if you want the chocolate to keep its shape use shop-bought chocolate chips.
  • Sieve in the flour, cocoa powder, baking soda, salt, and spices and mix, continuing with the wooden spoon, until you have a stiff but tacky dough.
  • Take roughly 1 ounce (30 gramme) portions of the dough and roll into balls. You can weigh the dough balls, or eyeball it. This mixture will make 30 one-ounce (thirty gramme) dough balls.
  • Place dough balls on the tray(s), 2 inches apart from each other and the edge of the tray, and bake for 8 to 9 minutes, turning the trays back to front half-way through baking.
  • Remove from the oven and allow to cool for a minute or so before transferring to a wire rack to cool. These cookies are delicious still warm from the oven, or cooled completely.

Tuesday, 21 August 2018

Red Velvet Cupcakes with "Cream Cheese" Butter Cream

In recent years I have found that the best way to make cream cheese icing is to not use cream cheese at all. Intrigued? Well, read on a to find out how I made these delicious red velvet cakes with "cream cheese" icing!


Here in Ireland, cream cheese can be very inconsistent: some brands are perfectly thick and creamy, but other brands can be watery and thin. Sometimes you can make a cream cheese icing that whips up beautifully, then other times it will turn into a sugary cream cheese sauce.

The issue at play here is the moisture levels in the cream cheese. Sugar absorbs water and goes runny, and the more water there is for the sugar to absorb, the sloppier your mixture becomes. I'd found the best way to avoid this is to make an icing that tastes like cream cheese, without actually using cream cheese.

Creamy cheese is rich and fatty, but it's also slightly tangy from the fermentation process, and salty to preserve its freshness. Understanding this balance between fatty, tangy, and salty is the key to mimicking its flavour.

In my previous foray into non-cream cheese icing, I made a white chocolate and greek yoghurt fudge icing, and it was absolutely fabulous. However, if you don't want to cook up a yoghurt simple syrup, or you don't have any white chocolate, there is a way to make plain old vanilla buttercream taste like cream cheese icing.

To make enough icing for 12 cakes, simply beat together 4 ounces (115 grammes) of unsalted butter with 4 ounces (115 grammes) of condensed milk. Gradually beat in 8 ounces (225 grammes) of sieved icing sugar to make a thick and creamy icing. Add vanilla essence to taste.

And now we get a little bit adventurous: it's time to add small amounts of sea salt and distilled white (or apple cider) vinegar. I think vinegar is the best because it was a fermented sourness that is like cream cheese. However, if you don't want to use vinegar, you can substitute fresh lemon juice.

Add the salt and vinegar, a pinch and a few drops at a time, until you have the right level of "cheesiness". I used just under a quarter teaspoon each of salt and vinegar, but please add slowly and to your taste: you can always add, but you can't take it out!

If you want it to taste like lemon cheesecake icing, you can also add some lemon zest to taste.


To make the cupcakes, I used my newly revised cupcake recipe and substituted a teaspoon of the flour with cocoa powder, and substituted buttermilk for milk. I also added red food colouring.... but I don't think I added enough!

I also added some nice little red and white flowers that I had got in a Halloween cake decoration kit, although sadly one of the red flowers crumbled in the packet and had to start a new life as sprinkles. The kit also had sugar devils and ghosts, which I still haven't found a use for.

I hope you give these delicious cakes a try soon!

Monday, 30 April 2018

Schoko-Nuss Muffins: Double Chocolate and Pecan Muffins (Wheat Free, with Dairy Free Option)

Today is the last day of (Irish) spring, and before the summer recipe collection starts, here is my final springtime offering: chocolate and pecan nut muffins!


Apologies for the poor photo quality: I'm due a phone upgrade, and as my phone ages (for the whole two or so years I've had it) the camera quality has slowly degraded. The levels and contrast are all over the place. Hopefully, with my new odd job doing homework tutoring, I can save up for a new one!

But anyway, back to the recipe.


It's been a while since I did a muffin recipe: the last one was nearly eighteen months ago back in the September of 2016, where I was introducing my companion to the wonderful world of baking. I don't think I've done many muffin recipes at all on this blog, because I'm not a big lover of muffins, truth be told.

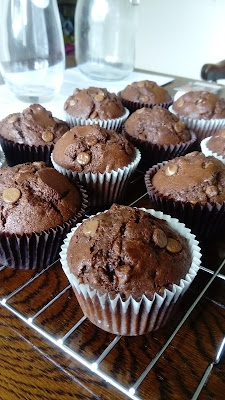
However, I was moved to try a new muffin recipe with inspiration from the Whoopie pie recipe. When I was eating a whoopie pie, I thought they tasted very muffin-like, which made me wonder if the recipe could be adapted. I took the whoopie pie recipe, and simply added an extra medium egg, 4 ounces (115 grammes) of chocolate chips, and 2 ounces (55 grammes) of pecan nuts. I divided the mix among 12 large muffin liners, and baked at the same temperature for 20 to 25 minutes.

They worked really well! Although, next time I think I'll try adding a little extra sugar because they were a little more bready than cakey. They turned out well for an experiment!

THIS TIME IN 2015: TiramisĂą Mini Cheesecakes (Wheat Free)
THIS TIME IN 2013: Dinosaur Kimberleys (Wheat Free)
There were no blogs on or around this day in 2014, 2016, nor 2017.

Sunday, 15 April 2018

First Attempt at Whoopie Pies (Wheat Free with a Dairy Free Option)

 There is now a new and improved post about Whoopie Pies here.

Today, I present to you a recipe several months in the making! Behold my own take on the American classic, Whoopie Pies!


About two or three years ago, I got a new cookery book for my birthday, which is a typical gift for me. This book, simply entitled Whoopie Pies introduced me properly to a confection that I had only heard of by name once or twice. I tried a recipe or two from the book, but wasn't a hundred percent happy with how they turned out and, as such, the book is still gathering dust on my bookshelf. 

Then a few months ago I was watching a programme on Food Network, and I saw the cook make some chocolate whoopie pies. It had been quite some time since I had last tried them and I thought Heck, why not give them another go? Seeing as the cook described them as a "mixture between a cupcake and a sandwich cookie", that's the kind of approach I took: I tried merging my basic sponge cake recipe and my chocolate chip cookie recipe together, but the results were disappointingly flat and crispy.


The real breakthrough came when I merged my basic sponge recipe with a basic scone recipe, and replacing the butter with oil: it made a very fluid mixture that puffed up nicely, but didn't spread out too much during baking. The result is a cake that has all the fluffiness and sweetness of a sponge cake, but the sturdiness of a biscuit. However, I'll probably work on this recipe in the future, because I generally am not a fan of the fact that this only uses brown sugar: I don't want my plain vanilla whoopie pies to be brown!

These lovely little sandwiches go slightly sticky on the crust the longer they stay in storage, which is ideal: I have it on good, American authority that a whoopie pie should somewhat stick to your fingers. 


~~ ^ _ ^ ~~

DIFFICULTY
Requires mixing and spooning out runny batter

TIME
About 2 hours

RECIPE RATING
Easy!

~~ ^ _ ^ ~~

INGREDIMENTS

For 12 to 14 sandwiches (24 to 28 total cakes)

8 ounces (225 grammes, 1.8 US cups) plain white spelt flour
2 teaspoons (10 millilitres) baking powder
¼ teaspoon (1 millilitre) salt
6 ounces (170 grammes, 1 US cup) brown sugar
4 fluid ounces (115 millilitres, ½ US cup) sunflower oil
1 medium (US large) egg
6 fluid ounces (170 millilitres, ¾ US cup) buttermilk, or plain soya yoghurt
1 teaspoon (5 millilitres) vanilla essence
About 1 pound (455 grammes) icing filling of your choice: butter cream, ganache, marshmallow fluff, etc.


METHOD

  • Preheat the oven to 170°C (340°F, Gas Mk.3), and grease and flour two flat baking trays.
  • In a large mixing bowl, sieve together the flour, baking powder, salt, and sugar. Make a well in the centre.
  • In a jug, beat together the buttermilk, egg, oil, and vanilla essence until smooth. Pour into the well in the dry ingredients then, using a balloon whisk or electric mixer, mix together until there are no streaks of flour and the mixture is smooth and consistent.
  • Drop teaspoonfuls of the mixture on the baking trays, about an inch (2 centimetres) apart, using the tip of the spoon to smooth the dollops into rounds. Tap the trays sharply on the work surface to flatten out the pies. I got about 6 on each tray.
  • Bake in the centre of the preheated oven for 10 to 12 minutes. Remove from the oven when the pies spring back when touched lightly with a finger.
  • Allow to cool for about 5 minutes before transferring from the trays to wire cooling racks to cool completely. Repeat with the remaining mixture.
  • Pair the cakes together according to size, then sandwich together with about two tablespoons of filling. Set in the fridge for about half an hour before serving.


NOTES

  • For chocolate whoopie pies: Replace an eighth of the flour with cocoa powder, and sieve in with the other dry ingredients.
  • For red velvet whoopie pies: Replace a tablespoon (30 millilitres) of the flour with cocoa powder and sieve with the dry ingredients, and add red food colouring to the wet ingredients to get the shade you want.
  • For pumpkin spice whoopie pies: Add in 1 or 2 tablespoons (15 or 30 millilitres) to taste of your favourite pumpkin spice or mixed spice blend, and sieve in with the other dry ingredients.
  • For coffee whoopie pies: Add 2 teaspoons (10 millilitres) of instant espresso powder, and sieve in with the other dry ingredients

THIS TIME IN 2016: Buttermilk Scones (Wheat Free)
There was no blog on this day in 2014.

Monday, 6 November 2017

Recipe Revision: Maple Pecan Pie (Options to make a Wheat- and Dairy Free Version)


November is a bit of a non-month here in Ireland, traditionally: you know how January is a bit of a non-month at the start of the year? Well, November is the traditional Celtic January. In England, there's bonfire night on the 5th; in America, there's Thanksgiving on the fourth Thursday; but here, it's just the waiting period between Hallowe'en and Christmas, with no real identity of its own.

As such, it's kind of difficult to come up with any nice and interesting baking projects. The only event  I feel is worth baking for in November is my Dad's birthday, on the 16th, which is obviously specific to my family with no widespread relevance, like any other family birthday. So only things you can really do is to capitalise on Thanksgiving, which is not a native festival here, but it is gaining popularity, particularly the Black Friday sales.

Which is exactly what I've done here: I've taken a traditionally American and Canadian treat and done a local version using ingredients commonly available in Ireland. There's no corn syrup here: in this recipe, I use golden syrup, and maple flavoured golden syrup. In my previous maple pecan pie attempt a few years ago, I tried using actual maple syrup, but I personally prefer the taste of maple flavoured golden syrup: it has a stronger, albeit slightly synthetic, smoky flavour.

This recipe uses the exact same ingredient ratios as the chocolate fudge tart I made in May, but the chocolate has simply been replaced with syrup: it makes for a sticky sweet treat, with just enough egg to set the middle into a gloriously sticky custard filling, chock full of roasty toasty pecan nuts. It's a truly decadent treat, to be enjoyed in small doses with ice- or whipped cream.

~~ ^ _ ^ ~~

DIFFICULTY
Requires mixing (and pastry making skills if you're making your own pastry case)

TIME
About 2 hours

RECIPE RATING
Easy!

~~ ^ _ ^ ~~

INGREDIMENTS

Makes one 8 inch (20 centimetre) deep dish pie, weighing roughly 2¼ pounds (1 kilogram)

One 8" (20 centimetre) deep pie crust
3 ounces (85 grammes) golden syrup
3 ounces (85 grammes) maple syrup, or maple flavoured golden syrup
4 ounces (115 grammes) unsalted butter, or margarine
1 tablespoon (15 millilitres) lemon or orange juice
6 ounces (170 grammes) soft light brown sugar
2 teaspoons (10 millilitres) vanilla essence
2 medium (US Large) eggs, beaten
6 to 8 ounces (170 to 225 grammes) pecan nuts, toasted
Optional: 1 shot (35 millilitres) spiced rum

~~ ^ _ ^ ~~

FREE FROM
Nuts, wheat (if you make your own pastry), yeast

CONTAINS
Gluten, dairy (italics show alternatives), eggs, refined sugar,

~~ ^ _ ^ ~~

METHOD


  • If you're making your own pie crust, blind bake it and allow it to cool. Preheat the oven to 180°C (350°F, Gas Mk.4)
  • In a small saucepan, heat together the syrups, butter, and lemon juice only until the butter is melted, stirring occasionally. 
  • Remove from the heat and mix in the sugar and vanilla essence, and rum if using. Allow to cool slightly before adding the eggs.
  • Using a balloon whisk, vigorously beat in the eggs until the mixture is smooth.
  • Scatter three-quarters of the nuts on the base of the pie crust. Pour in the filling, then add enough nuts to nearly fill the pie crust completely; this pie doesn't rise much, if at all. Make sure to poke down the nuts so they are all covered in syrup.
  • Bake on the centre shelf of the preheated oven for 45 minutes to an hour, until the centre is puffed up and no longer liquidy; a little jiggly is okay. If the pastry is browning too quickly, over with a large piece of tin foil.
  • Once cooked, remove from the oven and cool completely in the pie dish on a wire rack. If you want to remove the pie from the tin to serve, chill overnight before unmoulding.


STORAGE
As with all things made with pastry, this is best enjoyed within 3 days of eating, kept in an airtight container at room temperature. However, it can keep in an airtight container for up to a week in the fridge.

Friday, 29 September 2017

Strawberry Malt Shake Cupcakes


Here in Ireland, there are a few American style diners, the biggest chain used to be Eddie Rocket's before there was a big fallout and the franchises fell to pieces. Now, the only Eddie Rocket's restaurants are near to Dublin, our capital.

There used to be an Eddie Rocket's in Limerick (which is Ireland's third largest city) and they used to make absolutely sinfully delicious malted milkshakes. But now the new franchise has taken over, it's just not the same.

I decided to capture my delight in these malty pink delights my making a super fluffsome fairy cake topped off with swirls of super pink strawberry flavoured Ermine icing. You can use any kind of icing recipe you like, as long as you follow the instructions below to make it strawberry malt flavoued.

~~ ^ _ ^ ~~

DIFFICULTY
Requires the ability to make icing

TIME
About an hour

RECIPE RATING
Easy!

~~ ^ _ ^ ~~

INGREDIMENTS

12 vanilla cupcakes, in pink paper cases
1 pounds (455 grammes) cupcake icing of your choice, prepared as below
Strawberry milkshake powder, for icing
Barley malt extract, for icing
Pink decorations
6 pink paper straws

~~ ^ _ ^ ~~

METHOD

Make a good cupcake icing of your choice, such as traditional buttercream or Swiss meringue buttercream, but replace a quarter of the sugar with strawberry milkshake powder. Add some barley malt extract to the icing a teaspoon at a time to your taste, and beat very well. Adjust the consistency of the icing with milk or cream.

Fit a piping bag with a closed-star nozzle, and pipe swirls or roses on top of your 12 cakes. A pound (455 grammes) of icing is enough to generously ice 12 cakes, but if you're in doubt you can make another half a pound (225 grammes). Decorate with pink sprinkles or dragées, and then cut the paper straws into halves or thirds to decorate the cakes.

STORAGE
These will keep an airtight container in the fridge for up to a week, or at room temperature for 3 to 5 days.

Tuesday, 11 July 2017

Kitchen Experiment: Chewy Fudge Brownies Revision

UPDATE 20/11/17 I did further experimentations with this style of brownie, and found a better way of doing it. I thought instead of doing a whole new write up, I'd just update this one.

As I promised a few weeks ago on my blog, here is my recipe for proper, fudgy brownies!


When I first started my blog four years ago, I wrote a brownie recipe. I have been using at same recipe for years, but nowadays I find my taste in brownies has moved from cakey to fudgey: I like them to be squishy, but not super heavy. So, I thought I'd try and amend my already existing recipe into something a little fudgier, but still light enough to eat in great abundance.

This is essentially the exact same recipe as my previous one, but the ingredients are in slightly different proportion to each other: notably the butter and flour are lessened in favour of adding in more chocolate. I found the exact formula while I was making a base for a tray of cheesecake brownies.

This brownie recipe is another variation on my recent trials with replacing flour in cake recipes, like I did in my pecan pie and chocolate pie recipes. In this case, by replacing a half to two-thirds of the flour in a classic sponge cake with dark chocolate, and omitting the liquid, you get a deliciously dense brownie.

These brownies would go perfectly in a brownies sundae, like this one here.

INGREDIMENTS
Makes 12 brownies
  • 2 medium (US Large) eggs
  • 4 ounces (115 grammes) unsalted butter, or baking margarine
  • 4 ounces (115 grammes) plain or dark chocolate, 55%-70% cocoa, or dairy-free chocolate
  • 3 ounces (85 grammes) soft light brown sugar
  • 3 ounces (85 grammes) caster sugar
  • 2 ounces (55 grammes) plain spelt flour
  • 2 teaspoons (10 millilitres) vanilla essence
  • Up to 2 tablespoons (up to 30 millilitres) cocoa powder, to taste

METHOD

  • Preheat your oven to 170°C (325°F, Gas Mk.3), and grease a 9 inch (22 centimetre) square baking tin. Line the bottom with a square of non-stick baking paper, and then dust the sides with flour.
  • In a microwave safe bowl, or heatproof bowl set over simmering water, melt the butter and chocolate together. Allow to cool slightly.
  • In a mixing bowl, beat together the eggs and sugars with an electric mixer until pale and thickened in consistency. This should take 4 full minutes.
  • Beat in the vanilla, and then slowly add the melted chocolate in a stream, beating all the time with the electric mixer, until all the chocolate is incorporated.
  • Sieve in the flour, then fold through gently with a metal spoon or silicone spatula. Pour the mixture into the tin, and smooth out the top as much as you can.
  • Bake for 20 minutes on the centre shelf, or until the top is dry and a cocktail stick comes out clean when poked into the middle of the cake. Allow to cool completely in the tin on a wire rack.
  • Cut into 12 squares and eat at room temperature, or warmed up with ice-cream. Store in an airtight container for up to a week.

Wednesday, 14 June 2017

Southern States Caramel Cake

Howdy, y'all! I present to you a Southern States style caramel cake.


 I've been wanting to do another American style cake for a while, and ever since I saw a post about caramel cake on Pinterest, I knew it would be that one. I know I do a lot of American style things, but I find the cakes and sweets so fascinating because we have nothing like them here.

My father recently went on a business trip to New York, which was his first time in the United States. He works for a multinational company that designs LED signs, and one of the signage systems in the subway system had gone a bit haywire. As such, he was flown from Ireland to New York to investigate the problem for a couple of days; luckily for his wanderlust, the problem took all of three minutes to fix. He showed us all the photos of his trip when he returned, and it looked to us like he had a whale of a time.

(I think it speaks volumes of the company's faith in my father's programming ability that they wanted him flown over from here! Well done, Daddeee!)


As such, hearing about my father's transatlantic adventures reignited my interest in American baking. So I decided to have a shot at the caramel cake.

From my research, there are many, many, many ways to make caramel cake, each purporting to be the authentic way. So, I turned to retro recipe hunting: how was this cake made by all American grandmas? The cake itself has to be a good firm cake, a lot of the recipes for which advise using sour cream to make the crumb dense. And, although many recipes use icing sugar, the way to make the icing is a traditional boiled sugar beaten fudge.


Now, boiling sugar is one of those things that sends bakers running in the opposite direction: there are so many things that can go wrong. However, please don't feel overwhelmed as this one is quite easy! I just tweaked one of my fudge recipes in response to my research to make the mixture more like an icing. If you've made fudge before, you can make this icing.

I have made a baby little 4 inch (10 centimetre) cake just to try the recipe out, and I've scaled up the icing recipe for a full 8 inch (20 centimetre) cake. If you want to make a mini cake like I did, just half the quantity and cooking time, making sure to test for what sugar stage you're at.

INGREDIMENTS
For one 8 inch two-layer round cake
  • One deep 8 inch (20 centimetre) round cake, vanilla flavour
  • 1¼ pounds (570 grammes) caster sugar
  • 8 fluid ounces (225 millilitres) whipping cream, slightly warmed
  • 8 ounces (225 grammes) unsalted butter
  • ¼ to ½ teaspoon (1 to 3 millilitres) fine salt
  • 1 tablespoon (15 millilitres) vanilla essence

HOW TO
  • Prepare your cake for layering by cutting off the dome and cutting it in half horizontally, keeping the layers equal.
  • In a large saucepan with a metal or enamel interior (don't use a dark coated pan), add two ounces (55 grammes) of the caster sugar and cook over medium heat, stirring constantly, until it turns a deep, deep brown. Don't be afraid of burning it: if it does burn, just start again with another 2 ounces of sugar.
  • Once the sugar has browned, add in the warm cream, the rest of the sugar, and half of the butter. Stir well until everything has dissolved nicely and is a golden brown syrup. Bring to a simmer.
  • When it begins to simmer, turn the heat to medium-low and simmer gently for up to 30 minutes, until it reaches soft-ball stage (112°C to 115°C (235° F to 240° F)). On reaching this temperature, remove from the heat immediately and allow to cool for 10 to 15 minutes, or until the bubbling has completely stopped.
  • Cut the remaining butter into small cubes, and then beat the syrup with an electric hand mixer on medium speed for about 2 minutes.
  • As the syrup begins to thicken and lose its gloss, taking on a matte appearance, start adding the butter, a cube at a time while beating, making sure to beat in each cube fully before adding the next. The whole process should take about 5 to 6 minutes.
  • Eventually, you will get a deliciously thick, caramel icing. If the icing begins to split, leaving oily patches or film, add in half a teaspoon of cold water and beat until it comes together again.
  • Fill and ice the cake with the icing quickly. If the icing begins to seize as you're using it, once again add a little water and beat to get a nice icing once more.
  • After icing the cake, allow to set for at least 2 full hours before serving. This cake is best served the day after preparation.

THIS TIME IN 2015: Sausage Rolls (Wheat Free)
No blogs on this day in 2016, 2014, nor 2013

It's been a while! Happy 9th Anniversary!

  It's been a while. The past two years have been a helluva a ride. This year is gonna hold some big changes for this blog. I'm comp...