Showing posts with label Halloween. Show all posts

Friday, 18 October 2019

"Marvellous Creations" Muddie Buddies [BACK-DATED]

Looking for a delicious snack for your party entertaining! Try this American style treat with an English twist: "Marvellous Creations" Muddie Buddies!


Muddie Buddies, also known as Puppy Chow, is a Mid-Western American treat which involves coating Chex cereal in melted chocolate (and often peanut butter) and dusting the whole thing in icing sugar. Sometimes, other sweets are mixed in to make a themed puppy chow, like M&Ms or Andes Mints. The origin of this sweet treat isn't known for sure, but Chex cereal was invented in the late 1930s so it's a fairly recent creation.

Now, I know this treat is served normally at Christmas, but I think it'd be good for any large gathering, including birthdays or Halloween!

As for the "Marvellous Creations", you ask? That's where England comes into it! Cadbury has a Dairy Milk chocolate bar that has popping candy, cherry jelly beans, and coloured crispy shelled chocolates. I thought combining these two things together would make for a delicious mix and it did!


We can't get Chex in Ireland, so I used chocolate frosted Shreddies (Aldi's knock off finest!). I mixed 4 ounces (115 grammes) of these Shreddies and tossed them in 8 ounces (225 grammes) melted plain chocolate and about a tablespoon (15 millilitres) of popping candy. I mixed together 1 ounces (30 grammes) each of icing sugar and cocoa powder, and tossed the cereal until each individual piece was coated. I allowed it to set for about an hour.

I mixed small portions of the snack mix with crispy M&Ms, a variety of pink jelly beans, and sprinkled extra popping candy on top. It was lovely!

I feel that if this were tossed in icing sugar alone it would be too sweet, but if that's what you're used to knock yourself out!

Thursday, 18 October 2018

American Style: Deep Pan Pizza (Egg Free with Wheat Free Option)

Looking for a hearty, comforting dinner? Why not try this recipe for deep pan pizza! (It comes with my fiancé's approval, as seen below)


Autumn and Winter are full of party occasions and opportunities: in my family, even without the traditional holiday events, there are three birthdays in October and November. This time of year is a real season of festive eating!

When we were kids, we had normal kids' party food at all these kinds of occasions: sausage rolls, cocktail sausages, chips, and either hamburgers, or pizza. In the 1990s, supermarkets where I lived began to stock cook-from-frozen pizzas, and normally they had big, fluffy bread bases. I didn't see a thin and crispy based pizza until I was in my mid-late teens.


The most commonly eaten brand was Goodfellas, but there were many others, including supermarket own branded pizzas. I have very fond associations with thick based pizzas, even though when I eat shop bought ones now my adult taste buds aren't able to taste what was so amazing to my childhood taste buds....

I've been meaning to try a deep pan pizza for a very long time: I popped it on my list of projects to try about this time last year, I just never had the opportunity to try it. I was reminded to try it when I was watching Chef John's Detroit style pizza video on Youtube earlier last week.


My pizza differs from his, insofar as it's just a regular (well, what I consider regular) pizza with a thicker base. I use a completely different dough recipe to his, and different toppings. But, I was inspired by his idea to rise the bread dough in the tin it will be cooked in, rather than in a bowl.


DIFFICULTY
Intermediate


INGREDIMENTS

For the bread dough

6 fluid ounces (170 millilitres) warm water
One ¼ ounce (7 gramme) sachet of dry active yeast
1 tablespoon (15 grammes) caster sugar
½ teaspoon (3 millilitres) salt
1 ounce (30 grammes) light olive oil, or sunflower oil
12 ounces (340 grammes) plain flour: wheat or spelt
½ teaspoon (3 millilitres) baking powder

For the topping

Roughly 5 or 6 tablespoons (2½ or 3 fluid ounces; 75 or 90 millilitres) tomato pasta sauce, with herbs and garlic
Pinch of sugar
Salt and black pepper
Roughly 4 or 5 ounces (115 to 140 grammes) grated mozzarella cheese
Sliced meat of your choice: pepperoni, salami, ham, chicken, sausage, etc.
Thinly sliced vegetables of your choice: pepper, tomato, mushroom, courgette, etc.


HOW-TO
  • Grease a 9 by 7 inch (23 by 18 centimetre) deep baking tin with a tablepoon (15 millilitres) of sunflower or light olive oil. Set aside for later
  • In a large mixing bowl, mix the yeast, sugar, oil, and warm water together. Add in about half of the flour and mix into a sticky paste. Cover, and leave to rise in a warm place for about 30 minutes, or until doubled in size and very spongy in appearance.
  • Once risen, tap the bowl sharply on the counter top to release the air. Sieve in the half of the remaining flour, the baking powder, and salt and mix together with a wooden spoon until combined.
  • Sprinkle some of the remaining flour on the work surface, scrape out the dough in the bowl, and sprinkle some more flour on top. Knead the dough, adding flour only if you need to, until you have a smooth, tacky dough. You may not need all the flour, so don't add it all in at the beginning.
  • Knead the dough for a good 10 minutes until smooth and elastic. Press the dough into the bottom of your oiled tin and allow to rise for 30 to 40 minutes, or until doubled in size once more.
  • Once it has doubled, press the air out with floured hands and spread the tomato sauce on top, leaving a half-inch (1 centimetre) border around the edge of the pizza. Decorate with your toppings.
  • Set the oven to preheat to 190°C (375°F, Gas Mk.5) and allow the pizza to puff slightly while the oven is heating. Once the oven is hot enough, bake the pizza on the centre shelf for 30 to 25 minutes. If the toppings are browning too fast, cover the pizza with a piece of tin foil.
  • When fully cooked, remove from the oven and gently transfer the pizza to a wire rack. This will stop the crust from getting soggy with condensation.
  • Serve hot from the oven with side salad, or chips.

Saturday, 28 October 2017

Multicoloured Sweet Popcorn (Gluten-, Egg-, and Dairy Free) with Video!


If there's something that kid's particularly love, it's sweet things. And if there's something they love more than that, it's brightly coloured sweet things! Although, sometimes adults like it too.. especially this adult.

This is a simple way to make frosted popcorn of any colour you have available, that doesn't require a sugar thermometer: all you need is a microwave and an oven, and you'll have multicoloured popcorn in under 15 minutes.

If you want to add flavourings, you can add any flavouring oil or essence to the sugar syrup before tossing the popcorn. My companion likes popcorn that is sweet and salty, so I usually add a good few pinches of salt for that sweet/savoury experience.


~~ ^ _ ^ ~~

DIFFICULTY
Requires mixing and using a microwave

TIME
Under an hour

RECIPE RATING
Easy!

~~ ^ _ ^ ~~

INGREDIMENTS

Makes enough popcorn for 6 people

3 ounces (85 grammes) popped popcorn kernels
3 ounces (85 grammes) caster sugar
3 tablespoons (45 millilitres) water
Liquid food colouring

~~ ^ _ ^ ~~

FREE FROM
Eggs, nuts, dairy, gluten, yeast

CONTAINS
Maize, refined sugar

~~ ^ _ ^ ~~

STORAGE
Best eaten on the day it's made, but can be eaten the net day if kept in a airtight plastic bag or container.

Thursday, 19 October 2017

Coco-Lime Cream Soda (Naturally Free From)


You can't have a party without something to drink, and when party food is usually sugary and fatty, you want something nice and refreshing. Enter in this Thai inspired soft drink: the Coco-Lime Soda! A zingy lime syrup, mixed with rich yet light coconut milk, and topped off with sparkling water. The coconut milk and sparkling water create a wonderfully spooky frothy head...

This would appeal more to adults than children, especially if you decided to take this Thai delight to the West Indies and add in some white rum!

~~ ^ _ ^ ~~

DIFFICULTY
Requires mixing and using a microwave

TIME
Under an hour

RECIPE RATING
Easy!

~~ ^ _ ^ ~~

INGREDIMENTS

Makes roughly half a pint (285 millilitres) of lime syrup

6 fluid ounces (170 grammes) fresh lime juice, roughly 6 or 8 limes
Rind of 2 limes, peeled into strips with a vegetable peeler
6 ounces (170 grammes) caster sugar
1 teaspoon vanilla essence
Green food colouring
Pinch of salt

To serve
Light coconut milk, in a can (about 20-25% coconut), or full fat coconut milk if you're feeling decadent
Sparkling water
Green sugar
Optional: white or spiced rum

~~ ^ _ ^ ~~

FREE FROM
Dairy, nuts, gluten, eggs, yeast

CONTAINS
Refined sugar

~~ ^ _ ^ ~~

METHOD

  • In a microwave safe jug, place the lime juice, zest, sugar, and salt. Microwave for about 20 minutes, stirring half-way through. Allow to cool completely.
  • Strain the syrup into a bottle; discard the zest. Chill completely before assembling the drinks.
To serve
  • To mix a drink, wet the rim of a highball glass and dip in green sugar. Add 1 part lime syrup, 2 parts chilled coconut milk, and 3 parts sparkling water. If you pour the water from a height, you will get plenty of foam.
  • Serve with a straw. If you like, you can put ice in the glasses first.
  • Alternatively, you can make the drink in a punch bowl, rather than mixing individual drinks.
  • To make an alcoholic drink, mix 1 part lime syrup, 2 parts coconut milk, 2 parts rum, and 2 parts sparkling water.

Tuesday, 17 October 2017

Báirín Breac, a.k.a. Barm Brack: Traditional Irish Fruit Bread


Hallowe'en as a holiday originates in Ireland: Oíche Shamhna was the original Gaelic new year's eve, where the division between the living world and the spirit world would open for one night only to permit the dead to pass over. Sometimes, though, pesky spirits would accidentally (on purpose) take people who were still alive into the spirit world, where they'd get stuck forever. To prevent this from happening, the living people were advised to disguise themselves as ghouls, goblins and sprites to fool the spirits into thinking they were some of their own, and prevent their apprehension.

Once the Irish migrated en-masse to the United States, Hallowe'en became part of the American consciousness, and was popularised worldwide through American television. How the Irish celebrated Hallowe'en was always a little bit more ghoulish and pagan when I was a kid, and not as holiday-fied as the American Hallowe'en, but over my lifetime it has lost popularity and has become completely overshadowed by Christmas. Seriously, we have Christmas stuff in the shops from September.

So, in the spirit of sharing our traditions, I will share with you a recipe for barmbrack, or báirín breac in Irish, which is a fruited bread often eaten at this time of year. Hidden inside the loaf are a few trinkets that have symbolic meaning: a ring for marriage, a coin for wealth, a stick for poverty, a pea for spinsterhood, and a relic for a religious life. Nowadays, it's usually only a coin or ring. And yes, even the ones in the shop have the trinkets hidden inside; I understand in America it's illegal to sell food that contains foreign object, but not here!

I tried making this the traditional way, with a home-cultured yeast and tea-soaked fruit, but it was really really difficult: making your own bread starter is a tricky business, and I personally find it too sour, and using soaked fruit made a complete and utter mess. Instead, I've somewhat adapted the traditional bread recipe to make it a tad easier.

~~ ^ _ ^ ~~

DIFFICULTY
Requires bread making

TIME
About 5 hours

RECIPE RATING
Experienced

~~ ^ _ ^ ~~

INGREDIMENTS

Makes one large loaf, weighing roughly 1½ pounds (680 grammes)

6 fluid ounces (170 millilitres) strong black tea, hot
10 ounces (280 grammes) raisins or currants, or a mixture of both
2 teaspoons (10 grammes) brown sugar
12 ounces (340 grammes) white spelt flour, plus up to 2 ounces (55 grammes) extra for dusting
1½ teaspoons (7 grammes) salt
1 quarter-ounce (7 gramme) packet of dry active yeast
1 ounce (30 grammes) caster sugar
1 medium (US Large) egg, or you can use more tea
1½ ounces (40 grammes) unsalted butter, soft, or margarine
Demerara sugar, for sprinkling
Eggwash

~~ ^ _ ^ ~~

FREE FROM
Nuts, wheat

CONTAINS
Spelt, dairy (italics show alternatives), eggs (italics show alternatives), refined sugar, yeast

~~ ^ _ ^ ~~

METHOD


  • In a large jug, mix the fruit with the hot tea and brown sugar. Heat in the microwave on full power for 1 minute, stirring half way. Allow the fruit to cool to hand-hot, which will take about 20 minutes
  • Strain all the liquid out of the fruit, pressing as much liquid as you can out of the fruit. Set the fruit aside for later, and make sure the tea is still hand-hot: it should feel like nice bathwater. If it's too cold, heat gently in the microwave until it's hot enough again.
  • In a large mixing bowl, sieve in 8 ounces (225 grammes) of the flour, and add in the yeast, the sugar, and salt. Mix in the egg, and only enough of the strained tea to make what looks like a thick pancake mixture. Cover loosely with a tea towel or cling film, and allow to rise for about 20 minutes to half an hour. This will help the strengthening of the gluten.
  • Once the dough has risen, add in the remaining 4 ounces (115 grammes) of flour and mix to a very soft dough; it will be a little bit tacky. Sprinkle some of the premeasured flour onto the work surface and knead until smooth.
  • Add the butter and fruit into the dough, and knead again until the dough is very smooth and supple, and passes the window-pane test. The whole kneading process from adding the flour to finished dough might take up to 20 minutes and will be incredibly messy, so prepare yourself and don't be afraid to flour the surface often (making sure not to add more than 2 ounces (55 grammes). If you have a standing mixer with a dough hook, it'll be ready in half the time.
  • Roll into the dough into a ball, return to the bowl, and allow to rise for about an hour to two hours, or until just over doubled in size.
  • Grease and flour an 8 inch (20 centimetre) deep, round cake tin. You could also use two 8 inch (20 centimetre) sandwich tins to make shallower loaves.
  • Once doubled, press the air out of the dough and shape again to a ball, making sure the surface is very smooth and tight. Put into the prepared tin and flatten out until the surface is level. Cover again and allow to rise once more until doubled in size, about 45 minutes. In the last few minutes of rising, preheat the oven to 180°C (350°F, Gas Mk.4).
  • Brush the surface of the loaf with eggwash and sprinkle with Demerara sugar. Bake the loaf on the centre shelf of the oven for 30 to 45 minutes: the top will be a beautiful golden brown, and to test the doneness take the loaf out of the tin and knock the bottom, and if it sounds hollow it's done.
  • If the top is browning too quickly, cover with a tin foil hat. Ovens turn loaves of bread into conspiracy theorists sometimes.
  • When cooked, carefully remove from the tin and cool on a wire rack. If you want to enjoy it freshly baked, allow it to cool enough to handle before cutting, but it's best cut at room temperature.

STORAGE
These keep for up to 3 or 4 days in an airtight container at room temperature. Do not store in the fridge!

Saturday, 14 October 2017

Gingerbread Skeletons (Egg Free) with Video!


About two or so years ago, a friend of mine came to visit me around Halloween time, and she brought to me a small gingerbread man with a skeleton iced onto it; it was branded as a "Jack the Skeleton" biscuit, which made me chuckle. Ever since then, I've been curious about making some myself, but have had difficulty finding a gingerbread recipe that mimicked the soft, chewiness of the Jack the Skeleton biscuit.


This recipe, unlike the usual recipe I use, has a high ratio of sugar and syrup to flour, which renders the need to use egg as a binder redundant. Also, if you replace the butter with some good ol' margarine this recipe can be completely vegan! The icing is a very simple mix of butter, icing sugar, and water, so this doesn't use the traditional royal icing decoration. 
~~ ^ _ ^ ~~

DIFFICULTY
Requires mixing, rolling out, and cutting shapes

TIME
About 3 hours

RECIPE RATING
Easy!

~~ ^ _ ^ ~~

INGREDIMENTS

Makes six 3 inch gingerbread men

4 ounces (115 grammes) white spelt flour
¼ teaspoon baking soda
2 teaspoons ginger
1 teaspoon mixed spice
One pinch to a ¼ teaspoon ground cloves, to taste
2 ounce (55 grammes) unsalted butter, or margarine
2 ounces (55 grammes) golden syrup
2ounces (55 grammes) dark brown sugar
1 teaspoon vanilla essence

To decorate

2 teaspoons (10 millilitres) melted unsalted butter, or margarine
2 ounces (55 grammes) icing sugar, sieved
Water, to mix

~~ ^ _ ^ ~~

FREE FROM
Eggs, nuts, wheat

CONTAINS
Spelt, dairy (italics show alternatives), refined sugar

~~ ^ _ ^ ~~

METHOD


First, make the biscuits
  • In a jug or bowl, heat the butter, syrup, and sugar in the microwave at 50% power for a minute at a time until the butter has melted and the syrup is runny. Mix well.
  • Sieve the flour, salt, spices, and baking soda into a mixing bowl, make a well in the centre, and pour in the melted butter and syrup mixture. Mix with a spatula or spoon until you have a very soft dough.
  • Pour the dough out onto a piece of cling film, and wrap it up. Pop it into the fridge for an hour, or until firm.
  • Preheat the oven to 180°C (350°F, Gas Mk.4), and line one or two flat baking trays with non-stick paper.
  • Roll the dough out on a floured surface to a quarter inch (5 millimetres) thick, and cut into gingerbread man shapes. Re-roll the scraps, trying not to mix in too much of the flour dusting.
  • Lie the gingerbread men out on the tray(s), and chill for about 10 minutes before baking on the centre shelf of the oven for only 6 to 7 minutes for soft chewy biscuits, or up to 9 minutes for crispy biscuits.
  • After the biscuits are baked, remove the tray(s) from the oven and cool the biscuits on the tray for about 10 minutes before moving to a wire rack to cool completely.
To decorate
  • Mix the icing sugar and melted butter together in a small bowl, adding only enough water to make a thickly flowing icing.
  • Make a small baking paper piping cone, and fill halfway with icing. Snip off the end, and pipe on the skeleton bodies.
  • Allow to set for about 30 minutes before serving.

STORAGE
These keep for up to 2 weeks in an airtight container at room temperature.

Wednesday, 11 October 2017

Spooky Mummy Sausage Rolls (Wheat Free)


Sometimes I like to take a little break from sweet things, and like to dabble in the world of savoury treats! Now, a lot of people will be looking at this photograph and think Oh God, this needs puff pastry, which is super fiddly, but fear not: this uses rough puff pastry, which is a much simpler version of the recipe. This way you get the best of both worlds: the delicious flakiness of puff pastry, but the simplicity of shortcrust pastry.

I used ketchup to make the eyes, but you could also use brown sauce, or mayonnaise. Or, you could even use something like sesame seeds.

These little guys will be starring in my upcoming video, Sweetie Pie Throws a Party!, airing next week....

~~ ^ _ ^ ~~

DIFFICULTY
Requires mixing, rolling out, and cutting shapes

TIME
About 3 hours

RECIPE RATING
Intermediate

~~ ^ _ ^ ~~

INGREDIMENTS

Makes 8 or 10 sausage rolls

8 ounces (225 grammes) white spelt flour, cold
Salt and pepper
3 ounces (85 grammes) butter, very cold, cut into cubes
3 ounces (85 grammes) white vegetable fat, cold, cut into cubes
4 fluid ounces (115 millilitres) cold water
8 ounces (225 grammes) sausage meat, for a vegetarian option use prepared sage and onion stuffing
Eggwash, which is egg beaten with a little water
Ketchup, to decorate

~~ ^ _ ^ ~~

FREE FROM
Nuts, wheat, refined sugar

CONTAINS
Spelt, dairy, eggs, meat

~~ ^ _ ^ ~~

METHOD


  • In a mixing bowl, season the flour with a little salt and pepper. Add in the butter and fat, and break up with your fingers until you have a very coarse mixture with big chunks of butter and fat: they could be about the size of peas.
  • Using a knife, add in the water a bit at a time and mix through gently. You might not need all the water, so only add about a tablespoon at a time. The mixture will be very rough and shaggy, with dry and wet parts and big chunks of fat. This is necessary.
  • Turn out onto a floured work surface, and begin the turning and folding process: roll the mixture out to about half an inch (1 centimetre) thick, then fold up into third like a letter, then turn through 90 degress. Repeat this process once more, then wrap up and pop in the freezer for 10 minutes. This will be quite difficult at first because the mixture is a mess, but don't stop believing!
  • Remove from the freezer, and do two more folds and turns. Wrap up again, and either pop back in the freezer for another 10 minutes if you want to do another two folds and turns; or, pop into the fridge for about 45 minutes if you want to use it to make the sausage rolls.
  • Roll the pastry out to about a quarter inch (4 or 5 millimetres) thick and cut into 8 (or 10) squares. Visualise each square divided into thirds, and fill the middle third with an eighth (or tenth) of your desired filling, meat or stuffing mix.
  • Follow the instructions below to braid the squares, but leave a little gap to show the faces. Place the squares on an ungreased baking sheet and chill for 20 minutes in the fridge.


  • Preheat the oven to 200°C (400°F, Gas Mk.6), brush each roll with a little egg wash, sprinkle with coarse salt and black pepper if you like, and then bake the sausage rolls for 20 minutes.
  • Once baked, allow to cool on the tray for about 5 minutes to make them easier to remove. Serve hot or cold, using ketchup to make glowing eyes.

STORAGE
Store in an airtight container in the fridge for up to 3 days only.

Friday, 7 October 2016

Halloween 2016: Toffee Apple Doughnuts (Wheat Free)

It's October! Or as I like to call it: Halloween advent. And here's a sticky treat: toffee apple doughnuts!


Since I discovered my inner darkness in my teen years, and also as a result of Mum and Dad making it into a fun event in the year, I've always been fond of Halloween. I like the early dark evenings, the turf fire on at night, and the get-togethers involving food and party games.

Moving into adulthood, unfortunately, Halloween parties become drinking fests, and I find myself yearning for the simpler childhood events that involved wearing a black bin liner (which could make you anything you ever wanted) and eating sweets until I was sick.

One of the sweets that rarely--if ever--graced the Halloween spread in our house was toffee apples. Apple made an appearance in the form of bobbing for them in a mixing bowl full of water, but they never appeared covered in toffee. And in a way that's a good thing, because generally speaking when kids eat them you end up with a house full of skinned, mauled apples with all the toffee eaten off.

As I got older, I experimented with toffee apples and I actually like them, but it's important to use very small, tart apples, which are hard to find. I used to use Pink Ladies, because they're slightly sour and very firm fleshed, but spending ages hovering over the loose apples looking for the smallest ones is time not worth spending.

I experimented with toffee dipping slices of apple, but the surface of the slices was too juicy and the toffee would either run off as I was applying, or melt off over the course of the day, leaving a sticky toffee puddle under the apple slice. Apple slices dip very well in chocolate, however.

So, I decided to try and do something to capture the essence of a toffee apple, but be a small treat that isn't overwhelmingly and insurmountably sickly. And who doesn't like doughnuts?

A little cake doughnut filled with stewed apple and wrapped in a creamy toffee layer provides that instant sugar hit and autumnal feel that you'd get with a toffee apple, but without it eating it being a monstrous task.

FREE FROM
☑ Soya (check for soya lecithin)
☑ Yeast
☑ Wheat
☑ Nuts

CONTAINS
☒ Eggs
☒ Dairy
☒ Gluten
☒ Refined sugar products


INGREDIMENTS


For about 16 mini filled doughnuts
  • 1 pound (455 grammes) doughnut dough (use your favourite recipe, or use this recipe)
  • 1 firm eating apple, like a Granny Smith, Pink Lady, or Gala
  • Two pinches ground cinnamon
  • 1 teaspoon white sugar
  • 2 teaspoons brown sugar
  • 1 teaspoon lemon juice
  • 2 tablespoons water
  • ½ teaspoon cornflour

For the crunchy toffee coating
  • 6 ounces caster sugar
  • 3 ounces golden syrup
  • 3 ounces evaporated milk, or cream
  • 16 wooden lolly sticks

HOW-TO

First, make the apple filling,
  • Peel and core the apple, and cut into half inch (1 centimetre) cubes. Put into a small saucepan with all the ingredients except the cornflour. Bring to the boil, then reduce the temperature to a simmer. Simmer for about 10 to 15 minutes until the apple is tender.
  • Put the cornflour in a small cup, and add a tablespoon of water. Mix into a slurry, then pour into the saucepan slowly, stirring all the time. Cook until the sauce goes back to being transparent, and it has thickened.
  • Once fully cooked, set aside until completely cool; about an hour.

Then, make the doughnuts,
  • Preheat the cooking oil to 180°C (350°F), either in a deep fryer or a heavy saucepan.
  • Roll out the doughnut dough to a quarter inch (5 millimetre) thickness. Cut into as many 3 inch circles as you can, and make pairs of circles. Put half a teaspoon of the apple filling on one circle, brush another circle with water, and make a sandwich. Press the edges together very well, then cut into a 2 inch (5 centimetre) circle, keeping the jam in the centre. This will keep them well sealed. 
  • Repeat until you have run out of circles, then gently mash together and re-roll the trimmings, Continue until you have used all the dough.
  • Cook the doughnuts in the oil, about 3 at a time so as not to overcrowd the fryer. Cook for about 2 or 3 minutes on either side, until golden brown and puffed. Drain on kitchen towel then allow to cool on a wire rack.

Finally, make the toffee and assemble,
  • Line a baking sheet with non-stick baking paper, or a silicone liner.
  • In a medium saucepan, combine all the toffee ingredients and melt together slowly over low heat, until every sugar grain has dissolved.
  • Increase the heat to medium, and cook at a slow boil for about 10 minutes. If you have a sugar thermometre, it should read between 146 and 154°C (295 to 309 °F). If using the cold water test, a small drop in a glass of ice-cold water should snap cleanly.
  • Immediately remove from the heat, and place on a folded tea towel to protect the work surface. Take a lolly stick, dip the very tip in the toffee, and stick it into a doughnut. Then dip the doughnut into the toffee, twirling it to cover it completely in toffee. Tap gently on the edge of the saucepan to drip off the excess, then place it on the tray, holding it for a few seconds untilit can stand upright by itself.
  • Repeat this process with the remaining toffee and doughnuts. If the toffee starts to set, put it over a low heat until it goes runny again.
  • If you have any toffee left over, you can pour it out on another baking sheet lined with non-stick baking paper, or a silicone cake tin.

This is a tasty alternative to a full toffee apple, and they have a lovely fluffy doughnut added to boot. This should be a delicious treat for Halloween, or indeed Bonfire Night on November 5th.

Monday, 9 November 2015

Gingerbread House Part II: Baking and Assembly

Assuming that you have read Part I of my gingerbread construction saga, this is how I made the templates into a reality. As I said, I used regular white card to make the templates of the walls and chimney. At this point, no template exists for the roof, as I drafted that with paper after I assembled the gingerbread walls.
The house pattern includes:
  • 2 side walls,
  • 1 front/back wall,
  • 1 front/back chimney,
  • 1 top of chimney, and
  • 1 side of chimney.

I made a batch of gingerbread dough using the method in this recipe, and the following ingredients:
  • 1 ounce (30 grammes) treacle
  • 4 ounces (115 grammes) butter, or margarine, at room temperature
  • 4 ounces (115 grammes) light brown sugar
  • 1 medium egg
  • 9 ounces (250 grammes) spelt flour
  • 2 teaspoons ground ginger
  • 1 teaspoon ground cinnamon
  • ½ teaspoon ground coriander
  • ¼ teaspoon ground cloves
  • Pinch of salt

Unlike the original recipe, I use all spelt flour and no cornflour. The cornflour makes the gingerbread crumbly: nice texture to eating, but not as structurally sound. I divided the dough into two discs, wrapped them in cling film, and refrigerated them overnight. This is important, as it makes the dough good for handling, and not too sticky.
The next day, I sprinkled my work surface with flour and rolled out the dough to a thickness of a quarter inch (5 millimetres). I then cut out the pieces by laying them on the dough and cutting around them with a pizza wheel. I flipped the Front/Back template over to get the back of the house, and did the same with the triangular chimney template. I had to re-roll the dough once or twice, I think.
As pictured below, I cut a door and two jaunty windows out of the front part of the house, and two more windows out of the back. I filled them up with crushed boiled sweets, which then melted to create stained glass windows. This is a great little trick.


Once they were cooked, I allowed them to cool completely before moving them so the windows didn't get destroyed. Once all the pieces were cooked, the construction began! I used some royal icing (to my shame, I used the instant kind) and dyed half of it a cement grey colour, and the other half orange. I put the icing in two disposable icing bags, and cut a wide opening (about 5 millilitres) on the dark one, and a narrow opening (about 2 millilitres) on the orange one.

I stood the back of the house up, glued the sides on, and used cans to keep everything in place while it was setting. After the icing was set, I put the back of the house flat on the board, ends of the walls pointing up, so I could safely glue the front of the house on without destroying the delicate windows or the sides of the doorway.


I had bought a load of Smarties, jelly beans, and pretzel sticks from the shop, and I stuck them all on with the dark royal icing before adding flourishes with the orange icing. This was really just a going with the flow creative experience: I didn't plan what it would look like, I just go absorbed in it. I also did the chimney, as you can see.


Once everything was fused together, I draped a piece of paper over the pitched roof and drew a template for the roof slates. I made the roof slates out of dark chocolate, and decorated them with orange royal icing. To make the scalloped edges, I first piped the outline with royal icing, which I broke off when the roof slates were set. I stuck the roof slates on with the dark icing, using more cans to prop them up so they wouldn't slide off the roof while the icing was setting. 


I then stuck on the chimney piece; I was convinced it would go right through the roof, but the chocolate was surprisingly strong. I then did some more flourishes with the orange icing, making a roof cap tiles effect.


This was intensely fun, and took quite a lot of time. I'd say from start to finish took about 4 or 5 hours. It was so worth it, even if I didn't end up entering it into the competition. It did however get pride of place on the counter top in the gallery coffee dock...


THIS TIME IN 2014: Salted Caramel Shortbread (Wheat Free)
THIS TIME IN 2013: No blog

Friday, 6 November 2015

Gingerbread House Part I: Drafting the Template

Right. I will explain the entire process of making the gingerbread house from start to finish, from sketching to adding the last little flourishes.

First of all, I took to my sketchbook to do a few doodles about what I'd like my gingerbread house to look like. This is the first step I take for pretty much anything, even birthday cakes. I start drawing and let my imagination take me in whatever direction it pleases.

Here are the pages of my sketchbook that I dedicated to my design:


On the left are some generic putting-ideas-down drawings (including some designs for a completely different gingerbread skeleton idea I had based on the teddies holding sweets biscuits I did for my Picnic Afternoon Tea Party). 

On the right is a more concrete concept for the front of the house, showing the front of the house and one side of the chimney.


These two pages are some actual teasing out how it will be made sketches. My first concept for the roof slates was to make two royal icing run outs (plaques), but then I decided to use dark chocolate decorated with royal icing instead.

The next step was to turn the sketches, doodles, and scribbles into reality. To do this, I traced the drawing that I did of the front of the house onto some card, and used that to guide me in making the other parts of the template: the two walls and the individual parts of the chimney.


I used a ruler to measure the two sides of the front of the house and used the measurements to judge the height of the two walls. I then I chose how deep I'd make the house (I decided about 4 inches (10 centimetres) would be enough) and used this to measure the width of the walls. I used a similar process to design the chimney templates.

I designed the roof template after I had baked and assembled the walls of the house. Once I had assembled the house with royal icing, I folded a piece of paper in half and draped it over where I would like the roof to be, and traced around where the gingerbread touched the paper. I then extended the edges by about about half an inch (a centimetre) to give the roof a nice overhang.

To make sure I knew how to put it together, I drew little guidelines and indicators on the edges of the templates. This way I'd know which way around everything had to be.

I apologise for not having more pictures to show you the process in detail! I was so busy doing the actual project that I didn't think ahead to writing about it. But, when I get round to making my Christmas gingerbread house, I'll be a little more thorough.

For how to bake and assemble the house, keep an eye on Monday's upload CLICK HERE!

THIS TIME IN 2014: Spelt Doughnuts Video Tutorial!

Monday, 2 November 2015

Baking Competitions, Chili Con Carne, and Parties

Now that the Hallowe'en madness has calmed down, and work isn't as manic, I can finally do a full write up of the gingerbread house experience, and the party.

As I mentioned in my previous post, I was designing a gingerbread house for a baking competition. I had done all the research, done the sketches, drafted the template myself, and made the whole house, before I found out that the baking competition was for children.

Even though it had a "Big Kids" category for those over 17, I still felt a little odd bringing a super ornate house that I'd spent hours on to a competition designed for children. It felt like turning up to a school sports day in full professional sportswear with isotonic drinks, having trained for weeks beforehand. My decision to withdraw my entry was greeted by my friends and mother by surprise and disappointment, but I still brought it to work for people to look at. There were a few small children who came into the gallery that really liked looking at it.

Also, over the Hallowe'en weekend, I had somewhat of a mini mental breakdown, which may have clouded my judgment. I didn't want people thinking I was a loser for turning up to a kids' baking contest.

Read the full Gingerbread House on Friday! If I'd included it in this entry, it would have been way too long.

I will be keeping my eyes open for another baking contest, though. Or maybe I'll host my own...

The party I hosted on Friday the 30th went very well! Everyone showed up that should have, we played silly party games for a few hours, and then I got to catch up with a friend of mine that had returned from her second yearlong stint of working in Seoul, South Korea. It was lovely to catch up with her.

I made a big ol' vat of chili con carne for everyone to eat, and it didn't last five minutes. I think everyone was pretty hungry by that point in the evening. I cheated big time in my recipe, but it was utterly delicious:


  • I emptied 2¼ pounds (1 kilogramme) of minced beef, one grated medium onion, one chopped red pepper, and a few teaspoons of some leftover fajita spice I had languishing in my spice rack into a jam pot (or very, very large saucepan).
  • Over high heat, I cooked and stirred the mixture until the meat is very fine. If you like the meat a little more chunky, allow the beef to cook for a few minutes in between stirring.
  • Once the meat was mostly brown, I added one carton (500 millilitres) of passata, and filled the empty carton with water and added that too. I also added one jar (325 grammes) of hot salsa dip, and did a similar rinsing and watering process.
  • I stirred in about 2 tablespoons (30 millilitres) of tomato purée for extra thickness, and also a few crunches of my black pepper mill. I then cooked it on a rough simmer for about 45 minutes, until it was nice and thick.
It was fabulous. I served it with some cooked Basmati rice (which I know isn't the usual variety of rice to eat with a South American style meal, but it's the only rice I eat ever), and I had dyed some orange and some black to add some little flecks of Hallowe'en goodness. Unfortunately, I don't have photographs of the meal, but trust me it looked great!

Overall, this batch of chili con carne cost about €7.50 ($8.15 or £5.30) and fed 8 very hungry people, and could have fed 10 normally hungry people. Including the rice, the meal cost about one euro per person. It's a great meal to have up your sleeves for cheap entertaining.

I think the Hallowe'en festivities were a huge success! Apart from a little falter of self-confidence on the competition front.

Wednesday, 22 October 2014

Traditionl Irish Barmbrack (Wheat and Dairy Free)

There is nothing that transports me back to Halloween as a child than a traditional barmbrack: a dense, fruity bread enjoyed toasted with slatherings of real butter and raspberry jam.


Traditionally, it's a leavened bread with mixed dried fruits soaked in tea mixed throughout it, but I try to avoid cooking with yeast as much as I can. Why? Because it is a) really fiddly, and b) gives me a sore stomach if I eat too much.


This is also eaten in Wales, where it is called bara brith.

FREE FROM
☑ Soya (check for soya lecithin)
☑ Yeast
☑ Wheat
☑ Nuts
☑ Dairy

CONTAINS
☒ Gluten (spelt)
☒ Eggs

 INGREDIMENTS
For 1 8 inch (20 centimetre) cob


  • 13 ounces (375 grammes) dried mixed fruit
  • 2 ounces (55 grammes) brown sugar
  • 1 medium egg
  • 6 fluid ounces (180 millilitres) warm strong tea
  • 8 ounces (225 grammes) wholemeal spelt flour
  • 1 teaspoon (5 millilitres) cinnamon or mixed spice
  • 1 teaspoon (5 millilitres) baking soda
  • Pinch of salt


Wednesday, 15 October 2014

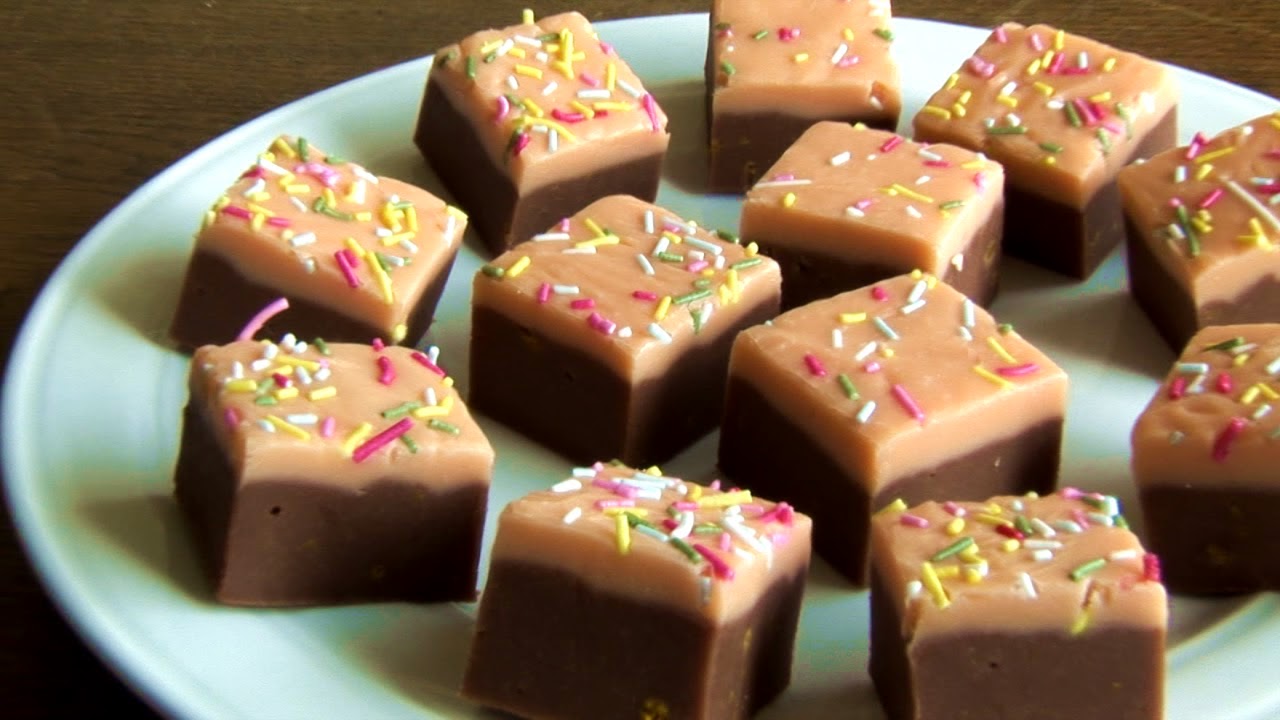
Orange Chocolate Fudge

When designing my second Halloween dessert, the concept of something orange just flew into my mind, as orange is a very Halloweeny colour: whether it's the imagery of stripy witch's tights, or a crispy fallen leaf, orange - along with green, purple, black, and grey - rank highly in my mind when it comes of Halloween colour associations.


Another inspiration that came to me was the idea of celebratory food. Halloween is Celtic new year's eve, and all the traditional celebrations we have as part of Halloween stem from ancient Irish new year's eve customs. Traditionally, a lot of nice food, beer and mead would be consumed as part of the festivities. Nowadays, celebration food looks very different to how it did in pre-Christian Ireland, but the vibe is still there.


To me, Halloween is all about sweeties, chocolate and autumn fruits and nuts, so I thought I'd design a sweetie worthy of any trick or treat bucket: Orange Chocolate Fudge.

There is no finer combination in the world than orange and chocolate: it's just a match made in heaven. The warmth of the orange oil lends itself as a perfect match for the dark earthy quality of chocolate, and when both are wrapped up in fat and sugar what's not to like?


FREE FROM
☑ Soya (check for soya lecithin)
☑ Gluten
☑ Wheat
☑ Nuts
☑ Eggs

CONTAINS
☒ Dairy
☒ Cocoa
☒ Refined sugar products

 INGREDIMENTS

For the orange chocolate layer:
  • 8 ounces (225 grammes) condesned milk
  • 8 ounces (225 grammes) light brown sugar
  • 4 ounces (115 grammes) butter
  • 2 fluid ounce (60 millilitres) milk
  • 1 teaspoon (5 millilitres) vanilla or other essence
  • 1 to 2 tablespoons cocoa powder, depending on how dark you want it
  • Zest of 1 orange
  • Pinch of salt

For the coloured topping layer:
  • 3 ounces (85 grammes) condensed milk
  • 3½ ounces (100 grammes) white chocolate
  • Pinch of salt
  • Orange food colouring


THIS TIME LAST YEAR: Wheat Free Ice Cream Cones

It's been a while! Happy 9th Anniversary!

  It's been a while. The past two years have been a helluva a ride. This year is gonna hold some big changes for this blog. I'm comp...