Showing posts with label pastry. Show all posts

Monday, 25 September 2017

No More Soggy Bottom Pies! Part 1: Blind Baked Bottom


It's apple harvesting season! Right up into October, people will be venturing outside to choose the nicest apples of their trees, or just going to the shop to reap the fruits of somebody else's labour, for cooking, making into jam, or simply eating out of hand.

But one of the best fates I believe an apple can have is ending up in a nice apple pie, made with delicious buttery pastry! There's nothing better than rolling out the pastry, loving chopping up the apples and sugaring them up, popping it into the oven, and smelling the delicious, cinnamony goodness waft around the house as it bakes... you open the oven, take out the pie, cut a lovely slice out and--

The bottom is a soggy, mushy, mess. It breaks your heart.

However! This doesn't have to be your pie! There are a few ways to avoid a soggy bottom, and over the next few days, I'll be sharing the benefit of my knowledge with you, starting right now with my most recent adventure: a blind baked bottom crust.

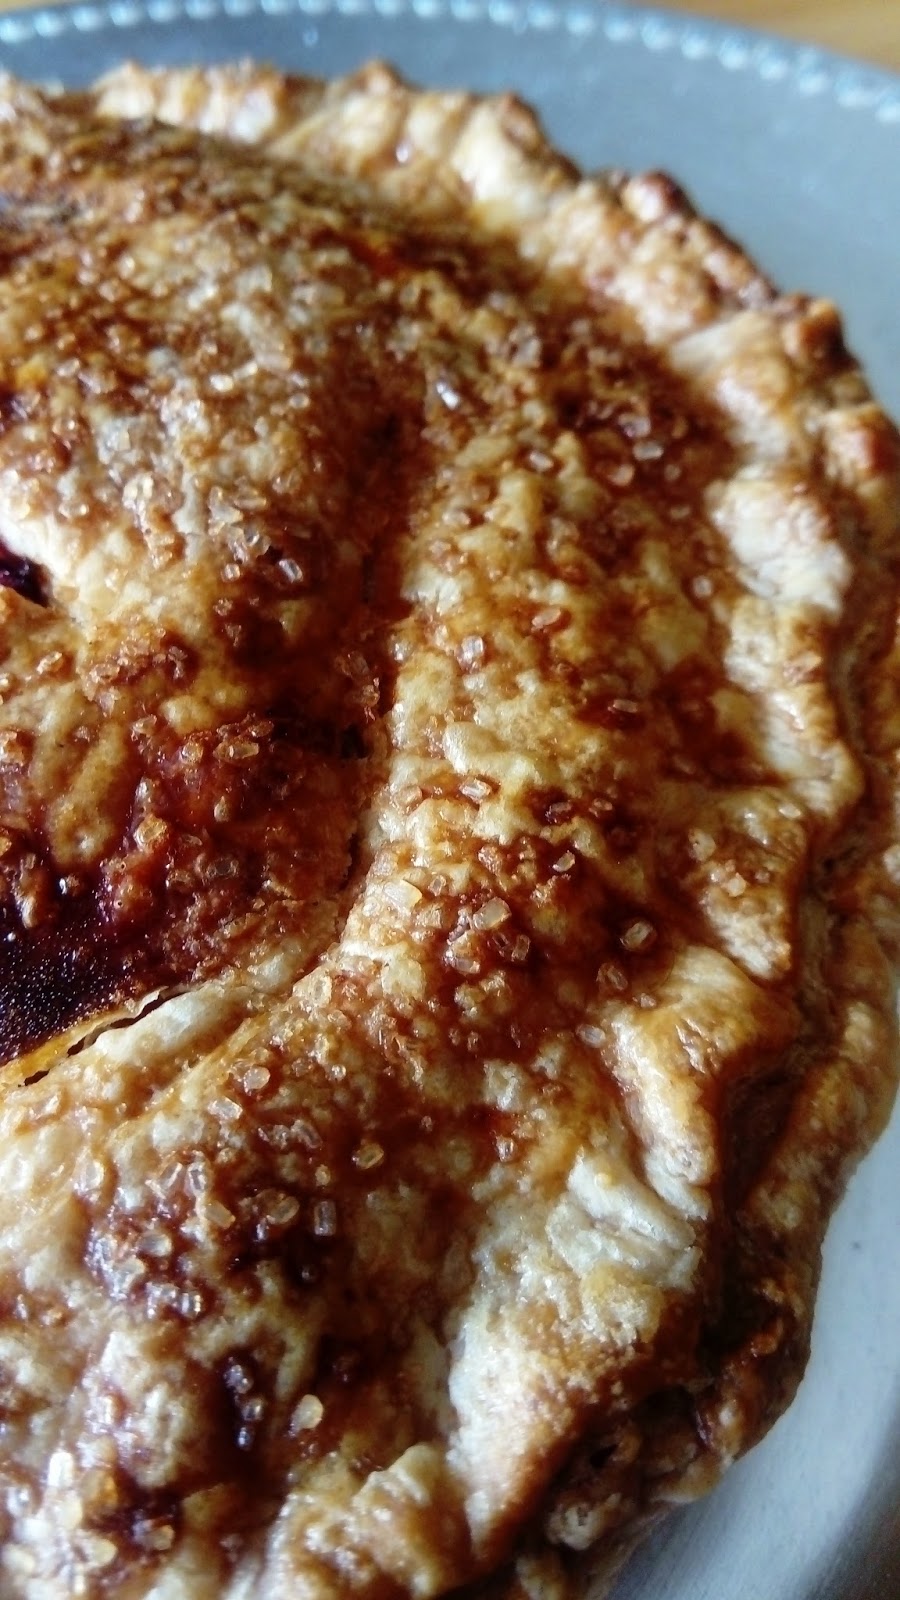
Simple bake the bottom crust separately before assembly, and you'll have gorgeous, crispy crust all the way through!

Pros of Blind Baked Bottom: no soggy bottom, repeatable every time, bottom can be baked in advance and frozen for another time

Cons of Blind Baked Bottom: a little more time consuming, a little fiddly, and you run the risk of an undercooked filling.

~~ ^ _ ^ ~~

DIFFICULTY
Requires experience with baking shortcrust pastry

TIME
About 2 hours

RECIPE RATING
Intermediate

~~ ^ _ ^ ~~

INGREDIMENTS
Makes one 9 inch (22 centimetre) round pie

About 1 pound (455 grammes) shortcrust pastry, premade or shop-bought
1½ pounds (680 grammes) of Granny Smith or Bramley apples, peeled and halved
4 ounces (115 grammes) light brown sugar
Zest of a lemon
Juice of half a lemon
4 tablespoons (60 millilitres) cornflour
1 ounce (30 grammes) butter, soft
2 teaspoons (10 millilitres) ground cinnamon
¼ teaspoon (1 millilitre) ground cloves
¼ teaspoon (1 millilitre) grated nutmeg
Eggwash, for assembly, or use flour and milk
Demerara (Turbinado) sugar, for assembly


~~ ^ _ ^ ~~

CONTAINS
Gluten if using shop-bought pastry, eggs, dairy, refined sugar, pectin from apples

~~ ^ _ ^ ~~

    METHOD

    First, make the bottom crust
    • Take roughly two-thirds of the pastry and roll out on a floured surface to quarter of an inch (5 millimetres) in thickness. 
    • Using the rolling pin to support the dough, lift it up and drape into a 9 inch (22 centimetre) pie dish, pressing down gently into the dish. Trim the excess, and then chill in the fridge for about 30 minutes.
    • After chilling, preheat the oven to 180°C (350°F, Gas Mk.4). Take the pie dough out of the oven, line tightly with tin foil, fill with a layer of dried beans or rice, and blind bake on the centre shelf for about 20 to 25 minutes. You want it cooked all the way through and dry to the touch, but not browned.
    • Once cooked, allow to cool slightly, but leave the oven on for the next step.

    Then, finish off the pie
    • Slice the peeled, halved, and cored apples into quarter inch (5 millimetre) slices, and mix in a mixing bowl with the rest of the filling ingredients.
    • Roll the remaining dough out to the same thickness as the base to make the lid. If you want to make a decorative lid, cut the pastry as you need to.
    • Brush the baked crust liberally with eggwash, or you can mix some flour into a slurry with milk or water and use that instead, add in the filling, and drape over the lid.
    • Firmly press the lid onto the edge of the base crust, then trim off the excess. If your lid is whole and uncut, cut at least one slash in the top to allow for steam. Eggwash the top, or brush with milk, and sprinkle with Demerara sugar.
    • Return to the centre shelf of the oven for 30 to 35 minutes, or until the crust is a beautiful golden brown.
    • Remove from the oven and allow to cool for about 10 minutes before serving hot, or allow to cool completely for serving cold.

    STORAGE

    These will keep in an airtight container for up to three days in the fridge.

    Sunday, 7 May 2017

    Variation on a Theme: Pepperoni, Mozarella, and Spinach Quiche

    Got leftover pizza toppings and eggs in the fridge? Why, make a quiche of course!

    A few weeks ago, I made my first ever quiche and became a convert: who'd have thought that an omelette in an edible plate of pastry would be so delicious? And also, who'd have thought that--like and omelette--they're great for using up stuff in the fridge.


    The other night, my companion and I had a pizza, and I had some leftover pepperoni, mozzarella, and spinach. So, I just cooked up the leftover pepperoni, about 2 ounces (55 grammes) worth, and a few handfuls of spinach with half a red onion, chopped finely, and then scattered it into the pre-baked 9 inch pastry crust along with a few handfuls of mozzarella. I know these measurements aren't really exact, but quiche filling isn't an exact science!


    I used three medium eggs in the filling, mixed with twice as much (in weight) milk, for the filling. I replaced about an ounce (30 grammes) of the milk with some yoghurt for extra interest. After adding salt, pepper, and cayenne pepper to taste, I poured it over the filling in the pastry case before topping off with some grated cheddar for added crustification (which is now a word thanks to Chef John of Food Wishes).


    I baked the quiche for about 40 minutes at 180°C (350°F, Gas Mk.4), until it was puffed and golden. Because I cooked this the night before for my companion to enjoy the next day while I wasn't around, I didn't have any; but I have it on his good authority that it was very, very tasty indeed!

    THIS TIME IN 2015: Peppermint Ice (Totally not a rip off of Kendal Mint Cake at all. I promise)
    No blogs on this day in 2016, 2014, or 2013

    Photographs by SilverBolt

    Thursday, 16 March 2017

    St Patrick's Day 2017: Beef and Beer Pie (Wheat Free with Dairy- and Egg Free Option)

    Looking for a hearty meal for your table this weekend? Here is a delicious pie made with super flaky pastry, succulent tender beef, enveloped in a rich beer gravy.

    (I did take a photo of the whole pie, but my new phone sometimes
    forgets to save photos, for some reason)

    It's no lie: Irish people love beer, and they love beef; and on St Patrick's Day, we love to celebrate our Irishness by buying into our own cultural stereotype heart and soul. So, I decided to mix our two great loves together in a pie, with the addition of another great love of ours: butter.

    However, here is where I make a little switcheroo. As any of my long term readers, and people who know me personally, will know, I am a bit of a mongrel: I'm Irish, but I'm also English. Being the child of two nations who have a very difficult historically colonial relationship is challenging, it has to be said.

    So, to bring a little bit of my own Englishness into this dish, I swapped the usual Irish pie topping of mashed potato for a flaky pastry, more commonly associated with English cookery. As much as I love mashed potato, my companion—who is also a mongrel like me, being a little bit Roscommon man, and a little bit Birmingham man—loves a good English style pastry pie, so I thought I'd do it for a change.

    I use the same kind of pastry as in my cherry pie recipe, however I reduced the sugar to a pinch or two, added some black pepper, used a pound (455 grammes) of flour and scaled all the other ingredients accordingly.

    The other thing I will say about this recipe is that I use my slow cooker to make the stew. If you don't have a slow cooker, that's perfectly okay. You can cook the stew on the stove top in a pan, or in a pot in the oven. It really doesn't matter, as long as the meat is appropriately cooked.

    This recipe takes a long time, about 6 hours, but it's well worth it in the end!

    INGREDIMENTS
    For one 9 inch (22 centimetre) square, or 10 inch (25 centimetre) round pie, ie. 4¼ UK pint (5 US pint, 2½ litre)

    For the stew filling,
    • 2¼ pounds (1 kilogramme) diced stewing beef
    • 1 large onion, white or red, sliced thinly
    • 6 ounces (170 grammes) passata, or 2 tablespoons (30 millilitres) tomato purée
    • 1 bottle (500 millilitres) pale beer, or gluten free beer
    • 2 teaspoons (10 millilitres) Worcestershire sauce, or fish sauce
    • 1 teaspoon (5 millilitres) brown sugar
    • 1 rounded teaspoon (7 millilitres) dried parsley
    • A small pinch of dried rosemary
    • 1 beef stock cube
    • 4 ounces (115 grammes) button mushrooms, cut into halves
    • 1 medium sized carrot, sliced into coins
    • 2 tablespoons (30 millilitres) cornflour
    • Salt and pepper, to taste

    For the pastry,
    • 1 pound (455 grammes) white spelt flour
    • 4 ounces (115 grammes) butter, or margarine, very cold
    • 4 ounces (115 grammes) block vegetable fat, or lard, very cold
    • 1 teaspoon (5 millilitres) caster sugar
    • About 5 ot 6 fluid ounces (150 to 180 millilitres) cold water
    • Salt and pepper
    • An egg, for egg washing, or milk, or omit

    HOW-TO

    First, make the stew,

    If you have a slow cooker,

    • Put the meat, passata, beer, onion, Worcestershire sauce, sugar, dried herbs, the stock cube, and about half a teaspoon (3 millitres) of salt. Stir well once more, then cover and cook on High for 3 hours until the meat is almost tender.
    • Add in the mushrooms and carrots, and cook for a further hour with the lid off to allow the sauce to reduce.
    • Mix the cornflour in a small bowl or glass with some water, and stir into the pot well. Cook on High for a further 15 minutes until the sauce is well thickened.
    • After cooking, allow to stew to cool down fully to room temperature.
    If you don't have a slow cooker,
    • Preheat the oven to 150°C (300°F, Gas Mk.2), and place the  meat, passata, beer, onion, Worcestershire sauce, sugar,
    •  dried herbs, the stock cube, and about half a teaspoon (3 millitres) of salt in a large casserole dish with a lid.
    • Cover with the lid, and place in the centre of the preheated oven. Cook for 1½ to 2 hours, or until the meat is almost tender.
    • Add in the mushrooms and carrots, and continue to cook without the lid for a further 45 minutes to an hour until the vegetables and meat are tender.
    • When the meat is cooked, place the casserole dish over a medium flame, and mix the cornflour with a little water in a small bowl or glass. Add to the stew and bring to the boil, mixing continuously, until the sauce is thickened.
    • After cooking, allow the stew to cool down full to room temperature.

    While the stew is cooking, prepare the pastry,

    • In a large mixing bowl, add the flour, salt, and pepper, then grate in the butter and the fat on the coarse side, dipping the grating side in the flour between strokes to prevent clumping.
    • Very gently rub and break up the strands of butter and fat between your fingers to make the pieces smaller, about the size of peas.
    • Add in the lemon juice or vinegar, then add in a tablespoon or two (15 or 30 millilitres) of the water. Use the tip of a table knife to mix the water through. Continue this until you get a nice soft dough. It shouldn't be sticky. I added about 8 tablespoons in total myself, but it depends a lot on humidity and flour quality.
    • Make the dough into a disc, wrap in clingfilm, and chill in the fridge for half an hour.
    • Take out of the fridge, and roll out to a thickness of about half an inch (1 centimetre). Fold one outer third into the middle, then fold the other third over on top, like folding a letter into three. Roll out and fold in the exact same way.
    • Wrap up and return to the fridge once more until ready to use.

    Finally, assemble the pie,
    • Preheat the oven to 180°C (350°F, Gas Mk.4), and get your chosen pie dish.
    • Take the dough out of the fridge, and divide into two pieces: two thirds, and one third. Wrap the smaller piece up and return to the fridge.
    • Roll the larger piece of dough to roughly a quarter inch thick (5 millimetres), and drape into the pie dish, pressing into the base and edges. Leave the overhang intact for to make adding the lid easier.
    • Gently scoop in the stew, and brush the edge of the crust with egg wash, milk, or water.
    • Roll out the other piece of dough in exactly the same way, and drape over the top. Press together the base and the lid with your fingertips, or a fork. Trim the overhang.
    • Brush the top of the pie with egg wash or milk, and pierce the top to allow steam to escape.
    • Cook in the centre of the preheated oven for about a 45 minutes to an hour.
    • Serve hot with steamed or roasted vegetables.
    No blogs on this day in 2016, 2014, or 2013

    Monday, 13 March 2017

    Pi Day Special: Cherry Pie (Wheat- and Egg Free, with Dairy Free Option)

    Nothing can beat tender, crisp, flaky pastry wrapped a sweet and sour and slightly spicy fruity filling, and that's why this cherry pie is so delicious!


    I love fruit tarts, particularly apple tart, but they can really be made or broken by their pastries: sometimes it can be too hard or too crumbly; too firm or too soft; too thick or too thin. It's a very subjective thing. Personally, I love a pastry that makes a fabulous crispy sound when you bite into it, and it firm enough to hold its shape when cut. This is such a pastry.

    The trick to great pastry is to make sure everything is cold, cold, cold! You've seen it repeated in cookery blogs all over the internet, and cooking personalities on the telly say it over and over again, but they wouldn't say it if it weren't true. The trick to tender flaky pastry is cold dough, hot oven (this is also true of popovers and Yorkshire pudding), and there are a few ways of achieving this with very little effort.

    1. Hands are warm, use them as little as possible
    Hands generate heat, as does working the pastry too much. Try and be as cold and distant as possible with your pastry: use cold knives to mix, not your hands, and when you do use your hands, only use the very tips of your fingers.

    2. Keep everything in the fridge, even the tools...
    Like many people advise when whipping cream, it's wise to chill your tools: use a glass bowl if you can, and chill the knives, the box grater, etc.

    3. ... and the flour...
    Yes: chill your flour for at least half an hour beforehand. If you can freeze it, even better. Same goes for the butter and vegetable fat (I use a combination for maximum flakiness); and make sure the water is as cold as you can get it without it turning into ice cubes.

    4. ... and the filling.
    Make sure whatever filling you're using it also cold. If you put warm, or God forbid hot, filling into the cold pastry, it will melt all that fat that you've been trying so hard to keep cold all this time; you'll undo pretty much all of your hard work.

    5. Chill between steps
    After making the dough, chill it. After rolling the dough, chill it. After lining the dish, chill it. If at any point you see the butter or fat softening in the dough, chill it. Heck, even if you can chill the pie after it's fully assembled for a few minutes, do so. Obviously, this is best case scenario, so in the recipe I have outlined chilling only where completely and utterly necessary.

    Keeping that in mind, making the dough it really simple. No rubbing of fat into flour necessary: the box grater does all the hard work for you!

    So, without further ado, let's get baking...

    INGREDIMENTS
    For one 9 inch (22 centimetre) round pie

    For the pastry
    • 12 ounces (340 grammes) white spelt flour, preferably cold
    • 3 ounces (85 grammes) butter or margarine, very cold
    • 3 ounces (85 grammes) white vegetable fat, very cold
    • 1 ounces (30 grammes) caster sugar
    • A few drops of lemon juice, or white vinegar
    • Up to 5 fluid ounces (150 millilitres) very cold water, to bind
    • Good pinch of salt
    • 1 egg, beaten with 1 tablespoon (15 millilitres) of water, or use all milk for an egg free version
    • Coarse Demerara sugar, for sprinkling
    For the filling
    • Two 14 ounce (400 gramme) can of cherries in syrup, I used black cherries but you can use whatever canned cherries you want
    • 4 teaspoons (20 millilitres) cornflour
    • 1 tablespoon (15 millilitres) lemon or lime juice
    • 1 tablespoon (15 gramme) sugar, white or brown
    • ¼ teaspoon (1 millilitre) mixed spice
    • Generous pinch of salt

    HOW-TO
    To make the filling,
    • Empty one can into a saucepan, and drain the other can. Add the drained cherries to the pan, and save the syrup for another project. In a small bowl, mix the the cornflour, sugar, lemon or lime juice, mixed spice, and salt with a little water until it becomes a slurry.
    • Add in the slurry, stir through thoroughly, and then cook over medium high. Bring to the boil, and boil continuously for about 3 to 4 minutes.
    • Pour immediately into a shallow bowl, and cover the surface of the filling directly with cling film. Allow to cool to room temperature before chilling until completely cold, about 2 hours.

    To make pastry,
    • In a large mixing bowl, add the flour and salt, then grate in the butter and the fat on the coarse side, dipping the grating side in the flour between strokes to prevent clumping.
    • Very gently rub and break up the strands of butter and fat between your fingers to make the pieces smaller, about the size of peas.
    • Add in the lemon juice or vinegar, then add in a tablespoon or two (15 or 30 millilitres) of the water. Use the tip of a table knife to mix the water through. Continue this until you get a nice soft dough. It shouldn't be sticky. I added about 8 tablespoons in total myself, but it depends a lot on humidity and flour quality.
    • Make the dough into a disc, wrap in clingfilm, and chill in the fridge for an hour, or the freezer for half an hour.
    To assemble the pie
    • Preheat the oven to 180°C (350°F, Gas Mk.4) and lightly (and when I say lightly, I mean it) grease a 8 or 9 inch (20 or 22 centimetre) pie dish.
    • Take the dough out of the fridge or freezer, then cut into two pieces, roughly two-thirds and one third. Wrap the smaller piece and return to the fridge.
    • Roll out the larger piece to about quarter of an inch thick (5 millimetres) on a flour surface. Drape into the pie dish and press into shape. Trim the overhang.
    • Pour in the completely cooled filling into the pastry, then wet the edges with some egg wash or milk.
    • Take the remaining dough out of the fridge, and place it on the work surface on top of the trimmings. Roll out as before, then drape over the topping, pressing onto the wet rim of the base layer. If you want the Pi symbol cut into it like I have, do that before draping and lift it very carefully.
    • Once again, trim the overhang with a straight cut, or a crimped cutter, or in whatever way you want. Brush the top with eggwash or milk, and sprinkle with the coarse Demerara sugar.
    • Pierce the top of the pie if you've not done the Pi symbol to allow steam to escape.
    • Place on the centre rack of the preheated oven, and bake for 40 to 50 minutes, or until golden brown. The filling is precooked, so you're just cooking the pastry. If it browns too quickly on top, cover with foil to allow the bottom crust to fully cook (don't make my mistake and let the top get a sun tan!)

    No blogs on this day in previous years.

    Friday, 21 October 2016

    Halloween 2016: American Pumpkin Pie (Wheat Free with Dairy Free Option)

    And for another American treat, here's a classic: pumpkin pie! I've never actually eaten one before, let alone made one, so this was a genuine adventure!


    This for me was quite a stretch. Not because it was in any way a stretch of my ability, because this was actually incredibly simple, but it was a test of what my palate can tolerate when it comes to weird and wonderful foods. Maybe it's because I wasn't brought up by Americans who eat this treat every year, but the idea of making a custard pie out of a vegetable is a bit out there as a concept to me. Nevertheless, I gave it a try!

    To my understanding, dessert pies are enjoyed prolifically across the Southern United States: pecan pie, chess pie, Mississippi mud pie, buttermilk pie, key lime pie, and pumpkin pie are all slight variations on the idea of a custard pie. All of these are baked in the oven using egg as a thickener, and rely heavily on dairy, whether whole milk, condensed milk, evaporated milk, buttermilk, or cream; butter, also.

    I always think of pumpkin being fairly bland in flavour, but definitely savoury. So the idea of mixing it with evaporated milk, brown sugar and spices didn't make much sense to me. That didn't stop me, though.

    The pie cooked well, and the surface was pristine, until I accidentally knocked it with the top knuckle of my pinky finger! Marred!


    Another mistake I made, and this was a biggy, was I forgot to chill the dough. This meant it shrank when I blind baked it. As such, I had a few spoonfuls of filling left in the bowl that didn't fit into the case. If it had not shrunk, the filling would have been the perfect amount. The recipe is written with this in mind.

    I wasn't brave enough to eat the final pie myself, to my shame. I did however try some of the uncooked filling: it was definitely sweet, with a nice spicy warmth, and a slight nutty flavour from the pumpkin. It wasn't bad, but it wasn't to my taste. However, I fed it to my friend Josie and she enjoyed it, so that's good enough for me!

    FREE FROM
    ☑ Soya (check for soya lecithin)
    ☑ Yeast
    ☑ Wheat
    ☑ Nuts

    CONTAINS
    ☒ Eggs
    ☒ Dairy (dairy substitutes can be found in italics)
    ☒ Gluten
    ☒ Refined sugar products


    INGREDIMENTS
    For one 9 inch (23 centimetre) pie

    For the pastry
    • 6 ounces (170 grammes) white spelt flour
    • 3 ounces (85 grammes) butter, at room temperature, or margarine
    • 1½ ounces (40 grammes) icing sugar
    • Cold water, to bind
    For the filling
    • 8 ounces (225 grammes) pumpkin purée (buy it, or see below for how to make it)
    • 2 ounces (55 grammes) caster sugar
    • 2 ounces (55 grammes) light brown sugar
    • 4 fluid ounces (120 millilitres) evaporated milk, or coconut milk
    • 1 medium egg
    • 1 teaspoon (5 millilitres) ground mixed spice
    • 1 teaspoon (5 millilitres) ground cinnamon
    • 1 teaspoon (5 millilitres) vanilla essence
    • Pinch of salt

    METHOD
    • Make the dough according to the instructions found here. Flatten the dough into a disc, wrap in cling film, and chill for an hour.
    • When chilled, preheat your oven to 180ºC (350ºF, Gas Mk. 4)
    • Roll out the dough to a quarter of an inch (5 millilitres) thick, keeping it as circular as possible. Lie over the rolling pin and lay into a 9 inch (23 centimetre) pie tin or dish. Press into the tin.
    • Cut a piece of baking paper to fit over the pastry case, then scrunch it up. This helps it fit into the case better. Un-scrunch it and lay it in the case, fill with coins or dry rice, and bake for 20 minutes.
    • While the case is cooking, prepare the filling. Mix all the ingredients together at the same time in a mixing bowl (preferably with a pouring spout) with a wooden spoon until fully combined. Don't be tempted to use a whisk: this will make it catch air, which will crack it during baking. See below for how to make pumpkin purée.
    • Reduce the oven temperature to 150ºC (325ºF, Gas Mk. 2), and gently slide out the shelf with the case on it just enough that you can pour in the mixture. Pour the filling into the case slowly but surely, then push it back in gently.
    • Cook for 35 to 40 minutes, or until dry on the surface, set about an inch (2 centimetres) all away around the edge, but still jiggly in the centre.
    • Gently remove from the oven and cool completely in the tin on a wire rack.

    I have it on good authority (that is, the woman who ate this pie) that it was delicious. I wasn't brave enough to try it myself though, so if you want to try this recipe and take that leap of faith, be my guest!


    Friday, 14 October 2016

    Halloween 2016: Maple Peacle Tarts (Wheat Free)

    Continuing in the vein of Halloween treats, here is a tasty American style morsel for you: maple peacle tarts!


    Yes, before you correct me, I know it's a pecan, not a peacle. But, this recipe combines the powers of a maple pecan pie, and a treacle tart. It's a bit of a Transatlantic experience.

    Here in Ireland, maple syrup is incredibly expensive, as I discussed in my post on a full sized maple pecan pie. Luckily though, maple flavoured golden syrup is a thing! I prefer using it because it has a stronger--albeit synthetic--flavour, whereas natural maple syrup's flavour is much more subtle

    As you can see in the picture, I used the wrong kind of cutter for the tarts: I tried to be all artsy and use a flower shaped cutter, but it meant that the filling overflowed. Take it from me: do traditional cases with a round cutter.

    This recipe could very easily be adapted for the good American Thanksgiving celebration coming u in November, as I understand maple pecan tart is something eaten at a holiday family meal in the States. Or it could be eaten pretty much anytime!

    FREE FROM
    ☑ Soya (check for soya lecithin)
    ☑ Yeast
    ☑ Wheat
    ☑ Nuts

    CONTAINS
    ☒ Eggs
    ☒ Dairy (dairy substitutes can be found in italics)
    ☒ Gluten
    ☒ Refined sugar products


    INGREDIMENTS
    For 12 tarts

    For the pastry

    • 8 ounces (225 grammes) white spelt flour
    • 4 ounces (115 grammes) butter, at room temperature, or margarine
    • 2 ounces (55 grammes) icing sugar
    • Cold water, to bind
    For the filling
    • 8 ounces (225 grammes) maple flavoured golden syrup
    • 3 ounces (85 grammes) ground almonds
    • 1 medium egg
    • 2 ounces (55 grammes) chopped pecan nuts
    • Zest of half a lemon
    • 1 tablespoon (15 millilitres) lemon juice
    • 12 full pecan nut halves

    METHOD
    • Make the dough according to the instructions found here. Flatten the dough into a disc, wrap in cling film, and chill for an hour.
    • When chilled, preheat your oven to 180ºC (350ºF, Gas Mk. 4)
    • Roll out the dough to an eighth of an inch (3 millilitres) thick, and cut into 3 inch (8 centimetre) rounds. Line a 12 hole muffin tin with the rounds, and prick the bases with a fork. Crumple up squares of tin foil to fill each case, and cook for 15 minutes, or until golden.
    • While the cases are baking, prepare the filling. Mix all the filling ingredients except for the nuts in a mixing bowl until smooth.
    • When the cases are cooked, remove from the oven and reduce the temperature to 150ºC (325ºF, Gas Mk. 2). Remove the tin boil balls, and divide the chopped nuts between the cases. Divide the batter between the cases, filling almost to the top, and place a pecan half in each tart.
    • Tap gently on the work surface, and return to the oven for a further 20 to 25 minutes, or until the centres have set and they are golden and crusty on the top.
    • Allow to cool in the tin for 10 minutes before transferring to a wire rack to cool completely.


    These tarts are super sweet, in true Halloween treat fashion! Enjoy with caution. These will keep in an airtight container for up to a week, if they last that long.


    Monday, 11 January 2016

    Rondos: Almond "Fingers" (Wheat Free with a Dairy Free Option)

    Happy 2016, readers! I had a nice break, but as soon as I got back to my home, after having been at my childhood home for the Christmas celebrations, I got back into the kitchen and made some delicious almond 'fingers'!


    Admittedly, they're not finger shaped. They would be if I had the special mould, but I had to improvise and use a muffin tin instead. For those of you who aren't familiar with an almond finger, this is what I'm talking about:

    These were always a favourite of mine when we went to the shop to get cakes as a kid, so it was a joy to recreate them. When I was researching the recipe to make these childhood favourites at home, I discovered that their native Dutch name is 'kanos', or 'rondos' for round ones.

    FREE FROM
    ☑ Soya (check for soya lecithin)
    ☑ Dairy (use substitute in italics for dairy free)
    ☑ Wheat

    CONTAINS
    ☒ Refined sugar products
    ☒ Nuts (almonds)
    ☒ Gluten
    ☒ Egg


    INGREDIMENTS
    For the pastry,
    • 9 ounces (255 grammes) white spelt flour
    • 6 ounces (170 grammes) butter, room temperature, or block margarine
    • 3 ounces (85 grammes) icing sugar
    • 1 medium egg
    • Zest of half a lemon

    For the filling,
    • 5 ounces (140 grammes) ground almonds
    • 3 ounces (85 grammes) icing sugar
    • 1 medium egg
    • A few drops of almond essence

    For finishing,
    • 1 medium egg, beaten with a little water, for glazing
    • 6 almonds, halved with skins removed

    HOW TO
    First, make the pastry.
    • In a large mixing bowl, cream the butter with a wooden spoon until soft. Add in the sugar and lemon zest and cream again until smooth and fluffy. 
    • Add in the egg and mix until fully incorporated, and then sift in the flour. Mix gently until you get a nice soft and slightly sticky dough. You might need to resort to your hands if the mixture is too stiff for the spoon.
    • Divide the dough in half equally, using a scale, and then wrap each half in cling film, flattening it to make it chill faster. Chill in the fridge for at least 60 to 90 minutes, or in the freezer for about 20 to 30 minutes.

    Next, make the filling and assemble.
    • Preheat your oven to 160°C (320°F, Gas Mk.2½, or very moderate).
    • In a mixing bowl, stir together the ground almonds and icing sugar until fine and free of any lumps. Add in the egg and almond essence, and mix until it becomes a paste.
    • Sprinkle the work surface with flour, and roll out the first half of the dough to just under a quarter inch (3 millimetre). Using a round cutter, or glass, or mug, cut out rounds to line a 12 hole patty tin, or muffin tin. Keep the trimmings aside.
    • Fill the cases with a rounded teaspoon of filling. Don't go mad: you want a gap of a few millimetres at the top of each case. I discovered the hard way that too much filling leads to cracked tops.
    • Roll out the second half of the dough and cut into slightly smaller circles for the lids. Brush the underside with water and use them to close each little cake. Pressing with the fingers is fine; no need for a fork.
    • Brush the top of each cake with beaten egg wash, prick with a fork to let air out, and press half an almond into the top.
    • Gather the trimmings together and squish into another dough ball. Wrap and keep for another project: you will have a little left over.
    • Bake in the preheated oven for 25 to 30 minutes. If they puff up too much and crack, it's no biggy: just put less filling in them next time.
    • Remove from the oven, allow to cool slightly in the tray, and then lift them out with the assistance of a blunt, thin bladed knife (like a palette knife). Move to a wire rack to cool completely.


    Friday, 18 December 2015

    Poppy Seed Kołaczki

    Sometimes, eating the same kinds of food every year for Christmas can get boring, so this year I decided to take last year's Polish experiment one step further and make some (almost) proper kołaczki (pronounced co-watch-key).


    Of course, these aren't properly authentic: real ones are made with cream cheese pastry, of which I'm not a fan whatsoever. So, I make them with good auld shortcrust. Although, my shortcrust pastry is more like shortbread, with an addition of some icing sugar.

    The poppy seed filling, called masa makowa in Polish, has an unusual flavour: it's somewhat peppery and aromatic. The filling is basically poppy seeds, milk, sugar or honey, dried fruits, and chopped nuts. It's not spicy in the sense that mincemeat is, that is with cinnamon and cloves and such, but it's definitely full of character.

    FREE FROM
    ☑ Soya
    ☑ Yeast
    ☑ Eggs

    CONTAINS
    ☒ Nuts
    ☒ Gluten
    ☒ Dairy (see ingredients for a dairy substitute)
    ☒ Refined sugar products

    INGREDIMENTS:
    Makes about 30 kołaczki

    For the pastry,

    • 12 ounces (340 grammes) white spelt flour
    • 6 ounces (170 grammes) butter, cut into cubes, or margarine
    • 3 ounces (85 grammes) icing sugar,
    • Cold water, to bind
    • Optional: zest of half a lemon


    For the poppy seed filling,
    • 3 ounces (85 grammes) poppy seeds
    • 5 fluid ounces (150 millilitres) milk
    • 1½ ounces (45 grammes) caster sugar, or honey for a more authentic flavour
    • 1 ounce (30 grammes) raisins, cut roughly
    • 1 ounce (30 grammes) nuts of your choice, chopped into small pieces
    • 1 teaspoon (5 millilitres) vanilla essence
    • Zest of half an orange

    HOW-TO:
    The night before, make the filling:

    • Put the poppy seeds into a food processor, a blender, or into a pestle and mortar in small batches, and grind them until powdery. Chop the dried fruit and nuts up into small pieces.
    • Mix the ground seeds, nuts, dried fruit, and all the other ingredients in a bowl. Cover the bowl with clingfilm and refrigerate overnight to allow the seeds and fruit to absorb the liquid.


    First, make the pastry:
    • In a large mixing bowl, mix the icing sugar and flour together. Add the butter, and rub the butter and flour between your fingertips until it becomes a fine, crumbly mixture.
    • Using the tip of a knife, mix in cold water a teaspoon at a time until it become a soft dough.
    • Lightly sprinkle the work surface with more flour, and tip the mix out onto the surface. Gently squash the mixture together until it comes together as a dough ball. 
    • Wrap up in clingfilm, flatten into a disc, then put into the fridge. Chill for about an hour.
    • Once chilled,  preheat the oven to 170ºC (325ºF/Gas Mk. 3).
    • Sprinkle some flour on the work surface and roll the dough out to a quarter inch (3 millimetre) thickness.
    • Using a fluted pastry wheel, a pizza wheel, or a knife, cut the pastry into two inch (5 centimetre) strips down and across, to make squares.
    • Put three-quarters of a teaspoon of filling in the middle of each square, wet the edges, then squash opposite corners together to make a little parcel.
    • Place the parcels about half an inch (1 centimetre) apart on an un-greased baking sheet. Bake in the centre of the preheated oven for 15 to 20 minutes, or until the filling has dried and the edges of the pastry have turned golden brown.
    • Allow to cool and harden slightly on the tray before transferring to a wire rack to cool.

    To serve, pile them up on a plate and dust with some icing sugar. Whenever I dust mince pies, I usually mix in a hint of ground cinnamon; you could do that if you like with any ground sweet spice you like.

    Monday, 24 August 2015

    Mini Apple Pies (Wheat Free with Dairy Free Option)

    Apologies for the lack of updates last week. My life is a mess at the moment: I never know where I'm going to be or when I'm going to be there, and have a terrible time remembering what the Hell I'm supposed to be doing when I get there... if this is the life of a young professional then I firmly believe I have made a terrible decision.

    However! Here is my most recent creation: little apple pies!


    I had a few apples in my fruit bowl, languishing, not really fresh enough for eating out of hand anymore. So, I turned them into a nice compote, and put them into tasty, crispy, flaky pastry. I thought of making some puff pastry, but life got in the way.


    The recipe was very simple: I cut up 2 firm fleshed apples and 1 soft fleshed apple into little pieces, about a quarter inch (5 millilitres) across. Firm fleshed apples in this case could be Bramley, Granny Smith, or Pink Lady; soft fleshed apples could be Braeburn, McIntosh, or Discovery. Keep the pieces in a bowl of water with a dash of lemon juice while cutting to stop them from browning.

    Melt about 1 ounce (30 grammes) of butter or margarine in a saucepan, and then cook the apples on medium until the firm apple pieces have softened and the soft apple pieces have started to break down. Add in brown or white (or both) sugar to taste; I added about 3 tablespoons (45 millilitres). Add about half a teaspoon (3 millilitres) of mixed spice, and top up with enough cold water to nearly over the apples. Cook on low, uncovered, for about 15 to 20 minutes, until the apples are fully tender and the mixture is like jam. Leave to cool.


    To make the pastry, mix 8 ounces (225 grammes) of white spelt flour with 4 ounces (115 grammes) of melted butter or margarine until blended and a little sandy. Add enough water to make a soft dough, without handling too much. Roll out thinly, and cut into rectangles that are about 4 by 6 inches (10 by 15 centimetres). Wet the edges of one side of each rectangle, put in about a heaped teaspoon of filling, then fold over. Crimp with the tines of a fork, then use scissors to snip in the 'V' shaped vents. You should get about 12 pies.


    Line on a lightly greased baking sheet, and brush with milk or eggwash, and sprinkle with caster sugar. Cook in the oven, preheated to 200ºC (400ºF, Gas Mk.6) for 20 to 25 minutes, or until golden brown and crispy. These can be eaten after about 5 minutes of cooling, and are also lovely if eaten cold. They will keep in an airtight container for about a week.


    THIS TIME IN 2014: No blog this time last year

    Monday, 20 July 2015

    Cheat Croissants (Wheat and Yeast Free)

    Hello everyone!! I'm back from my extended break, and I am happy to be back to managing my time well enough to be able to bake often. Let me tell you what I was up to in my time away:

    Firstly, where I work is a community centre run by the Methodist Church in Limerick: it's a three story building that used to be an office block that the church built about 75 years ago to rent out and have an income. However, 15 or so year ago, the businesses moved out and it was unoccupied except for one street unit that houses USIT, a student travel agent.

    My mother became the minister of the Methodist Church in 2012, and since then she has been working on making the office block into a community space. In that time we have had many a different group and individual use our space, and everyday it is used for something or other, from breakdancing classes and theatre rehearsals, to English language classes and Mums and Tots groups. In 2014, I was made part-time community and youth worker, and as of the start of July, I was made full time.

    Our longest tenant is an organisation called Doras Luimní, which is a migrant support and human rights NGO (non-governmental organisation) that offers legal aid, advocacy, and assistance to migrant people living in Limerick, and as part of my job I work with them for 5 hours on a Thursday. Part of Doras Luimní's remit is anti-racism and integration training, and since 2014 we have been running a European initiative called "C4i" (Communication for Integration), which involves "Anti-Rumours" training and workshops, designed to tackle racist rumours. The project evaluation was in Brussels at the end of June, and the project leader and I went over to attend the conference.

    Since then, I've just been getting to grips with having a full time job and juggling it with my personal life - my friends, my companion, and my hobbies - and it's been incredibly time consuming. For about three weeks I only baked things for youth groups and church things, and as such used old reliable recipes with little or no experimentation.

    But now, having found my feet, I'm back to abnormality, and my trip to Belgium inspired my to try something that I haven't done for years: croissants!


    I tried making croisssants once when I was younger with no success: they didn't rise, and were as tough as nails. My brother Paddy ate them, but I did not think they were successful. Not only because I hate working with yeast (yeast and spelt are not friends in my experience), but because my layering process wasn't done properly or something.


    Since then, I have dabbled in puff pastry many times, including recently when I made some sausage rolls. That dough was nice, but not quite right either. So, I did some serious research. What I present to you now is a mixture of about 4 different puff pastry recipes; these croissants are raised with baking powder, which is a little bit of a cheat, but it works.


    FREE FROM
    ☑ Soya (check for soya lecithin)
    ☑ Yeast
    ☑ Wheat

    CONTAINS
    ☒ Gluten
    ☒ Refined sugar products
    ☒ Eggs (you can skip on the egg wash, though)
    ☒ Dairy (you can use block margarine instead of butter, and water instead of milk)

    INGREDIMENTS:

    • 4 ounces (115 grammes) white spelt flour
    • 1 teaspoon (5 millilitres) baking powder
    • ½ teaspoon (3 millilitres) lemon juice
    • 2 teaspoons (10 millilitres) caster sugar
    • 2 fluid ounces (60 millilitres) water
    • 4 ounces (115 grammes) butter, at room temperature, divided in four
    • Extra flour for dusting
    • 1 egg beaten with 1 tablespoon (15 millilitres) of milk or water, for glazing


    METHOD

    First, make the pastry (this takes roughly 90 minutes, over an hour of which is waiting for the pastry to chill):

    • In a mixing bowl, sieve together the flour, baking powder, and sugar to mix evenly. Then, using your fingertips, rub in one quarter of the butter until it resembles a slightly wet sand kind of consistency.
    • Add the water and mix until it becomes a very soft dough that cleans the sides of the bowl. Gather the dough into a ball, and allow to relax for about 15 minutes.
    • Dust the work surface with flour and roll the dough into a rectangle about a quarter inch inch (5 millimetres) in thickness. Using a butter knife or the back of a spoon, spread another quarter of the butter over two thirds of the dough's surface. Sprinkle a little with flour, and then do a trifold: fold the unbuttered third over, then fold the remaining buttered flap over again; think of how you would fold a letter into three before you put it in an envelope. Wrap in cling film, and then put in the freezer for 15 minutes.
    • After the brief freeze, the dough should be firm but still pliable. Dust the surface once more and roll out the dough into another rectangle quarter of an inch (5 millimetres) in thickness again. This time, do a trifold with no butter, folding the dough into three like a letter. Roll out again, and spread another quarter of the butter over two-thirds like before, sprinkling lightly with flour. Do another trifold, then wrap up and freeze again for another 15 minutes.
    • Repeat the process, doing one more dry trifold and one last trifold with the final quarter of butter and a last little sprinkling of flour. Wrap and freeze for another 15 minutes.
    • At this point, you can use it after the 15 minutes of freezing, but if you want even more flaky crispy layers, you can do a few more dry trifolds. Just be careful: do NOT allow the butter the melt out of the pastry, and always freeze it for 15 minutes before you finally decide to use it. Congratulations, you have made puff pastry!

    Now, make the croissants:
    • Preheat the oven to 200°C (400°F, Gas Mk.6)
    • When you're ready to use, roll out the pastry on a dusted work surface into another rectangle to about a quarter inch (5 millimetre) thickness. Cut 3 long triangles out of the dough, like this:
    • Put the scraps on either edge aside for now, and then take each triangle in turn. Cut a tiny slit in the wide end, maybe about an inch or so (2½ centimetres), end then roll from the wide end to the thin end. Bend in the ends to made a crescent shape and that's your first croissant! Repeat with the others. You can also make wonky croissants with the edge strips, if you like; that's what I did.
    • Place about 2 inches (5 centimetres) apart on baking tray lined with baking paper, or that has been every so lightly greased. 
    • Brush each croissant with the milky egg wash, using a brush or your fingers, and then bake in the well preheated oven for 15 to 20 minutes, or until puffed up, flaky, and golden brown. It's important that the oven is well preheated, otherwise they'll be soggy. (You can use any leftover egg wash to make some nice egg fried rice or an omelette.)
    • Once cooked, remove  from the oven and transfer to a wire rack. Allow to cool for 5 minutes before eating, or if you want you can eat them cold.

    Croissants are best enjoyed the day they are made, straight from the oven, but if you want to eat them later they keep for up to 3 days in an airtight container.

    THIS TIME IN 2014: Variation on a Theme: Choco-Nut Granola with Cranberries
    THIS TIME IN 2013: Ginger Nut Biscuits (Wheat Free)

    Friday, 10 April 2015

    Treacle Tarts, without Breadcrumbs (Wheat Free)

    Last autumn, I tried my hand at making a treacle tart, but I shook it up by adding some apple to it to make something that was somewhat toffee apple inspired. I was delicious, but very much an experiment. I was going to try the recipe again, but then I just... forgot about it. Until this week, when my companion's mother invited me round for tea, and requested in jest some treacle tarts as payment for her company. So, here they are!


    However, these are a little different to traditional treacle tarts, insofar as they don't use breadcrumbs. I used breadcrumbs the last time, and found it a little squishy, and I wanted something with a little more firmness. Also, I don't eat bread so I find buying bread just to make breadcrumbs is sort of backwards. So, I researched what I could use instead, on many a baking forum, and one forum user suggested ground almonds.


    They turned out really well, and my companion's family liked them (so I think they think I'm good girlthing material for their child/sibling), the mother comparing them to something like a gingerbread tart. Generally speaking, treacle tart isn't spiced, but I like to add a little bit to mine just for flavour.

    FREE FROM
    ☑ Soya (check for soya lecithin)
    ☑ Yeast
    ☑ Wheat

    CONTAINS
    ☒ Eggs
    ☒ Dairy
    ☒ Gluten
    ☒ Nuts
    ☒ Refined sugar products

    INGREDIMENTS
    For four 4 inch (10 centimetre) tarts, or one 7 inch (18 centimetre) round tart

    For the pastry:
    • 1 ounce icing sugar
    • 2 ounces butter, at room temperature, cut into pieces
    • 3 ounces spelt flour
    • 1 ounce cornflour
    • 1 tablespoon cold milk/water

    For the filling:
    • 1 ounce treacle
    • 5 ounces golden syrup
    • 4 ounces ground almonds
    • 1 medium egg
    • 1 teaspoon lemon juice
    • 1 teaspoon lemon zest
    • ½ teaspoon ginger
    • ¼ teaspoon cinnamon 


    HOW-TO
    • Preheat the oven to 180˚C (350˚F, Gas Mk.4).
    • Put the butter, sugar, flour and cornflour in a mixing bowl and rub together with your fingertips into a crumble.
    • Mix in about a tablespoon of milk (or water), mixing with your hand, until you get a nice smooth, pliable dough.  Roll out to a ¼ inch (0.5 centimetre) thickness.
    • This amount will line one 7 inch round tart tin, or 4 four-inch tarts, and you don’t need to grease them. Cut out rounds to fit the individual cases, or press into a round tart tin, using the rolling pin to trim the excess falling over the edges.
    • Gently heat the treacle and syrup together until warm and runny, either in a saucepan over low heat, or in a heatproof jug in the microwave for about a minute on medium power.
    • Remove from heat, and stir in the ground almonds, spices, lemon zest and juice and mix thoroughly. Allow the mixture to cool slightly, so the almonds can soak.
    • Once cool enough to touch add the egg and beat immediately until smooth and pourable. Divide the filling among the individual pastry cases, if using, or pour into the large pastry case.
    • Bake for 20 to 25 minutes for four individual tarts, or 25 to 30 minutes for one large tart.
    • Allow to cool completely in the tin before removing. The pastry will slightly shrink, making it easier to remove.

    NOTES
    You can use any leftover dough to decorate the tarts. Traditionally, treacle tarts are decorated with a lattice pattern, the weaves sometimes being twisted. I used some cut outs because I didn’t have enough left over dough to make lattices.

    THIS TIME IN 2014: No blog
    THIS TIME IN 2013: Gingerbread of the Gingeriest Proportions (Wheat Free)

    Friday, 27 March 2015

    Bakewell Tart Slices (Wheat Free)

    Recently I've been feeling a little lacking in inspiration in the kitchen, as I've just been baking the same old things for months. So, I thought I'd try something completely new and different, and try my had at making some Bakewell tart, and here's the result!


    Bakewell is a town in County Derbyshire (pronounced DAR-bi-shur, for those who take that first letter E literally), and this confection is said to have been made there as far back as the mid 1800s. Nowadays, it is best known as a little individual cake manufactured by Mr Kipling, which has fondant icing and a glacé cherry on top.

    Although the original Bakewell tart recipe doesn't include the aforementioned icing and cherry, the combination of pastry crust, raspberry jam, and almond sponge (also known as frangipane) is absolutely delightful. It's one of my Dad's favourite things.
    Usually the name Bakewell tart conjures up the image of individual tarts in foil cases, but it is traditionally baked as a large round tart. However, I decided to go tray bake on it and make Bakewell slices.
    FREE FROM
    ☑ Soya (check for soya lecithin)
    ☑ Yeast
    ☑ Wheat

    CONTAINS
    ☒ Gluten
    ☒ Refined sugar products
    ☒ Dairy
    ☒ Eggs
    ☒ Nuts (Almonds)

    INGREDIMENTS:
    To make one 4x8 inch (10x20 centimetre) tart, which yields eight decent slices

    For the base:
    • 3 ounces (85 grammes) white spelt flour
    • 1 ounce (30 grammes) cornflour
    • 2 ounces (55 grammes) butter or margarine, at room temperature
    • 1 ounce (30 grammes) icing sugar
    • 4 tablespoons (60 millilitres) raspberry jam
    For the filling:
    • 1 ounce (30 grammes) ground almonds
    • 1 ounce (30 grammes) white spelt flour
    • 1/2 teaspoon baking powder
    • Pinch of salt
    • 2 ounces (55 grammes) butter or margaine
    • 2 ounces (55 grammes) caster sugar
    • 1 medium egg
    • Several drops of almond essence
    • 1 fluid ounce (30 millilitres; 2 tablespoons) milk, or water or milk alternative
    For the topping:
    • 4 ounces (115 grammes) icing sugar
    • 1 tablespoon (15 grammes) butter, or margarine
    • Water, to mix
    • 4 whole glacé cherries, halved

    METHOD
    • Preheat your oven to 180°C (350°F, Gas Mk.4, or moderate).
    • In a small mixing bowl, beat together the butter and icing sugar until fluffy with an electric mixer or wooden spoon. Add in the two flours and mix into a soft but crumbly dough.
    • Tip the dough into an ungreased loaf tin and press down into a smooth and even layer. To make it easier, moisten your fingertips to stop the dough sticking to your hands.
    • Spread the raspberry jam over the base in an even layer, like you were putting jam on toast. You don't want it too thick. Set aside.
    • In the same bowl, beat the butter and caster sugar until fluffy with the same beaters or wooden spoon. Beat in the egg until fully mixed, then then the almond essence. Different brands have different strengths, so go by taste if you don't have an issue with raw egg: it should have a good almondy taste that's not offensively strong.
    • Put the almonds, spelt flour, salt, and baking powder in a sieve. Sieve in half the ingredients into the bowl, mix in, then add the milk, mix in, then add the last of the dry ingredients and beat to a smooth batter.
    • Spoon the mixture carefully over the jam in blobs, and then smooth out without disturbing the jam too much. Even out the surface, and then put in the centre of the preheated oven and bake for 25 to 30 minutes.
    • Once removed from the oven, cool fully in the tin on a wire rack.
    • When your tart has completely cooled, make the icing. Melt the butter in a small bowl, and add in the icing sugar and mix until the icing sugar is moistened with the melted butter. Add water, a teaspoon at a time, until it is a thick but spreadable icing. Spread all over the top of the tart, and press 8 glacé cherry halves into the top of the tart, spaced evenly. 
    • Allow to set for at least 3 hours. Cut unto eight even slices, trimming the sides if you like to make it neater.

    The combination of crumbly, butter pastry, with the moist soft almondy sponge, and the tartness of the fruity jam, topped off with the campness of fondanty icing and glacé cherries, is absolutely wonderful; and quintessentially English. This turned out so well, and it went down very well with the family.


    THIS TIME IN 2014: Spanner in the Works: White Spelt Flour No Longer Exists
    THIS TIME IN 2013: Basic Sponge Cake (Wheat Free)

    It's been a while! Happy 9th Anniversary!

      It's been a while. The past two years have been a helluva a ride. This year is gonna hold some big changes for this blog. I'm comp...