Showing posts with label fairy cake. Show all posts

Wednesday, 1 August 2018

Perfectly Rounded Cupcakes (Wheat Free with Dairy Free Option)

I was starting to worry about my cupcake fixation: I thought I'd need some kind of psychological intervention at some point. But, as it turns out, engaging in a compulsive and obsessive trial and error process until you get the results you want works!

Sure, my house may have been littered with cupcakes for a solid fortnight, and that was after palming them off continually on my fiancé's coworkers, but it meant that I finally cracked the code to perfectly rounded cupcakes like these:


Aren't they a thing of beauty? When this batch came out of my mother's oven I was dancing with glee, and when I was able to replicate the results in my own problematic home oven I was even more excited. I learned a few things along the way about what was causing my cupcake problems.

I learned:
  • From my tests, using a egg-foam (sabayon) based cake mixture gets the most consistent and roundest results. Whenever I used a butter-based creamed mixture, like Madeira, the tops peaked and cracked open, producing a mostly flat cupcake with a nose.
  • However, using an egg-foam technique where the egg whites were whipped separately and added to the mxiture later made cupcakes that shrank after cooking. It also made very dry cupcakes.
  • I found that using baking powder sometimes made the cupcakes rise too fast and then collapse immediately after baking. The combat the issue, I used baking soda instead, and the results were massively improved. Baking soda is a slower acting raising agent, which in this scenario I think helped a lot.
  • Melted butter made a deliciously rich cake, but they went hard once they were cold and staled quickly. Using all sunflower oil made for a lovely moist cake that stayed moist for days on end, and had a nice soft springy texture.
So, the main takeaway is use baking soda instead of powder, whip the eggs and sugar together as a base, and don't overwhip the eggs.

I am so pleased that I found the way to make lovely round cakes. Now, I have to experiment with storage, freezing, and defrosting: I'll be a monkey's uncle before I make and ice 120 cakes the day before my wedding.

~~ ^ _ ^ ~~

DIFFICULTY
Requires whipping eggs and gently folding

TIME
About an hour

RECIPE RATING
Intermediate

~~ ^ _ ^ ~~

INGREDIMENTS

For 12 cupcakes

2 medium (US Large) eggs, room temperature
4 ounces (115 grammes) caster sugar
2 ounces (55 grammes) sunflower oil
2 tablespoons (30 millilitres) milk, or milk alternative, room temperature
1 or 2 teaspoons (5 or 10 millilitres) vanilla essence
4 ounces (115 grammes) plain white spelt flour
¼ teaspoon (2 grammes) bicarbonate of soda
Two pinches of salt

~~ ^ _ ^ ~~

METHOD
  • Line a 12 hole muffin tin with regular cake cases, measuring about 2 inches (5 centimetres) across the base. Preheat the oven to 170°C (340°F, Gas Mk.3).
  • Set a sieve over a bowl, or a piece of baking paper, and add in the flour, bicarbonate of soda, and a pinch of salt. Sieve thoroughly and set aside.
  • In a mixing bowl, whisk the eggs, a pinch of salt, and the sugar with an electric mixer for about 3 minutes, or until the mixture has turned a pale yellow colour and has doubled in volume.
  • With the mixer still running, pour in the oil gradually, followed by the milk. Mix only enough to combine. 
  • Sieve over the flour mixture, and fold through quickly with a balloon whisk. Stir until the flour is completely absorbed, and the mixture has a ribbon consistency: if you lift the whisk, the mixture will run off the end like a ribbon.
  • Divide the mixture between the cases and bake on the centre shelf of the preheated oven for 14 to 16 minutes, until the tops are perfectly rounded the the centre of the cake springs back when gently pressed with your little finger.
  • Take the cakes out of the tin and transfer to a wire cooling rack. Cool completely before decorating, about 45 minutes to an hour.

VARIATIONS


  • For chocolate cakes, replace an eighth of the flour with cocoa powder.
  • For lemon or orange flavoured cakes, add in a teaspoon of lemon or orange zest.
  • For toffee flavoured cakes, use soft brown sugar instead of caster sugar. If you like, you can replace half of the oil with cooled melted butter.
  • For coconut cakes, add in an ounce (30 grammes) of desiccated coconut and use coconut milk.
  • For coffee flavoured cakes, you could add in a teaspoon (5 millilitres) of ground instant coffee with the flour, or you could use espresso in place of the milk.
  • If you'd like a red velvet style cake, you can double the vanilla, replace a teaspoon of flour with a teaspoon of cocoa and add some red food colouring. For extra points, you could use buttermilk instead of milk.
  • You could also add any kind of ground mixed spices you like: add in 1 to 2 teaspoons (5 to 10 millilitres) of ground spice per dozen cakes.
  • You could also add in mix-ins for a bit of texture interest: chopped nuts, dried fruit, chocolate chips. For a dozen cakes, add 2 ounces (55 grammes) of mix-ins, but make sure they are tossed in a little flour before adding to the cake mixture.
  • Of course, any of the above ideas can be combined: for example you can add mixed spice to a brown sugar cake to make a gingerbread cake, you could add orange zest to a chocolate cake.

STORAGE
These keep well in a completely airtight container, stored at room temperature, for up to 5 days. After 5 days, they start to go dry. These can be frozen, based on previous experience of using this style of cake, for up to 3 months. In the spirit of full disclosure, I have frozen these for 6 months and they've been completely fine on defrosting, but were only edible for about 2 days before going completely stale.

THIS DAY IN 2014: Anniversary Gift: Chocolate Dipped Gingerbread Teddies (Wheat Free)
There were no blogs on this day in 2013, 2015, 2016, nor 2017

Saturday, 28 July 2018

I've Got OCD: Obsessive Cupcake Disorder!

I've made about four dozen fairy cakes over the past few days, possibly more because I've been sending the excess cakes to work with my fiancé.

I'm going a little mad in the search for the perfect fairy cake: fluffy yet moist, tall and rounded, and deliciously sweet but not sickly.

However, the oven in my current house has become my worst enemy: recipes that worked like a treat in my mother's and two of my previous homes' ovens are routinely failing in my current oven. I think all my experiments are to be done anymore in my mother's oven because I no longer have access to the ovens in my previous rental homes, obviously!


Here is a batch of cupcakes using the traditional pound cake recipe: a quarter pound each of sugar, flour, eggs, and butter. I'm not a fan of pound cake, personally, but normally it turns out nicely in my mother's oven. These however were simultaneously peaked and flat, and dense in texture.


This batch was made using my Madeira cake recipe. These too had noses, which I couldn't work out how to prevent.


On the right hand side is a batch of cakes using the light sponge cake recipe that I normally use for fairy cakes, which normally works in my mother's oven, but in my oven they were dry, dense, and flat.


This final batch is the same recipe, however the baking powder in the recipe was replaced with a quarter teaspoon of baking soda for every quarter pound of flour. The rise on these cakes was much more even, but in fear of the cakes deflating after coming out of the oven I overcooked them and they were dry.

I think I'll have to redo all my tests in my mother's oven and see what the issue is because I'm at my wit's end. I cannot find a way to prevent my cakes from:

  • Either rising flat, or peaking and growing 'noses'
  • Being too dense, or too dry
  • Shrinking or flattening after cooking.
The tests continue......

Monday, 22 May 2017

Happy World Goth Day! (Goth Fairy Cakes)

Happy World Goth Day, everyone! A day to celebrate the colour black, bats, and everything morbid and macabre!


The first time I wore a completely black outfit, I was about fifteen years old. That was the start of a love affair with the gothic that has never stopped. Once you embrace black, you can't go back! My wardrobe and drawers are populated with black, grey, red, blue, purple, and the odd neon accent; leather, fishnet and opaque coloured tights, tartan, and pirate paraphernalia, too. I started my collection of piercings when I was 17 (12 in total, so far), and my tattoos followed later on at 25. Neither collection is finished.


So, as you can probably guess, Goth Day and Halloween are my favourite times of the year. This year, however, is the first time I've got around to wearing false vampire teeth! When I say teeth, I mean some white false stiletto style fingernails stuck on with denture adhesive. Does the job though!


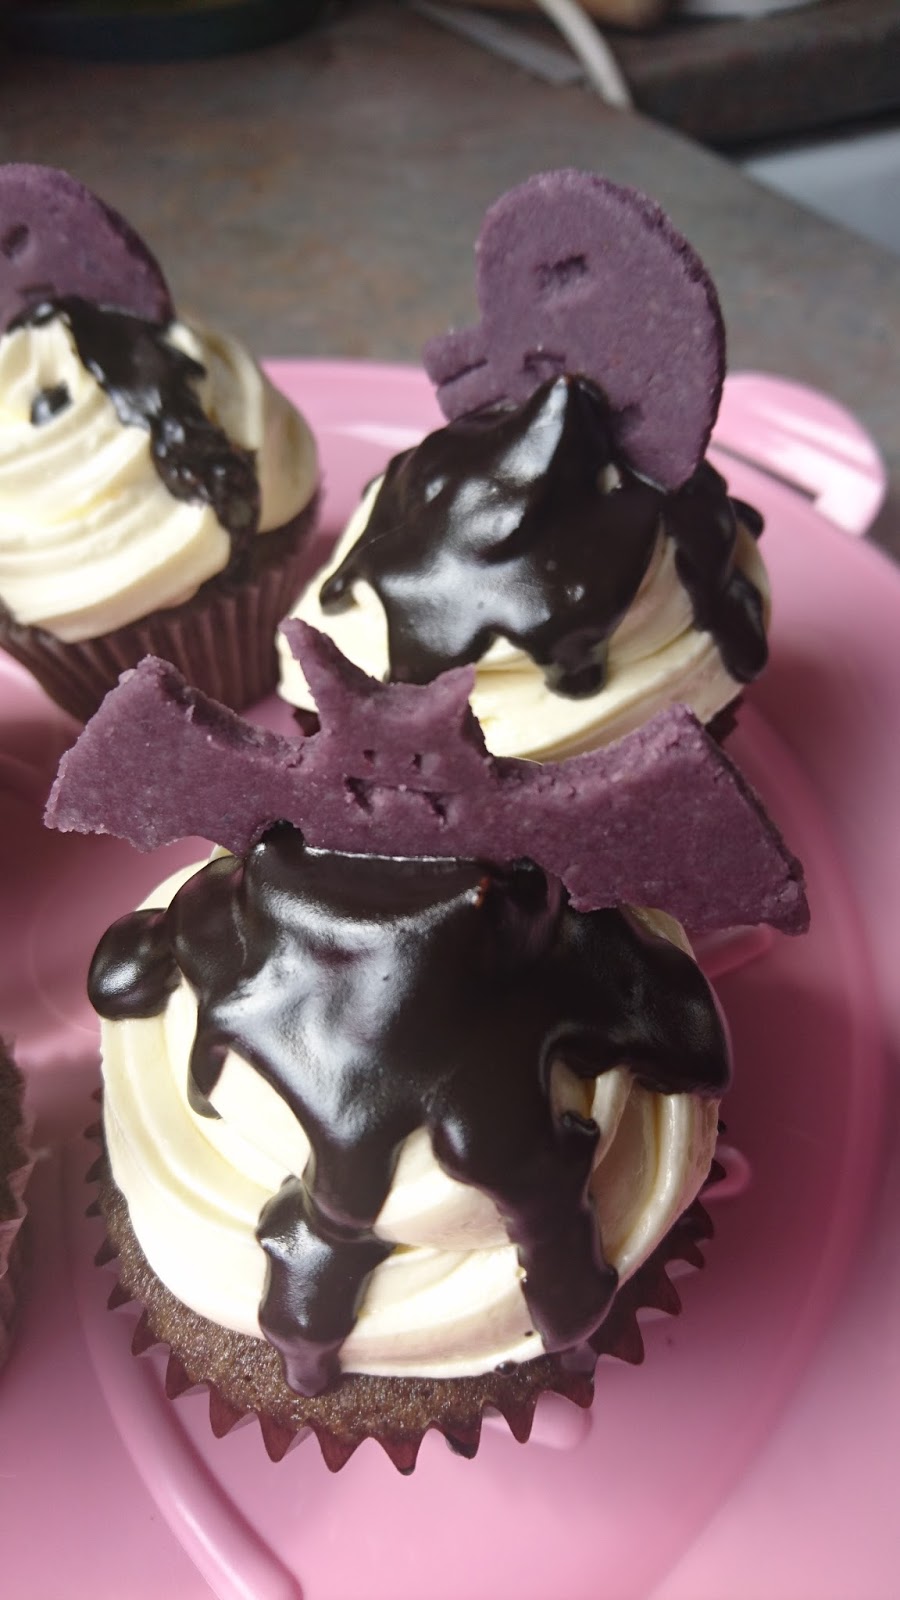
To celebrate, I made some lovely purple velvet fairy cakes, swirled with buttermilk-spiked cooked milk icing, drizzled in super-black chocolate glaze, and crowned with a marzipan batty-bat.

I made the cakes using my red velvet cake recipe, using two eggs and scaling the other ingredients down accordingly, and using purple food colouring instead of red; this amount made 12 cakes. I topped off the cakes with the same icing as the red velvet cake too, only I used half the amount.


The chocolate glaze was made using 2 ounces (55 grammes) dark chocolate, 1 ounce (30 grammes) butter, half a tablespoon of black liquid food colouring, and half a tablespoon of milk. I melted all these ingredients together in a bowl in the microwave, heating for 15 seconds at a time and stirring between. I allowed it to cool down enough to pour over the icing swirls without melting it.

I coloured some marzipan purple, rolled it out to roughly a quarter inch (5 millimetres), and cut out bats and skulls. I drew the designs freehand on some card and cut out them out to make the templates.

The outside crusts of the cakes aren't very purple, I must admit. But the insides are suitably luminous! I was very pleased with how these turned out, and I'm even more pleased about the Goth ensemble with false teefs!

THIS TIME IN 2016: Mocha Cupcakes: Chocolate and Coffee Join Forces (Gluten Free; Dairy Free Option)
THIS TIME IN 2015: Super Moist and Rich Chocolate Cake
THIS TIME IN 2013: Coconut Custard Creams (Wheat Free)
There was no blog this time in 2014.

Friday, 12 August 2016

Cherry Chocolate Fairy Cakes

Whether it's black forest gateau, liqueur chocolates, covered berries, chocolate bars, or biscuits and cakes, chocolate and cherries belong together. Forever, and always.

I've done the black forest thing a few times, but this time I thought I'd try something a little bit different. In the traditional gateau, it's chocolate cake, fresh cream, and fresh cherries and cherry jam, whereas this time I thought I would try mix the cherry and the cream together, in a cherry butter cream.

However, here in Ireland, cherries are incredibly expensive. Because they have to be imported from southeastern England or the continent, they can be up to €13 ($14.50, £11.30) per kilogram. Also, there's no such thing as cherry essence in the shops. So, I had to improvise.

Here, we can buy cherry juice drink. It's generally in the fruit juice and juice drink section of the supermarket. The one I buy is 25% cherry juice. Of course, you can't add cherry juice directly to the buttercream, otherwise it'll be too runny, but if you reduce it to a syrup it works just as well.

If you have access to cherry essence or flavour oil, you can just use that instead.

FREE FROM
☑ Soya (check for soya lecithin)
☑ Yeast
☑ Wheat
☑ Nuts

CONTAINS
☒ Eggs
☒ Dairy (dairy substitutes can be found in italics)
☒ Gluten
☒ Refined sugar products


INGREDIMENTS


For 12 standard fairy cakes
  • 3 ounces (85 grammes) white spelt flour
  • 1 ounce (30 grammes) cocoa powder
  • ½ teaspoon (3 millilitres) baking powder
  • Pinch of salt
  • 2 medium eggs
  • 4 ounces (115 grammes) caster sugar
  • 2 ounce (55 grammes) sunflower oil
  • 2 fluid ounces (30 millilitres) warm water
  • 1 teaspoon (5 millilitres) vanilla essence

For the icing:
  • 3 ounces (85 grammes) butter, softened or margarine
  • 3 ounces (85 grammes) block vegetable fat, softened
  • 12 ounces (340 grammes) icing sugar, sifted
  • 4 fluid ounces (120 millilitres) cherry juice drink, at least 25% fruit juice content, like this one
  • 1 teaspoon (5 millilitres) vanilla essence
  • Red and blue food colouring

To make the chocolate coated cherries,
  • 12 glacé cherries (choose the roundest, prettiest ones from the tub)
  • 1 ounces (30 grammes) dark chocolate
  • 2 teaspoons (10 millilitres) sunflower oil

HOW-TO

First off, make the chocolate cherries,
  • Wash and dry the glacé cherries to remove all the excess syrup.
  • To make the coating, melt the chocolate and oil together in a cup or small bowl, either in the microwave in 30 second increments, or over a pan of simmering water.
  • Line a small tray or chopping board with a sheet of non-stick baking paper.
  • Using a cocktail stick, pick each cherry up through the hole in the top and dip in the chocolate. Slide each cherry off onto the paper lined tray. Refrigerate for about an hour.

Then, prepare the syrup for the icing,
  • In a small saucepan, boil the cherry juice until reduced by half. It should be slightly syrupy.
  • Leave the syrup aside to cool completely

Then, make the cakes,
  • Make the cake mixture according to this recipe, using a 12 hole muffin tin lined with pink cake liners (or white, if you can't get green). Divide the mixture between all the cases, and bake at 180ºC (350ºF/Gas Mk. 4) for about 20 minutes. Once cooked, transfer the cakes to a wire rack and cool completely.

Now, assemble the masterpieces,
  • To make the icing, beat the butter and fat together with an electric beater, or with a wooden spoon and a lot of elbow grease, until light and fluffy and well combined.
  • Add in the vanilla essence, and about 3 tablespoons (45 millilitres) of the cooled cherry syrup and half the icing sugar and beat again until fully combined.
  • Add the rest of the icing and continue to beat until you get a nice smooth and creamy icing. If you think the icing is too stiff, add cherry syrup until it's the right conistency.
  • Add the red colouring a drop at a time until it's a deep pink colour, then add a drop or two of blue colouring to give it a slightly darker, more cherry like shade.
  • Fit a piping bag with a medium or large star nozzle, and pipe swirls on top of each cake. I start in the centre of the cake, swirl around the edge, then continue to swirl upwards to have two layers and a peak on top.
  • Pop a chocolate glacé cherry on the top of each cake. You could add some sprinkles if you like, too.


The cherry taste in the buttercream is nice and subtle, and a lot more natural than the intense -- almost synthetic -- taste of a flavour oil or essence. And the chocolate coated glacé cherries are a nice touch, and I think I'll be repeating that in the future.

Friday, 20 May 2016

Mocha Cupcakes: Chocolate and Coffee Join Forces (Gluten Free; Dairy Free Option)

Greetings from the UK!

I'm currently on holiday visiting relatives in Kent, so my recipes will be few and far between. My cousin has a fantastic new kitchen which is great to cook in... so I'll probably be experimenting a bit while I'm here...

Looking for a cutesy cupcake project? Look no further! I decided to make some of these little lovelies for a film night I was having at mine. I needed to stay up all night to be at a gig which started at 2:30am (it was for a worthy cause), so I made some snacks for the journey. I actually didn't last: I had to go to bed around 11:30pm. So, behold the mocha cupcakes!


It was actually last week that this happened, but I didn't get around to writing this post until now: things have been busy getting ready to go abroad, going to visit friends in Roscommon, and performing midnight gigs.

I was wandering through Tiger -- which is essentially a slightly posher and more Scandinavian discount shop -- and found these lovely dark chocolate 'coffee beans'. Originally, I thought they were chocolate coated coffee beans, which are the business, but they weren't: they were coffee infused 52% dark chocolate shaped in little bean shapes. And in fairness I think that's better.


I've also been practising my icing swirl technique recently, and felt like a bit of an eejit: I never really realised that to make tall icing swirls, you need to pipe a dollop in the centre of the cake, and swirl around it. Obvious when you think about it... but it had never occurred to me to do it like that.

To make these, I used my go to light and fluffy sponge cake mixture, as opposed to the slightly denser cake mixture I use for layer cakes. I replaced the cornflour with cocoa powder to make the cakes chocolate flavoured, and I also used gluten free plain flour instead of spelt flour. They worked out really well! Dare I say, that recipe works better with gluten free flour than with spelt or wheat flour. 

I then made some buttercream, using strong espresso to taste, then adjusting the consistency -- if needed -- with some milk. Swirling on the icing using a closed star nozzle, I topped it off with a coffee bean chocolate.


I think I might make some when my cousins come over for dinner on Thursday, if they're fans of coffee and chocolate.

Tuesday, 10 May 2016

Birthday Cupcakes and Centre Piece Cake: Wheat-Free Lemon Sponge

As I have mentioned in many, many, many blog posts before now, when one has made at least five birthday cakes a year for roughly eleven years, you run out of ideas after a while. Sometimes, you need to shake it up a bit.


I decided this year to act on inspiration from a wedding I was at a few years ago: they had no big wedding cake, but they have a whole ream of little fairy cakes, iced with white buttercream and decorated with fondant shapes following the theme of Alice in Wonderland. They had a little centre piece cake that they could cut for the photos, but because the cakes were all individual there wasn't the hassle of cutting up a whole cake and serving it to all the guests.

I decided to take this inspiration and use it to make my mother's birthday cake this year: I made a small cake -- using the same tin as I used for the photoshoot cake -- and then made a load of little cakes to go with it, one for each guest at the birthday dinner.

The photos for this one aren't so great because it was the evening time when I got around to take them: my phone battery is cat these days, and that's what I use for my camera.

This was a lemon cake with nice zingy icing, like last year. My mother like lemon...

FREE FROM
☑ Soya (check for soya lecithin)
☑ Yeast
☑ Wheat
☑ Nuts

CONTAINS
☒ Eggs
☒ Dairy (dairy substitutes can be found in italics)
☒ Gluten
☒ Refined sugar products


INGREDIMENTS


For one 4 inch sponge cake:
  • 1½ ounces (40 grammes) white spelt flour
  • ½ ounce (15 grammes) cornflour
  • ½ teaspoon (3 millilitres) baking powder
  • Pinch of salt
  • 1 medium egg
  • 1½ ounces (40 grammes) caster sugar
  • 1 ounce (30 grammes) sunflower oil
  • 1 fluid ounce (30 millilitres) milk, or milk alternative
  • 1 teaspoon (5 millilitres) vanilla essence
  • Zest of half a lemon
  • Optional: 2 tablespoons of poppy seeds, or hundreds and thousands, for visual interest
Repeat this quantity of batter to make 6 individual fairy cakes, meaning you will need double the above recipe overall.

For the icing:
  • 6 ounces (170 grammes) butter, softened or margarine
  • 12 ounces (340 grammes) icing sugar
  • Juice of half a lemon
  • 1 teaspoon vanilla essence
  • 1 to 2 tablespoons (15 to 30 millilitres) milk or milk alternative,
     to adjust the consistency
  • Hundred and thousands
  • A bar of white chocolate

HOW-TO

First, make the centre piece cake,
  • Make the cake mixture according to this recipe, using a greased and floured 4 inch round cake tin. I use a tin from a shop-bought steamed pudding. Bake at the recommended temperature for about 25 to 30 minutes.
  • Bake according to the recipe, then once it is out of the oven immediately drop onto the work surface from a height of roughly a foot (30 centimetres); that will reduce the chances of it shrinking. Allow to cool completely.

Then, make the fairy cakes,
  • Repeat the above recipe, lining a muffin tin with 6 large cake cases. Use yellow ones if you can find them.
  • Divide the recipe between the cake cases, which should be at three-quarters full. Bake this time at 190ºC (375ºF, Gas Mk.5) for about 15 minutes.
  • Once cooked, drop them on the work surface also. Transfer to a wire rack to cool completely.

Now to decorate,
  • Make the buttercream according to this recipe, if you don't know how to make buttercream already, starting off with the lemon juice and only adding the milk if the consistency needs adjusting.
  • Use just under a half of the icing to decorate the fairy cakes. Sprinkle the tops with a small amount of hundreds and thousands, then shave some white chocolate onto them using a vegetable peeler directly on the chocolate bar.
  • Cut the dome off the cake, cut it in half, then place upside down on the serving platter so the base is now the top. Fill and crumb coat then chill for an hour, then coat with a second coat, leaving about 6 ounces (170 grammes) of icing to pipe the rosettes around the top and bottom.
  • Before you pip the rosettes, cover the top of the cake with the sprinkles, leaving about half an inch of a border (about a centimetre), then pipe the rosettes on top. Pipe on in the middle to hold the candle.
  • Allow to set completely, either in the fridge for up to an hour, or on the work surface for up to 3 hours.

Thursday, 28 January 2016

200 Recipes! Strawberry Fairy Cakes (with Meringue Buttercream)

Happy 200th Recipe!!

Today marks the 200th recipe (technically the 201st post, but the first post I ever wrote was an introductory one), so I thought I'd do something that I've always wanted to do but have actually never done: strawberry cupcakes.


When I was in college, the canteen served these super cute pink-iced fairy cakes. They had tooth-achingly sweet buttercream, flavoured with strawberry and coloured pink, and were decorated with little pink and white heart shaped sprinkles (like the ones I buy from Lidl; I think you've been rumbled, catering company!). The cake was just simple vanilla sponge. There's something wonderful about synthetic strawberry flavour: it conjures up images of childhood, and even as an adult who knows it's cheap and nasty I just can't help but love it.


I know you're all thinking, how can you have been running a bakery blog for nearly 3 years and never have done a simple strawberry cupcakes recipe? Unfortunately, here in Ireland strawberry essence is hard to come by, and usually very expensive, so I just forgot about it for quite some time.

However, the other day I was catching up on my YouTube channel subscriptions, and saw a woman making icing using strawberry milkshake powder, and I suddenly felt like a bit of an idiot: that stuff is super cheap and easy to come by, and I actually had used it once to make icing when I was a teenager.

So, I went to the shop to buy some, and inspected the ingredients: it's pretty much all sugar, except for less than one-percent strawberry powder, and some flavouring. This makes it easy to swap out for sugar in icing recipes.


This is my first foray into meringue buttercream, and I will say, it's harder than it looks. I based my creation on this recipe, halving the butter and adding it in in thin slices instead of chunks, and increasing the sugar. It made some delicious icing, but the making of it was quite complicated. I will in the future be tampering with it and trying to find a way to make it easier: I found that it kept collapsing and I had to refrigerate it to make it whip-able.

I also decided to chance putting some jam into the middle of each cake before baking, but the jam was heavier than the cake misture, so it sank to the bottom. It still tasted nice, though!


INGREDIMENTS
For 12 large cupcakes
  • 6 ounces (170 grammes) white spelt flour
  • 2 ounces (55 grammes) cornflour
  • 1½ teaspoons (7 millilitres) baking powder
  • 6 ounces (170 grammes) caster sugar
  • 4 medium eggs
  • 2 ounces (55 grammes) butter, or block margarine
  • 2 ounces (55 grammes) sunflower oil
  • 1 teaspoon (5 millilitres) vanilla essence
  • 3 tablespoons (45 millilitres) strawberry jam, sieved

For the meringue buttercream (EXPERIMENTAL; correct recipe to follow)
  • 2 medium egg whites
  • 2 ounces (55 grammes) strawberry milkshake powder
  • 2 ounces (55 grammes) white caster sugar
  • 2 ounces (55 grammes) butter at room temperature, cut into thin slices


HOW-TO

To make the cakes,
  • Line a 12 hole muffin tin with large paper cases, and preheat your oven to 180°C (350°F, Gas Mk.4, or moderate).
  • Make the cake mixture following this recipe (leaving out the jam). Divide equally between the 12 cases: they should be about three-quarters full. Swirl half a teaspoon of strawberry jam in each cake, and tap the pan off the work surface to release all the bubbles.
  • Bake for 20 to 25 minutes, or until well mounded and springy to the touch. Take out of the oven, transfer to a wire rack to cool completely.

To make the icing,
  • Put the strawberry milkshake powder, caster sugar, and egg whites in a large heatproof mixing bowl. Heat over a saucepan containing about an inch (2 centimetres) of simmering water. Stir until hot to the touch, and when you rub the mixture between your fingertips you can feel no grains of sugar.
  • Take off the heat, and beat with an electric whisk until you have a super fluffy, big, soft meringue that is completely cold; it should have at least tripled in size. This can take anywhere from 7 to 15 minutes, depending on the strength and quality of your whisk.
  • With the whisk still running, add in a slice of butter at a time; each slice should be no more than half an ounce (15 grammes). Once the first slice is completely beaten in, add the next one, and so on. Take it slowly: otherwise it might collapse.
  • If it does collapse, no worries: finish adding the butter, then refrigerate for about 20 to 30 minutes and beat again, and it should be lovely and fluffsome.
  • Put into a piping bag fitted with a close star nozzle, and pipe onto the cooled cakes as you please. Decorate with sprinkles of your choice!

As you can see in this picture, I also made some chocolate ones, which were fabulous. The meringue buttercream is much lighter and creamier than traditional buttercream, so I actually prefer it, however I need to work on my technique. Watch this space...


Friday, 23 January 2015

Malted Chocolate Fairy Cakes (Wheat Free)

Happy Friday all!

Since yesterday's revelation (and the weighing scales' telling me that Christmas gave me a few extra pounds to carry around) I've decided to retrain myself into eating a little better and in a more balanced fashion. Of course, that doesn't mean I'll give up baking, but it does mean that for a little while I want to rid myself of anything tempting.

Following on from my detox, I want to start eating a little better. I have designed for myself three meal menus that I will cycle through 4 times each, which gives me a solid 12 day start to forming new eating habits. I hope to reduce my calorie intake by 300-500 calories a day, and up my exercise by 30 minutes a day. I don't want to shock my body with some ludicrous fad diet, but make small sustainable changes over a long period of time so that before long eating in a balanced way, and curbing my sweetie consumption,will become second nature.

But before that, here is today's creation: malted chocolate fairy cakes, with malted glacé icing!


The camera on my phone loves washing everything out, so I've had to exercise my leet Photoshop skillz recently. I may have to look into using a different camera, or improving my lighting. Either one.

I've always loved the taste of malt: as a child, I loved drinking mugs of Ovaltine before bedtime, and eating malted milk biscuits, which were shortbread style biscuits that had been moulded before baking to show a rural scene with grazing cows. For those who don't know, Ovaltine is a malted hot chocolate drink that is traditionally drunk to aid sleep, and it comes in both chocolate and plain varieties. I drank that plain one for the years that I had a chocolate allergy, and to be fair I preferred the plain one. When I moved to Limerick city from the countryside of West Clare, a friend of mine introduced me to a chain of restaurants called "Eddie Rockets", which are modeled on the American style burger joint diner. They sold malted milkshakes, and their strawberry malt was to die for. Nowadays, I opt for the espresso or peanut butter malt, and on days when I'm feeling particularly carefree, Oreo biscuit malt.

These were a little bit of an experiment: I decided to see if my usual sponge cake recipe works with only butter instead of a mix of butter and oil. They did, but they were much more dense and firm than my usual fluffy cakes. Doing it this way would actually be much more suitable for layer cakes, because the firm texture of the cakes makes them easier to slice and hold their shape.

For this recipe, which yielded six cakes, I used my usual sponge cake recipe using 2 medium eggs, 2 ounces of melted butter, 3 ounces of white and brown sugar combined, 3 ounces of white spelt flour, half an ounce of cornflour, 2 tablespoons of Ovaltine, 2 tablespoons of water and a pinch of salt.

I then made a simple glacé icing for them by melting 1 ounce of butter and 1 ounce of barley malt extract together in a microwave safe bowl in 20 second blasts on "Defrost", then working in 2 ounces of icing sugar until it was nice and runny. While it was still warm, I poured it onto the cooled cakes and let it comfortably glaze the cakes.

These were nice and tasty: a delicious rich malty taste, and a lovely sticky glaze. Although when I took them to my brother's house the tin wasn't big enough, and the cakes stuck to the lid; oops!

FREE FROM
☑ Soya (check for soya lecithin)
☑ Yeast
☑ Wheat

CONTAINS
☒ Cocoa
☒ Eggs
☒ Gluten
☒ Dairy
☒ Refined sugar products


THIS TIME LAST YEAR: Coffee and Walnut Gateau (Wheat Free)

Monday, 12 January 2015

Chocolate Brownie Icing

Over the course of my bakery days, I had tried a lot of recipes for chocolate fudge icing, which can double function as glaze. As a child I had a book called "I Can Cook", which was a little paper back book with about 16 pages of easy recipes, one of which was a chocolate fudge icing. It was basically chocolate, butter, sugar and milk, but it required making a simple syrup with the milk and sugar, and it used an inordinate quantity of sugar and milk. It makes a lovely sticky sweet fudgy icing that sets beautifully thick for spreading, but I don't think it really works well as a brownie glaze.

I then watched a great video (in German) about how to make American style chocolate cake, and in it she included a recipe for "Schokocreme", which is basically chocolate fudge icing. It is super, super, too rich, as it uses equal quantities of chocolate and butter. Here in Ireland, the commonest form of butter is salted, meaning the finished icing was quite salty as well. I then put my thinking cap on to see if I could find a middle ground between too much sugar and too much butter.

So, I tried a few variations on a theme, until I settled on this quite effective recipe:

  • 4 parts chocolate (dark, milk, or white)
  • 2 parts icing sugar
  • 2 parts butter (or margarine)
  • 1 part milk (or coffee works too)
To make, simply melt the butter, sugar, and milk together in a microwave safe bowl on 1 minute bursts on "Defrost", or in a bowl over a pan of simmering water; once melted, beat in the sugar. What's that I hear you say? Is that it? Yes. Yes it is.


For a tray of brownies, which is roughly a 10 inch (25 centimetre) square in my case, 4 ounces of chocolate, 2 ounces each of butter and sugar, and 1 fluid ounce of coffee works really well for me to pour on top of the brownies while they're still hot, and then the whole batch cools down together. This means that the frosting fuses nicely to the cake surface, preventing the set icing from peeling off in layers, which can sometime happen when hot icing is poured onto cold cake.

This makes a nice mixture that's both pourable as a glaze when hot (which I use for topping brownies, as pictured), and spreadable as an icing when cold. Also, you can use it as a whipped filling if you beat it when it is fully cold.

While its wet, you can sprinkle things into it and they set into it perfectly. This icing works really well also as a piped icing for fairy cakes, due to its decadent nature.


It has a slightly soft, impressionable texture when set, and is great for decorating tray bakes. This seems to work equally well with dark, milk or white chocolate, whereas other recipes I've tried in the past really don't work with white chocolate, given its high fat content.


Monday, 15 December 2014

Fairy Cakes with Buttercream (Gluten-, Dairy-, and Egg Free)

I have a lot of friends (and a mother) with a lot of allergies, and every friend has their own unique combination of allergies. So, I decided to kill all the birds with one stone by making an allergen free batch of fairy cakes, drawing on a few recipes I found online. It took a few attempts, but they turned out nicely!


These cakes are gluten-, egg-, and dairy free, meaning basically anyone can have them; the buttercream is made using vegetable margarine, too.


I did a lot of research before I made these. I remember last year sometime being introduced to the idea of American wacky cake, which was a recipe invented during the Depression era when butter and eggs were in short supply, making it suitable for dairy and egg allergy sufferers. I then decided to see if making wacky cake with gluten free flour would work, and it did. I followed the first recipe (which I found here) to the letter, but when made with gluten free flour it was a little greasy; I retried using a little more flour, and it was a success.


Now, I use self-raising gluten free flour, which has added raising agent and a touch of xanthan gum. If you can only find plain gluten free flour, per 6 ounces (170 grammes) of plain flour add in 2 teaspoons (10 millilitres) baking powder, and 1/4 teaspoon (2 millilitres) xanthan gum, and sieve together.


FREE FROM
☑ Soya (check for soya lecithin)
☑ Yeast
☑ Eggs
☑ Gluten

☑ Dairy

CONTAINS
☒ Refined sugar products


INGREDIMENTS:
  • 6 ounces (170 grammes) self-raising gluten free flour (I use Doves Farm brand)
  • 6 ounces (170 grammes) caster sugar
  • 3 tablespoons (45 millitres) cocoa powder
  • Pinch of salt
  • 1 teaspoon (5 millilitres) vanilla essence
  • 5 tablespoons (2½ fluid ounces; 75 millilitres) sunflower oil
  • 8 fluid ounces (240 millilitres) water

METHOD
  • Preheat oven to 180°c (350°F, Gas Mk. 4) and line a 12 hole muffin tin with paper cases.
  • Sieve the flour, sugar, cocoa, and salt together into a large mixing bowl; make a well in the centre, and add the vanilla, oil, and water.
  • Mix gently with a wooden spoon until the flour it just moistened. Don't over mix, or the cakes will by dense and dry.
  • Divide the mix between the cases, filling each case to three-quarters full. Bake in the preheated oven for 15 to 20 minutes, or until spongy to touch and a cocktail stick comes out clean when poked through the middle of a cake.
  • Allow to cool in the tin for about 5 minutes before moving the cakes to a wire rack. Allow to cool completely before icing.


I made some with the cocoa, and some without. The plain vanilla cakes I iced with raspberry buttercream, and the chocolate cakes I iced with chocolate buttercream. To make the buttercream, use the instructions inthis blog entry, and the ingredients listed below.

RASPBERRY BUTTERCREAM
  • 1 ounce (30 grammes) vegetable margarine
  • 1 ounce (30 grammes) raspberry jam
  • 4 ounces (115 grammes) icing sugar
  • 1 or 2 teaspoons warm water

CHOCOLATE BUTTERCREAM
  • 2 ounce (55 grammes) vegetable margarine
  • 4 ounces (115 grammes) icing sugar
  • 1 tablespoon (15 millilitres) cocoa powder
  • 1 or 2 teaspoons warm water


Fit a piping bag with a half-inch (1 centimetre) closed star tip, and fill with one of the buttercreams. Pipe roses onto the appropriate cakes, by starting in the centre of each cake, piping outwards in a tight spiral until you have covered the whole top of the cake. The result should look like a rose.

And there you are! Some delicious gluten free vegan fairy cakes. I am yet to experiment a bit more with this recipe and make some more adventurous concoctions, but these are a good start. I bought these really pretty boxes in the local Dealz (PoundLand) and they went down a real treat.


Friday, 24 October 2014

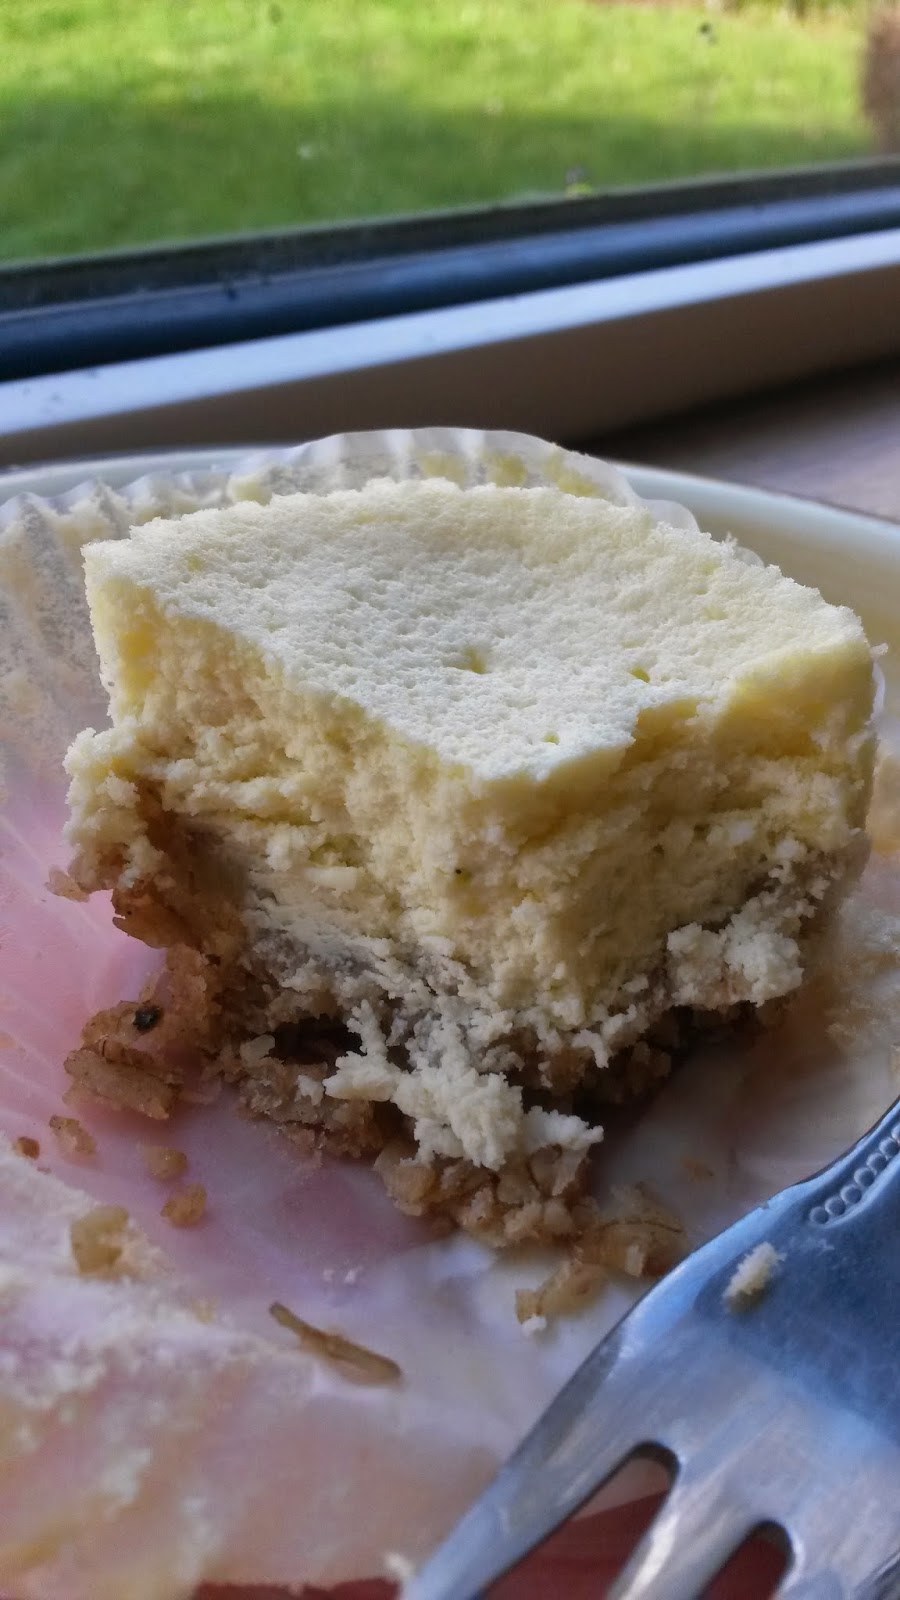
Coconut Lime Mini Cheesecakes (Wheat-Free)

Seeing as my Millionaire's Cheesecake recipe is my blog's most popular post, accruing over 100 views as of this day, I kinda gathered that people like cheesecake. So, I thought I'd share with you another delicious, Caribbean inspired recipe, Coconut and Lime Mini Cheesecakes!


I've always loved the combination of coconut and lime, sometimes with ginger and sometimes with rum and brown sugar, but the richness of the coconut and the freshness of the lime go so well together. In fact, outside the world of sweets, it's a fabulous combination for flavouring white rice as a side dish for marinaded chicken recipes, such as jerk chicken or barbecue chicken.


But back to sweets, which is why you're all here. I have long experimented with different kinds of baked cheesecake recipes, but I think I've come across a method that makes cheesecakes with a fantastic texture. The idea came to me when I was watching a fellow YouTube cook's channel, Ania's Kitchen, where she makes a vanilla cheesecake (sernik waniliowy) by whipping the egg whites separately and folding into the rest of the mixture.

I tried this out in my go-to baked cheesecake recipe, which I've been using for ages now, and it worked amazingly! The resulting dessert was so light and fluffy, and in no way dense or heavy liked baked cheesecakes can sometimes be. I thought it was a massive improvement. However, it made the mixture much more voluminous and as such it made about 50% more cakes than I was expecting: my original batch made 18 mini cakes!


So, without further ado, let's get on with the recipe! This has been amended to make a more realistic batch of 12 mini cakes.

FREE FROM
☑ Soya (check for soya lecithin)
☑ Yeast
☑ Wheat
☑ Nuts

CONTAINS
☒ Gluten
☒ Refined sugar products
☒ Dairy
☒ Eggs


 INGREDIMENTS

For the base:
  • 4 ounces (115 grammes) rolled oats
  • 2 ounces (55 grammes) wholegrain spelt flour
  • 2 ounces (55 grammes) dessicated coconut
  • 2 ounces (55 grammes) brown sugar
  • 2 fluid ounces (60 millilitres) sunflower oil
  • 2 tablespoon (30 millilitres) water
  • ½ teaspoon (3 millilitres) ground ginger
  • Pinch of salt

For the cheesecake mixture:
  • 10½ ounces (300 grammes) cream cheese, room temperature
  • 5½ ounces (150 grammes) coconut cream (What's this? See notes below)
  • 3 ounces (85 grammes) caster sugar
  • Zest and juice of 1 lime
  • 2 medium eggs
  • Pinch of salt

HOW-TO
To make the biscuit base:
  • Preheat your oven to 150°C (300°F, Gas Mk.2, or very moderate). Line a 12 indent muffin tin with large cake cases (muffin cases).
  • Mix all the ingredients for the base together in a mixing bowl very thoroughly until fully blended. It'll take a while, but you want a moist, loose and consistent mixture. It's sort of like a crumble.
  • Put a rounded tablespoon (about 20 millilitres) of crumble into each case. Press it down with the spoon, spreading some up the sides a little.
  • Bake for 10 to 15 minutes in the oven while you prepare your filling.
For the cheesecake:
  • In a large mixing bowl, beat the cream cheese, set coconut milk and salt until light and smooth. Beat in the sugar until creamy. Fold in the lime juice and zest.
  • Separate the eggs, putting the yolks in with the cream cheese mix and putting the whites in a separate mixing bowl. Beat in the yolks.
  • Using clean beaters on an electric mixer, whip the egg whites until they form stiff peaks.
  • Fold a third of the whipped whites into the cream cheese until half mixed. Add the remaining whipped whites and gently fold in until completely incorporated.
  • Remove the bases from the oven and divide the mixture between the cases. Shake the tray lightly to smooth out the tops of the cakes, and give it two or three firm taps off the counter.
  • Return to the oven and bake for 20 minutes. When the cooking time it elapsed, turn off the oven, crack the oven door, and allow the cakes to cool in the oven.
  • Once cooled, chill for at least 4 hours; I find it's best to leave them overnight.

NOTE
What is coconut cream, I hear you ask (or imagine hearing you because this is a computer)? Sometimes when you leave a can of coconut milk sitting in the press for ages it separates into coconut cream and coconut water. When you open the can, the solid cream has risen to the top and set, and when you scoop it out, the water it sitting at the bottom. This separation usually happens when coconut milk hasn't been tampered with and pumped full of nasty preservatives or gums to lengthen its shelf life.

For this recipe, you'll need to scoop out the cream; you can discard the coconut water if you like, but it's good for your skin, hair and nails if you drink it.

And there you are! It's a little fiddly, and probably NOT a beginner's recipe, but my Lordy are they delicious. I brought some to a friend's house and they were demolished; her 2 year old ate about 3 of them...

There was no recipe this time last year.

Friday, 17 October 2014

Banoffee Fairy Cakes (Wheat Free; Dairy Substitute)

Introducing my latest creation: wheat-free, dairy-free banoffee fairy cakes! Tada! 


I have a confession to make: I don't like bananas. I'll only eat a banana in a very specific set of circumstances, when the banana is exactly the correct ripeness and presented to me in exactly the right form. There's something about the texture: it's fine until you chew, then it just gets weird. But, that's just me.
I do however really like the flavour of banana, if indeed its texture is too odd for my taste, and one banana thing I truly love is banoffee pie. Originally from East Sussex but now famous world over, banoffee pie is traditionally made of a pastry case covered with sliced banana, topped off with toffee sauce and decorated with whipped cream and shaved chocolate.
The concept of mixing buttery pastry, banana and toffee together has now spread into other kinds of desserts, such as ice cream sundaes and cakes. This inspired me to make some nice little banoffee fairy cakes.

These are not in anyway complicated, just a banana flavoured sponge fairy cake, topped with toffee flavoured glacé icing, and decorated with a little banana chip.

FREE FROM
☑ Soya (check for soya lecithin)
☑ Yeast
☑ Wheat
☑ Nuts


CONTAINS
☒ Gluten (oats and spelt)
☒ Dairy (you can use margarine instead of butter)
☒ Eggs

 INGREDIMENTS
For 12 fairy cakes


  • 3 ounces (85 grammes) white spelt flour
  • 1 ounce (30 grammes) cornflour

  • ½ teaspoon baking powder
  • 2 medium eggs, at room temperature
  • 3 ounces (85 grammes) caster sugar
  • 1 teaspoon vanilla essence (preferably the pure and natural kind)
  • 2 ounces sunflower oil
  • 1 medium banana, mashed
  • 1 tablespoon (30 millilitres) warm water
For the icing:
  • 4 ounces (115 grammes) icing sugar
  • 1 ounce (30 grammes) butter or margaine
  • 1 ounce (30 grammes) golden syrup
  • 1 ounce (30 grammes) brown sugar
  • 2 tablespoons (30 millilitres) water
  • 12 banana chips


METHOD
  • Make the batter following this recipe, adding the mashed banana with the water. Distribute among 12 large fairy cake cases and bake as instructed.
  • Once baked, allow to cool completely before icing.
  • To make the icing, melt together the butter (or margarine), golden syrup, and brown sugar together with the water in a saucepan over medium heat. Once the sugar has dissolved, remove from the heat and beat in the icing sugar until smooth.
  • Pour the icing over the cakes, and while still wet press a banana chip into each cake.
  • Allow to set before eating, roughly 30 minutes.


THIS TIME LAST YEAR: No-Churn No-Cook Strawberry Cheesecake Ice-Cream (EGG FREE, WHEAT FREE)


It's been a while! Happy 9th Anniversary!

  It's been a while. The past two years have been a helluva a ride. This year is gonna hold some big changes for this blog. I'm comp...