Showing posts with label red velvet. Show all posts

Thursday, 18 July 2019

Making My Own Wedding Cake, Part 2: Wedding Cake Recipe

And here it is at last: the actual recipe for the wedding cake and cupcakes! After months of planning, designing, and practicing, it finally came together.... with a few unfortunate incidents (which you can read all about in Part 1)

(I'm awaiting the professional photos: this was taken by a guest, Simon)

This recipe isn't complicated, just time consuming. I made the main cake and 120 cupcakes over the course of a few days: I can only fit 24 cakes in my oven at once, so I had to do 5 batches in total. 

I baked, cooled, and iced each two-dozen cupcakes at a time before freezing, iced and all. However, if you want to add other decorations like sprinkles, they don't freeze well at all so the cakes will have to be frozen un-iced then iced and decorated after defrosting.

I baked the Madeira cake, sliced it into layers, and then froze it in advance before completely defrosting to fill and decorate a few days before the wedding. I recommend making the cake about two days in advance to let the syrup soak in and for the whole cake to set nicely.

My husband Simon hand-painted the figurines that sat atop the cake. Despite giving the hotel instructions on how to mount them on the two provided flower nails and place them into the cake, they simply balanced the models on the cake. Next time I do a cake like this, I'll send a family member in to oversee the construction if I can't be there!

(I'm awaiting the professional photos: these were taken by a guest, Katie)

The ladybirds were bought from Lidl during their Easter season. I used them because they're black and red, like our theme colours. You could always decorate with seasonal flowers, toothpick flags, or even fondant figures or flowers.

For the cupcakes, make sure to get cases that are coloured inside and outside: some coloured cake cases are white cases that have been printed with edible ink on the outside, but better quality cases are made out of paper that is dyed which gives them a solid colour, inside and out. SuperValu sells them in packs of 50, and as of writing this they cost €2 a pack. Or, buy Culpitt brand cases online from Amazon or eBay.


INGREDIMENTS
There are many, many ingredients

Lemon Cupcakes

For 2 dozen cupcakes

5 eggs, at room temperature
10 ounces (285 grammes) caster sugar
5 ounces (140 grammes) sunflower oil
2 teaspoons vanilla essence, or 1 teaspoon of vanilla pod paste
10 drops almond essence
Grated zest of half a large lemon
5 tablespoons (75 millilitres) milk
10 ounces (285 grammes) plain white flour
⅝ teaspoon baking soda
¼ tsp ground sea salt
24 solid black cake cases (see note above)

To ice

8 ounces (225 grammes) salted butter
8 ounces (225 grammes) condensed milk
1 pound (455 grammes) icing sugar, sifted
Up to 2 tablespoons (30 millilitres) extra milk
Zest of quarter of a large lemon
1 teaspoon vanilla pod paste


Chocolate Cupcakes

For 2 dozen

5 eggs, at room temperature
10 ounces (285 grammes) caster sugar
5 ounces (140 grammes) sunflower oil
2 teaspoons vanilla essence, or 1 teaspoon of vanilla pod paste
5 tablespoons (75 millilitres) milk
1½ ounces (45 grammes) cocoa powder, preferably Bournville or another good brand
8½ ounces (240 grammes) plain white flour
⅝ teaspoon baking soda
¼ tsp ground sea salt
24 solid red cake cases (see note above)

To ice

8 ounces (225 grammes) salted butter
8 ounces (225 grammes) condensed milk
2 teaspoons vanilla essence
1½ ounces (45 grammes) cocoa powder
14½ ounces (410 grammes) icing sugar, sifted
Two 19g packages of red gel food colouring (I bought mine from Aldi)
If you're not using the colouring, add up to 2 tablespoons (30 millilitres) of milk to adjust the consistency


To Make the Cupcakes


  • Preheat the oven to 180C (350F) and line two muffin tins with cupcake cases (mine measured 3cm x 5cm). Make sure all of your ingredients are at room temperature.
  • Sieve the flour (and cocoa) with the baking soda and salt very well. Set aside.
  • In a mixing bowl, whisk the eggs and sugar together until about doubled in size, a pale lemon colour, and looks like a loose foam.
  • While running the mixer, drizzle in the oil in a steady stream. Don't overbeat, though: adding the oil should take all of about 15 seconds.
  • Fold in the milk and flavourings (vanilla, almond essence, lemon zest, etc.), then sieve in the dry ingredients. Fold well: don't fret too much about overmixing, and be careful not to undermix.
  • Divide the mixture between the 24 cake cases, using a scoop or measuring cup/spoon. Fill the cases about halfway, two-thirds at the most.
  • Bake the cakes for 14 to 16 minutes, turning the trays through 180 degrees halfway through baking. If the two trays are on different shelves, swap them around too. Do this very carefully so the cakes don't get deflated.
  • Once baked, remove from the oven and tap the tins very firmly on the work surface to burst any air bubbles.
  • Transfer the cakes to a cooling rack and cool completely before decorating.

To Make the Icing
  • Make sure your ingredients are all room temperature, including the condensed milk.
  • In a mixing bowl, beat the butter and condensed milk together until light and fluffy. Add the dry ingredients in four additions, beating well after each one. To adjust the consistency, add milk between the additions of dry ingredients, but add no more than one or two teaspoons at a time.
  • If colouring, add the colouring in gradually until you have the colour you want.
  • Ice the cakes, and then immediately freeze for later use, or store in an airtight container for up to a week.

Lemon Layer Cake

For the cake

One 8 inch Madeira cake, made with 5 eggs' worth of ingredients, and flavoured with lemon zest, lemon juice, almond essence, and vanilla pod paste (details below)
4 ounces (115 grammes) lemon curd, homemade or shop-bought
Lemon simple syrup, or soaking

For the icing

9 ounces (250 grammes) white chocolate, cut into small pieces
3 ounces (85 grammes) caster sugar
3 fluid ounces (85 millilitres) milk
3 ounces (85 grammes) salted butter, in small pieces
Vanilla pod paste
Optional: 1 teaspoon of lemon zest


To Make the Icing
  • In a saucepan, heat the milk and sugar together until the sugar has dissolved. Bring to the boil, and cook for only a minute.
  • Take off the heat and stir in the white chocolate and butter. Return to very low heat, stirring continuously, until all the chocolate and butter has melted and the icing is smooth and consistent.
  • Stir in the vanilla pod paste (and zest, if using) then allow the icing to cool completely, about two hours, stirring every so often to prevent crusting.
  • Once cool, beat with an electric mixer until creamy, fluffy, and spreadable. Whipping the icing makes it lighter and makes it go further, but if you want a denser, American fudge style icing don't whip it.
  • Be careful not to whip too much! It can cause the icing to go crumbly. If that happens, simply melt it down again, and repeat the cooling and whipping.


To Assemble the Cake

  • Bake the cake according to the above link, scaling up all the ingredients in proportion with 5 eggs. Flavour it with the zest of a lemon, 2 teaspoons of vanilla pod paste, and half a teaspoon of almond essence.
  • You can use the juice of the lemon to make the lemon simple syrup. Pour the syrup into a large dish, big enough to dip the cake layers in.
  • Once the cake is baked and cooled, slice into two layers and dip both sides of each layer in the simple syrup. Layer the cake with the lemon curd in the middle
  • Crumb coat the cake, then chill for about 20 minutes before finishing the icing and decorating.

As you can see, there's a lot of making here! But, it was all worth it in the end. I think the cake disaster was a blessing in disguise, as it led me to using the white chocolate fudge icing that was a mega hit! If, however, you want to see how I was going to make the cake with the white chocolate glaze, I'll shortly be uploading a lovely white chocolate and coffee cake recipe....

To everyone who came to the wedding, and to everyone who helped on my journey, thank you all from the bottom of my heart! I hope that in sharing my experiences, anyone out there who wants to attempt their own cake is well and thoroughly warned!!

Tuesday, 21 August 2018

Red Velvet Cupcakes with "Cream Cheese" Butter Cream

In recent years I have found that the best way to make cream cheese icing is to not use cream cheese at all. Intrigued? Well, read on a to find out how I made these delicious red velvet cakes with "cream cheese" icing!


Here in Ireland, cream cheese can be very inconsistent: some brands are perfectly thick and creamy, but other brands can be watery and thin. Sometimes you can make a cream cheese icing that whips up beautifully, then other times it will turn into a sugary cream cheese sauce.

The issue at play here is the moisture levels in the cream cheese. Sugar absorbs water and goes runny, and the more water there is for the sugar to absorb, the sloppier your mixture becomes. I'd found the best way to avoid this is to make an icing that tastes like cream cheese, without actually using cream cheese.

Creamy cheese is rich and fatty, but it's also slightly tangy from the fermentation process, and salty to preserve its freshness. Understanding this balance between fatty, tangy, and salty is the key to mimicking its flavour.

In my previous foray into non-cream cheese icing, I made a white chocolate and greek yoghurt fudge icing, and it was absolutely fabulous. However, if you don't want to cook up a yoghurt simple syrup, or you don't have any white chocolate, there is a way to make plain old vanilla buttercream taste like cream cheese icing.

To make enough icing for 12 cakes, simply beat together 4 ounces (115 grammes) of unsalted butter with 4 ounces (115 grammes) of condensed milk. Gradually beat in 8 ounces (225 grammes) of sieved icing sugar to make a thick and creamy icing. Add vanilla essence to taste.

And now we get a little bit adventurous: it's time to add small amounts of sea salt and distilled white (or apple cider) vinegar. I think vinegar is the best because it was a fermented sourness that is like cream cheese. However, if you don't want to use vinegar, you can substitute fresh lemon juice.

Add the salt and vinegar, a pinch and a few drops at a time, until you have the right level of "cheesiness". I used just under a quarter teaspoon each of salt and vinegar, but please add slowly and to your taste: you can always add, but you can't take it out!

If you want it to taste like lemon cheesecake icing, you can also add some lemon zest to taste.


To make the cupcakes, I used my newly revised cupcake recipe and substituted a teaspoon of the flour with cocoa powder, and substituted buttermilk for milk. I also added red food colouring.... but I don't think I added enough!

I also added some nice little red and white flowers that I had got in a Halloween cake decoration kit, although sadly one of the red flowers crumbled in the packet and had to start a new life as sprinkles. The kit also had sugar devils and ghosts, which I still haven't found a use for.

I hope you give these delicious cakes a try soon!

Monday, 22 May 2017

Happy World Goth Day! (Goth Fairy Cakes)

Happy World Goth Day, everyone! A day to celebrate the colour black, bats, and everything morbid and macabre!


The first time I wore a completely black outfit, I was about fifteen years old. That was the start of a love affair with the gothic that has never stopped. Once you embrace black, you can't go back! My wardrobe and drawers are populated with black, grey, red, blue, purple, and the odd neon accent; leather, fishnet and opaque coloured tights, tartan, and pirate paraphernalia, too. I started my collection of piercings when I was 17 (12 in total, so far), and my tattoos followed later on at 25. Neither collection is finished.


So, as you can probably guess, Goth Day and Halloween are my favourite times of the year. This year, however, is the first time I've got around to wearing false vampire teeth! When I say teeth, I mean some white false stiletto style fingernails stuck on with denture adhesive. Does the job though!


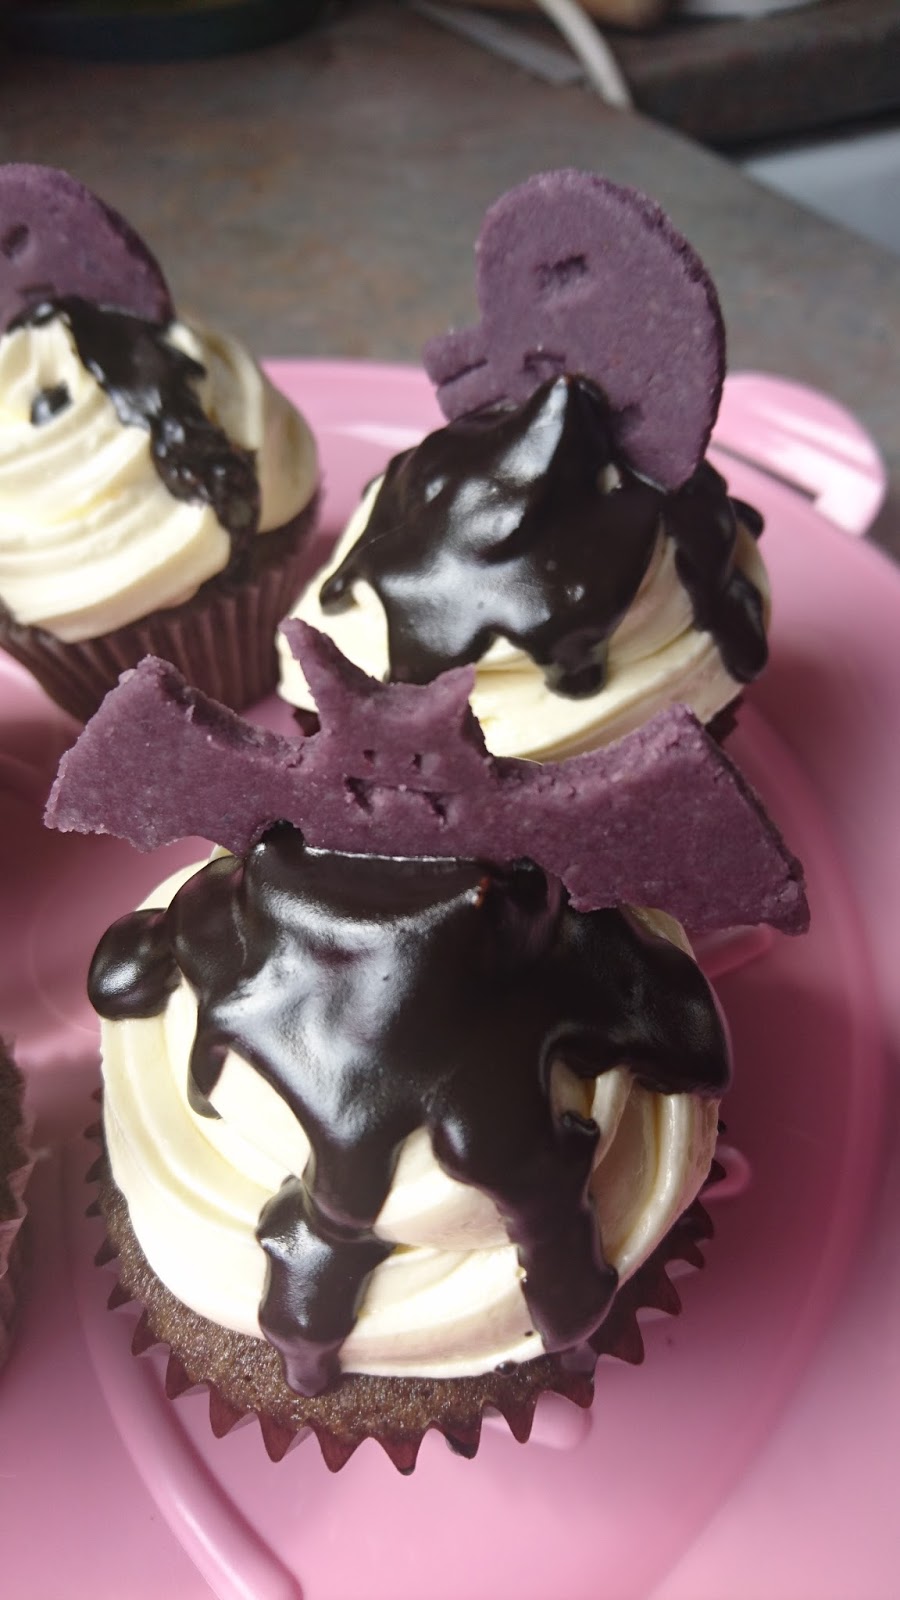
To celebrate, I made some lovely purple velvet fairy cakes, swirled with buttermilk-spiked cooked milk icing, drizzled in super-black chocolate glaze, and crowned with a marzipan batty-bat.

I made the cakes using my red velvet cake recipe, using two eggs and scaling the other ingredients down accordingly, and using purple food colouring instead of red; this amount made 12 cakes. I topped off the cakes with the same icing as the red velvet cake too, only I used half the amount.


The chocolate glaze was made using 2 ounces (55 grammes) dark chocolate, 1 ounce (30 grammes) butter, half a tablespoon of black liquid food colouring, and half a tablespoon of milk. I melted all these ingredients together in a bowl in the microwave, heating for 15 seconds at a time and stirring between. I allowed it to cool down enough to pour over the icing swirls without melting it.

I coloured some marzipan purple, rolled it out to roughly a quarter inch (5 millimetres), and cut out bats and skulls. I drew the designs freehand on some card and cut out them out to make the templates.

The outside crusts of the cakes aren't very purple, I must admit. But the insides are suitably luminous! I was very pleased with how these turned out, and I'm even more pleased about the Goth ensemble with false teefs!

THIS TIME IN 2016: Mocha Cupcakes: Chocolate and Coffee Join Forces (Gluten Free; Dairy Free Option)
THIS TIME IN 2015: Super Moist and Rich Chocolate Cake
THIS TIME IN 2013: Coconut Custard Creams (Wheat Free)
There was no blog this time in 2014.

Wednesday, 3 May 2017

Red Velvet Cake, with Traditional Cooked Milk Frosting (Wheat Free, with Dairy Free Option)

I can't think of anything more American than red velvet cake, apart from possibly root beer or barbecue chicken. And now, it's a global sensation.


I've avoided the red velvet craze for a few years now, because I was sick of the sight of it. However, I was on Pinterest one day and I came across a kind of icing I wanted to try: Ermine frosting. Traditionally, this icing goes with red velvet cake, not the cream cheese icing that people would initially assume. So, I thought if I'm going to try making that icing, I'd may as well make the cake that traditionally goes with it!


As someone who's never eaten a homemade red velvet cake, I was really pleasantly surprised at how delicious it is: it's like a mild chocolate muffin, but bigger! And its luminous redness is really, really appealing. The first one I made, however, went into the oven red but came out brown. After some research, I learnt that this was because I used natural food dye. To keep the red colour throughout cooking, it has to be artificial colour. Which isn't ideal, but this is a sometimes treat.


The icing was also a delicious surprise: it turned out remarkably like a Swiss meringue buttercream, but without the hassle of cooking egg whites. It's super silky smooth, not super sweet, spreads like a dream, and makes beautiful sharp edges when cut. It sort of tastes like a sweetened whipping cream. The first time I made it I used salted butter, and it wasn't very nice at all: as such, I strongly urge you to use only unsalted butter to make this icing.

I took a detour from the original recipe, that uses a flour roux, and made a cornflour custard instead. Also, I decided to make it taste mildly reminiscent of a cream cheese icing, which is nowadays more commonly associated with red velvet cake, by adding some buttermilk. You can leave that out and use normal milk, if you prefer.

INGREDIMENTS
For one 8 inch (20 centimetre) two-layer cake

For the cake,
  • 8½ ounces (240 grammes) white spelt flour, or gluten free flour
  • ½ ounce (15 grammes) cocoa powder
  • ½ teaspoon baking powder
  • ¾ teaspoon baking soda
  • 3 medium eggs
  • 9 ounces (250 grammes) caster sugar, divided in two
  • 3 fluid ounces (90 millilitres) sunflower oil
  • 3 ounces (85 grammes) butter, at room temperature, or margarine
  • 6 fluid ounces (180 millilitres) buttermilk, or milk alternative mixed with 2 teaspoons of lemon juice or white vinegar; or dairy-free yoghurt thinned down with water to buttermilk consistency
  • Artificial red food colouring*
  • 2 teaspoons (10 millilitres) vanilla essence
For the icing,
  • 8 ounces (225 grammes) unsalted butter, or margarine**
  • 8 ounces (225 grammes) caster sugar
  • 10 fluid ounces (240 millilitres) milk, or milk alternative
  • 2 tablespoons (30 millilitres) cornflour
  • 2 teaspoons (10 millilitres) vanilla essence
  • 3 to 4 fluid ounces (90 to 120 millilitres) buttermilk***, at room temperature, or dairy-free yoghurt
* Artificial red colouring doesn't evaporate in the oven, whereas natural colouring does. If you use natural colouring, your cake will come out brown. Artificial red colours include E110, E122 to E129, E161 (c,d, h, and j), E162 and E180.

** If you can't get unsalted butter in your area, the originally recipe used vegetable shortening... which you can try if you're feeling adventurous.

*** If you want your icing not to taste slightly sour, just use normal milk.

HOW-TO

First, prepare the cake.
  • Preheat the oven to 170°C (325°F, Gas Mk.3), and grease and flour a tall round 8 inch (20 centimetre) cake tin.
  • In a large mixing bowl, cream butter with an electric mixer until very pale. Take one half of the sugar and gradually add it, beating all the time, until it's light and fluffy
  • In a jug, beat together the oil, eggs, and remaining sugar with the electric mixer (you don't have to change the beaters) until completely incorporated and slightly pale.
  • Return to beating the butter mixture, gradually adding in the egg mixture a little at a time until it is all beaten in.
  • In a separate bowl, mix the flour, soda, power, and cocoa together. Sieve half of the dry ingredients into the butter and egg mix, and fold through until nearly mixed.
  • Add in the buttermilk and a little food colouring, fold a little bit, and finally the remaining dry ingredients. Fold until completely combined. If you want the cake to be redder, add more colour a little at a time until you get the shade you like.
  • Pour the mixture in the prepared tin, and bake on the centre shelf of the preheated oven for one hour, checking for doneness at 45 minutes.
  • Cool for 15 minutes in the tin, then unmould and cool completely on a wire rack before leveling and cutting in half.
While the cake is cooling, start on the icing.
  • Mix the cornflour and milk in a small saucepan until completely smooth and place over medium high heat. Bring to a boil, and cook at boiling for 2 minutes, until it has thickened well.
  • Transfer the mixture to a small bowl to cool fully, mixing occasionally to preventing a skin forming. It will be very thick when cool, almost like a jelly.
  • Beat the butter in a mixing bowl very well using an electric mixer until almost white; this should take about 3 or 4 minutes. 
  • Then, beat in the sugar gradually until fully mixed and fluffy. This should take another 4 minutes or so.
  • Add the cooled custard and continue to beat until it comes together into a fluffy mass, about 2 or 3 minutes. Add enough of the remaining buttermilk to adjust the consistency until it becomes like whipped cream; you don't have to use it all.
  • Use the icing to sandwich the cakes together, and to ice the top and sides. If you like, you can do some piped decorations and add some sweets, too.
VARIATION
If you want to make a plain milk, without butter milk, you can replace the buttermilk with regular milk and replace the baking soda with 1½ teaspoons (7 millilitres) of baking powder, making 2 teaspoons (10 millilitres) in total.

It's been a while! Happy 9th Anniversary!

  It's been a while. The past two years have been a helluva a ride. This year is gonna hold some big changes for this blog. I'm comp...