Showing posts with label coconut. Show all posts

Thursday, 24 January 2019

"Jacob's Mikado" Cupcakes: Coconut, Raspberry, and Marshmallows

Mikadoo, doo, doo, push Pineapple shake the tree.... 


Y’all know I love Mikado biscuits. I don’t think I’ve ever done a Mikado recipe on this blog before, but I’ve probably enthused about this all-Irish treat at some point on some blog post in the past. A Mikado, produced by a company called Jacob’s, is a small rectangular biscuit topped with two parallel rows of pink marshmallow, between which is a row of tangy raspberry jam; the whole confection is dusted with desiccated coconut. Although they are available all year round, they are especially popular at Christmas time, where they’re sold in massive plastic tubs to make sure you have enough for all the guests you’ll be entertaining throughout the Christmas season. 

Mikados are just one biscuit in a range of marshmallow biscuits produced by Jacob’s: there are Coconut Creams, which are round plain biscuits topped with a splodge of coconut sprinkled marshmallow (which are either pink or white); and there are Kimberleys, which are a sandwich biscuit made of gingerbread and marshmallow, the exposed edges of which are encrusted with coarse white sugar crystals. And all of these, of course, come in a chocolate coated variety for greater indulgence at special occasions (there’s even a triple chocolate Kimberley, where the biscuit and the marshmallow within the chocolate coating are also cocoa flavour. It’s sinfully delicious). 


This simple combination of plain, buttery biscuit, jam, marshmallow and coconut is easily adapted to all sorts of baked goods, including these here cupcakes! These are a nice vanilla almond cake (a flavour which is commonly referred to as “birthday cake” flavour in the States, sans the sprinkles) filled with seedless raspberry jam and topped with pillowy 7-minute frosting, before being dunked in desiccated coconut. The whole thing is then crowned with a Mikado. 

I make 7-minute frosting by mixing 2 egg whites, 2 tablespoons of water, 1 teaspoon of lemon juice, and 8 ounces of caster sugar in a heatproof bowl. I then gently heat this over simmering water until the sugar dissolves and it’s warm to the touch. I take it off the heat and whip it with an electric hand mixer for a full 7 minutes, until it is marshmallowy light and cool to the touch. This is easily flavoured and coloured: in hindsight, I should have coloured mine pink to mirror the biscuits, but the white it also pretty; I flavoured mine with vanilla. 


This is best eaten within three days, as after three days the icing turns all dusty as the sugar re-crystalises. To avoid this, you can replace up to a third of the sugar with glucose syrup. 

Monday, 19 March 2018

Birthday Cake to Me! Coconut Lime Mini Cake (Wheat Free)

Here is the written recipe for the recipe featured in the first episode of "Sweetie Pie Bakes Stuff" 2018 series.


~~ ^ _ ^ ~~

DIFFICULTY
Each step is simple, but there are a lot of steps

TIME
About 2 hours

RECIPE RATING
Intermediate

~~ ^ _ ^ ~~

INGREDIMENTS

For one 10 centimetre round cake

30 grammes (1 ounce) unsalted butter, soft
30 grammes (1 ounce) sunflower oil
85 grammes (3 ounces) caster sugar
1 medium egg
85 grammes (3 ounces) plain white spelt flour
3/4 teaspoon baking powder
30 grammes (1 ounces) desiccated coconut
60 millilitres (2 fluid ounces) light coconut milk

For the icing
115 grammes (4 ounces) white chocolate, in small pieces
40 grammes (1⅓ ounces) unsalted butter
55 grammes (2 ounces) caster sugar
Zest and juice of 1 lime, mixed with water to measure 60 millilitres (2 fluid ounces)

~~ ^ _ ^ ~~

FREE FROM
Wheat, yeast, nuts

CONTAINS
Eggs, spelt, dairy (dairy free option in italics), refined sugar

~~ ^ _ ^ ~~

Thursday, 19 October 2017

Coco-Lime Cream Soda (Naturally Free From)


You can't have a party without something to drink, and when party food is usually sugary and fatty, you want something nice and refreshing. Enter in this Thai inspired soft drink: the Coco-Lime Soda! A zingy lime syrup, mixed with rich yet light coconut milk, and topped off with sparkling water. The coconut milk and sparkling water create a wonderfully spooky frothy head...

This would appeal more to adults than children, especially if you decided to take this Thai delight to the West Indies and add in some white rum!

~~ ^ _ ^ ~~

DIFFICULTY
Requires mixing and using a microwave

TIME
Under an hour

RECIPE RATING
Easy!

~~ ^ _ ^ ~~

INGREDIMENTS

Makes roughly half a pint (285 millilitres) of lime syrup

6 fluid ounces (170 grammes) fresh lime juice, roughly 6 or 8 limes
Rind of 2 limes, peeled into strips with a vegetable peeler
6 ounces (170 grammes) caster sugar
1 teaspoon vanilla essence
Green food colouring
Pinch of salt

To serve
Light coconut milk, in a can (about 20-25% coconut), or full fat coconut milk if you're feeling decadent
Sparkling water
Green sugar
Optional: white or spiced rum

~~ ^ _ ^ ~~

FREE FROM
Dairy, nuts, gluten, eggs, yeast

CONTAINS
Refined sugar

~~ ^ _ ^ ~~

METHOD

  • In a microwave safe jug, place the lime juice, zest, sugar, and salt. Microwave for about 20 minutes, stirring half-way through. Allow to cool completely.
  • Strain the syrup into a bottle; discard the zest. Chill completely before assembling the drinks.
To serve
  • To mix a drink, wet the rim of a highball glass and dip in green sugar. Add 1 part lime syrup, 2 parts chilled coconut milk, and 3 parts sparkling water. If you pour the water from a height, you will get plenty of foam.
  • Serve with a straw. If you like, you can put ice in the glasses first.
  • Alternatively, you can make the drink in a punch bowl, rather than mixing individual drinks.
  • To make an alcoholic drink, mix 1 part lime syrup, 2 parts coconut milk, 2 parts rum, and 2 parts sparkling water.

Monday, 10 July 2017

Ice-Cream Month: Strawberry and Coconut Ice Sundae (No Churn)

Fancy something exotic and fruity? Try out this strawberry and coconut ice sundae!


In this recipe of the series, I took my inspiration from the traditional sweet shop favourite: coconut ice. I have done a few renditions of coconut ice, like the traditional version, and a version inspired by neapolitan ice-cream, and each version is as tasty as the next! But in my ice-cream adaptation, I had to decide what the pink flavour would be, as the white flavour would obviously be coconut. I decided to settle for the good old favourite: strawberry!

Strawberry ice-cream is super easy, and made in exactly the same way as my raspberry ice-cream using a combination of jam and condensed milk. The result has a deep fruity flavour.


To make the coconut flavour, I thought it would be as simple as making a condensed milk substitute with coconut milk instead of evaporated milk. But, that wasn't the case. I had a few issues with developing this particular flavour: sometimes it wouldn't whip up properly, sometimes it froze too hard. After about four attempts, this version worked the best: it's best to whip the cream before adding the coconut condensed milk, rather than whipping them together.

It has a lovely mild coconut flavour, and it's a sweet treat that's best enjoyed in small doses.


To further emphasise the coconut ice image, I made some little coconut wafers. This uses a new and improved wafer recipe, which I will be trying out in future to make full ice-cream cones.... (watch this space)

INGREDIMENTS
Makes 4 sundaes, each with a scoop of each ice-cream

Coconut ice cream
  • 8 UK fluid ounces (230 milliltires) whipping cream
  • One 14-ounce (400 millilitre) can of full-fat coconut milk, cold
  • 4 ounces (115 grammes) caster sugar
  • A few drops of vanilla essence

Strawberry ice-cream
  • 8 UK fluid ounces (230 millilitres) whipping cream
  • 3 UK fluid ounces (85 millilitres) condensed milk
  • 3 UK fluid ounces (85 millilitres) good quality strawberry jam

To serve
  • 1 medium egg white
  • 1 ounce (30 grammes) caster sugar
  • 1 tablespoon (15 grammes) butter, melted
  • 1 ounce (30 grammes) white spelt flour
  • 1 ounce (30 grammes) dessicated coconut
  • A few drops of red food colouring
  • Strawberry syrup

METHOD

First, make the coconut ice-cream
  • Open the can of cold coconut milk, and scoop out the solid cream that has set on the top. Measure out 4 ounces in weight (125 grammes) of the cream. You can use the rest of the coconut cream, and coconut water left in the can, for another project.
  • Take the coconut cream and place in a saucepan. Add in the sugar and cook over medium heat until the cream has melted and the sugar has dissolved. Bring to the boil and boil for 1 minutes. Set aside to cool completely, then chill for an hour.
  • When the coconut syrup has chilled, whip together the whipping cream, and vanilla essence in a mixing bowl until it reaches firm peaks.
  • Gently fold in the syrup mixture thoroughly, making sure to keep all the air. Transfer to a one-pint (580 millilitre) pudding basin, cover with the lid or some cling film. Now, prepare the strawberry ice-cream.
Then, make the strawberry ice-cream
  • In a jug, mix together the condensed milk and strawberry jam until completely combined.
  • In a mixing bowl, whip the cream to medium peaks. Add in the condensed milk and jam mixture, and continue to beat until it holds medium firm peaks. If you like, mix in some red food colouring to intensify the pink colour.
  • Transfer to a one-pint (580 millilitre) pudding basin, cover with the lid or some cling film. Freeze, along with the coconut ice-cream, for at least 6 hours, preferably overnight.
Early on the day of serving, prepare the wafers
  • Preheat the oven to 160°C (325°F, Gas Mk.2). Line a flat baking sheet with non-stick baking paper.
  • Take half of the coconut and tint it red with some food colouring. Use your fingertips to rub it in well.
  • In a mixing bowl, beat the egg white until it becomes frothy. Add in the caster sugar and beat again until it looks like shaving foam. Beat in the melted butter, followed by the flour, until you have a smooth batter.
  • Take a teaspoonful of the mixture and smooth out into a very thin circle, as thin as you dare. Sprinkle one half red, and one half white.
  • Bake on the centre shelf for 8 to 10 minutes, or until the edges are nicely browned. Allow to cool completely.
Now, assemble the masterpiece
  • Place a scoop of each flavour in a bowl, top off with strawberry ice-cream syrup, and serve with a coconut wafer.

Tuesday, 4 April 2017

Chocolate Cake with Beetroot, and Coconut Fudge Icing (Wheat and Dairy Free)

Happy 250th blog post! I can't believe I've written so many blogs.

And for this joyous occasion, I present to you my future sister-in-law's birthday cake! A dairy free chocolate extravaganza with a secret ingredient: beetroot.

(In fact, what she actually asked for was a chocolate cake with beetroot and avocado, but I thought adding one weird ingredient would be enough for my conservative tastebuds, and those of my family.)

I know what you're thinking: beetroot? In a cake?! I thought the same thing when she asked me to make one of these for her birthday. But, d'you know what, it's actually way nicer than it sounds.

I hate beetroot. So much. I cannot stand how it tastes or smells. So the thought of putting it into a cake which I would most likely be eating was, at first, abominable. However, having tried it, it's actually nowhere as bad as one might think. It just makes the chocolate taste darker, earthier, and a little more bitter.


I mixed the beetroot with a little carrot to take the edge off. If you like the taste of beetroot, you could use all beetroot.

The icing turned out really well also! I adapted my dairy-free truffles recipe from a few years ago to make a vegan ganache that I could make into a fudge icing. I also made a dairy-ful version when I made a well-done-for-finishing-college-without-killing-everyone cake for my colleagues for the last day of classes last week (I'll be sharing that recipe in a few days when I've written it up.

If one didn't add any water to adjust the texture of the icing, you could easily make some delicious dairy-free chocolate fudge with it too: it has just the right level of density and richness to make a nice sweet.

INGREDIMENTS:
For two round 8 inch (20 centimetre) sandwich cakes:
  • 2 ounces (55 grammes) cocoa powder
  • 6 ounces (170 grammes) white spelt flour
  • 2 teaspoons (10 millilitres) baking powder
  • 4 ounces (115 grammes) caster sugar
  • 1 teaspoon (5 millilitres) ground mixed spice
  • Pinch of salt
  • 4 medium eggs
  • 4 ounces (115 grammes) sunflower oil
  • 2 ounces (55 grammes) brown sugar
  • 4 ounces (115 grammes) finely grated raw carrot
  • 4 ounces (115 grammes) finely grated raw beetroot.You can adjust the ratio of carrot and beetroot to your taste, just make sure you have 8 ounces (225 grammes) of grated raw vegetable in total

For the dairy free chocolate icing,
  • 8 ounces (225 grammes) dairy free dark chocolate, such as cooking chocolate
  • 2 ounces (55 grammes) coconut oil
  • 3 ounces (85 grammes) golden syrup, or honey
  • 8 ounces (225 grammes) icing sugar
  • 2 to 3 tablespoons (30 to 45 millilitres) water, to adjust texture
To decorate:
  • Candy coated chocolate sweets, or any other decoration of your choice

METHOD

First, make the cakes.

  • Preheat oven 180ºC (350ºF, Gas Mk.4). Grease two 8 inch (20 centimetre) round sandwich tins with a little butter or margarine. 
  • In large bowl, sieve the cocoa powder, spelt flour, baking powder, spice, salt, and caster sugar. Take a spoonful of this mixture and use it to dust the tins, returning the excess to the bowl.
  • In a jug, beat together the brown sugar, sunflower oil, and eggs until fully combined. Mixing the brown sugar with the wet ingredients makes it easier to dissolve out the lumps.
  • Make a well in the dry ingredients and pour in the wet mixture. Mix with a spatula or wooden spoon until it is half mixed, and then add in the carrot and beetroot. Mix until completely combined and smooth.
  • Divide the mixture between the two tins and bake for 20 to 25 minutes, or until springy to the touch and a cocktail stick poked into the centre comes out clean.
  • Cool in the tins for about 10 minutes, then run a knife around the edges to loosen. Turn out the cakes and allow them to cool completely.
Second, make the icing.
  • In microwave proof mixing bowl, or a glass bow set over a pan of simmering water, melt together the chocolate, oil, and syrup. If using the microwave, heat in one minute intervals on the "Defrost" setting.
  • Stir well until fully melted and combined, then cool completely until it thickens.
  • Once thickened, beat the icing sugar in gradually using an electric mixer, alternating with a few teaspoons of water at a time, until you have a fudgy spreadably icing.
Finally, assemble the masterpiece.
  • Cut the domes off the cakes, and sandwich cut sides together with about a quarter of the icing. Use half to ice the top and sides, and then use the rest to pipe a border along the top and bottom edges of the cake. I used a star tip, but you can use whatever shape you like.
  • Decorate the top with the sweets, or any decoration of your choice.
Keep in an airtight container for up to two weeks, but it's best eaten within the first five days.


Monday, 25 January 2016

Lime and Coconut Cake Truffles

In her last dying throes, my oven produced a batch of completely spread out, flat as a pancake, and pale vanilla fairy cakes. Until recently, the recipe I used for the cakes would have worked perfectly every single time, but this time they were a disaster. It was then that I decided to pack up all my baking equipment and move it to my mother's house until such time as the oven could be fixed, or replaced.

But the question remained: what do I do with the leftover disastercakes? Do I throw them out? Feed them to the ducks? Or, recycle them? That's when the concept of using them to make something else sprung to mind...


I decided to have another go at the good old favourite of the 50s American housewife: cake truffles. These may be more known to people as cake pops, which are simply cake truffles mounted on sticks. These are a good way to use up any failed/slightly stale/grand once you pick the mould off (not really, obviously) cakes that you have lying around.

INGREDIMENTS
Makes 20 small truffles

For the truffles,
  • 9 ounces (250 grammes) crumbled vanilla sponge cake
  • 2 ounces (55 grammes) thick coconut milk
  • 2 ounces (55 grammes) desiccated coconut
  • Zest of 1 lime
  • Juice of half a lime


For the glaze,
  • 1½ ounces (40 grammes) icing sugar
  • Juice of half a lime
  • 3½ ounces (100 grammes) white chocolate, chopped into pieces
  • Sprinkles of your choice

HOW-TO
  • In a mixing bowl, mix all of the truffle ingredients until it becomes a soft paste. You may need to use your hands. Divide into 20 equally sized pieces and roll into balls. Refridgerate for about 10 minutes.
  • Line a baking tray with non-stick paper, or better, a silicone mat.
  • To make the glaze, mix the lime juice with water to make 2 tablespoons (30 millilitres) worth of liquid. Put the diluted lime juice, icing sugar, and broken white chocolate together in a heatproof bowl and set over a pot of simmering water. Stir continuously until melted. Don't be tempted to do this in the microwave: your chocolate will seize.
  • Take the cooled truffles and dip them in the glaze, rolling around until completely coated. Gently scoop up with a fork, tapping the fork on the bowl to let the excess glaze drip off. Put the glazed truffle on the lined tray. Sprinkle with whatever decorations you like while the glaze is still wet.
  • Put the truffles in the fridge to set for about an hour, then move them to little paper cases for serving.
These are nice and zingy, with a subtle hit of coconutty richness, and the unexpected lime flavour in the glaze worked quite well: it seemed to be the favourite aspect of those who tried them out...


Friday, 24 October 2014

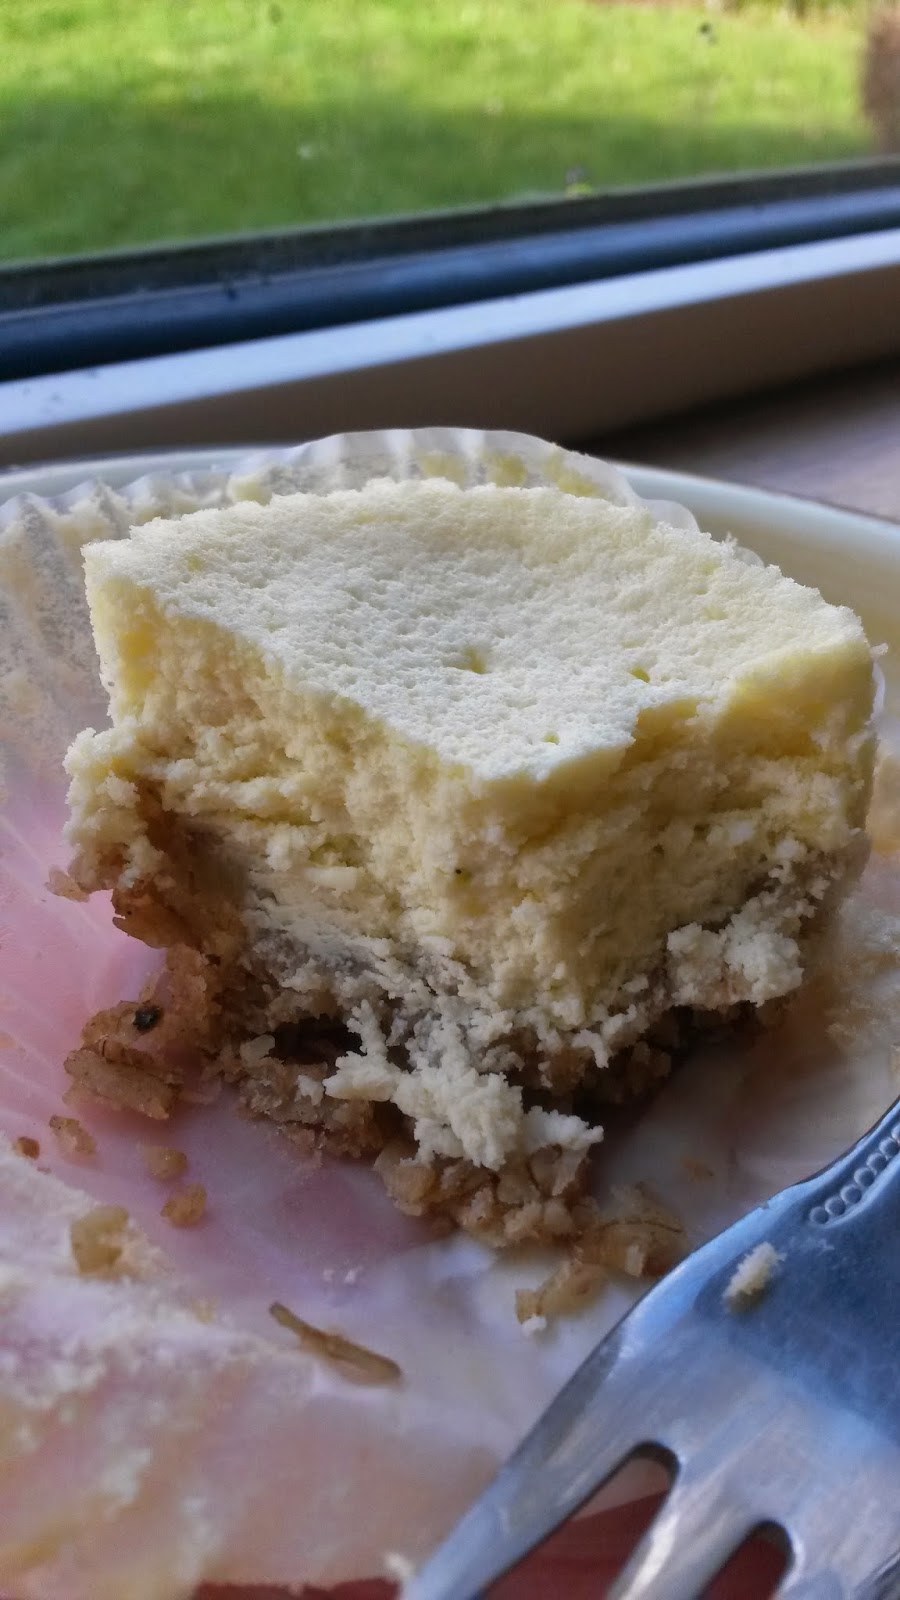
Coconut Lime Mini Cheesecakes (Wheat-Free)

Seeing as my Millionaire's Cheesecake recipe is my blog's most popular post, accruing over 100 views as of this day, I kinda gathered that people like cheesecake. So, I thought I'd share with you another delicious, Caribbean inspired recipe, Coconut and Lime Mini Cheesecakes!


I've always loved the combination of coconut and lime, sometimes with ginger and sometimes with rum and brown sugar, but the richness of the coconut and the freshness of the lime go so well together. In fact, outside the world of sweets, it's a fabulous combination for flavouring white rice as a side dish for marinaded chicken recipes, such as jerk chicken or barbecue chicken.


But back to sweets, which is why you're all here. I have long experimented with different kinds of baked cheesecake recipes, but I think I've come across a method that makes cheesecakes with a fantastic texture. The idea came to me when I was watching a fellow YouTube cook's channel, Ania's Kitchen, where she makes a vanilla cheesecake (sernik waniliowy) by whipping the egg whites separately and folding into the rest of the mixture.

I tried this out in my go-to baked cheesecake recipe, which I've been using for ages now, and it worked amazingly! The resulting dessert was so light and fluffy, and in no way dense or heavy liked baked cheesecakes can sometimes be. I thought it was a massive improvement. However, it made the mixture much more voluminous and as such it made about 50% more cakes than I was expecting: my original batch made 18 mini cakes!


So, without further ado, let's get on with the recipe! This has been amended to make a more realistic batch of 12 mini cakes.

FREE FROM
☑ Soya (check for soya lecithin)
☑ Yeast
☑ Wheat
☑ Nuts

CONTAINS
☒ Gluten
☒ Refined sugar products
☒ Dairy
☒ Eggs


 INGREDIMENTS

For the base:
  • 4 ounces (115 grammes) rolled oats
  • 2 ounces (55 grammes) wholegrain spelt flour
  • 2 ounces (55 grammes) dessicated coconut
  • 2 ounces (55 grammes) brown sugar
  • 2 fluid ounces (60 millilitres) sunflower oil
  • 2 tablespoon (30 millilitres) water
  • ½ teaspoon (3 millilitres) ground ginger
  • Pinch of salt

For the cheesecake mixture:
  • 10½ ounces (300 grammes) cream cheese, room temperature
  • 5½ ounces (150 grammes) coconut cream (What's this? See notes below)
  • 3 ounces (85 grammes) caster sugar
  • Zest and juice of 1 lime
  • 2 medium eggs
  • Pinch of salt

HOW-TO
To make the biscuit base:
  • Preheat your oven to 150°C (300°F, Gas Mk.2, or very moderate). Line a 12 indent muffin tin with large cake cases (muffin cases).
  • Mix all the ingredients for the base together in a mixing bowl very thoroughly until fully blended. It'll take a while, but you want a moist, loose and consistent mixture. It's sort of like a crumble.
  • Put a rounded tablespoon (about 20 millilitres) of crumble into each case. Press it down with the spoon, spreading some up the sides a little.
  • Bake for 10 to 15 minutes in the oven while you prepare your filling.
For the cheesecake:
  • In a large mixing bowl, beat the cream cheese, set coconut milk and salt until light and smooth. Beat in the sugar until creamy. Fold in the lime juice and zest.
  • Separate the eggs, putting the yolks in with the cream cheese mix and putting the whites in a separate mixing bowl. Beat in the yolks.
  • Using clean beaters on an electric mixer, whip the egg whites until they form stiff peaks.
  • Fold a third of the whipped whites into the cream cheese until half mixed. Add the remaining whipped whites and gently fold in until completely incorporated.
  • Remove the bases from the oven and divide the mixture between the cases. Shake the tray lightly to smooth out the tops of the cakes, and give it two or three firm taps off the counter.
  • Return to the oven and bake for 20 minutes. When the cooking time it elapsed, turn off the oven, crack the oven door, and allow the cakes to cool in the oven.
  • Once cooled, chill for at least 4 hours; I find it's best to leave them overnight.

NOTE
What is coconut cream, I hear you ask (or imagine hearing you because this is a computer)? Sometimes when you leave a can of coconut milk sitting in the press for ages it separates into coconut cream and coconut water. When you open the can, the solid cream has risen to the top and set, and when you scoop it out, the water it sitting at the bottom. This separation usually happens when coconut milk hasn't been tampered with and pumped full of nasty preservatives or gums to lengthen its shelf life.

For this recipe, you'll need to scoop out the cream; you can discard the coconut water if you like, but it's good for your skin, hair and nails if you drink it.

And there you are! It's a little fiddly, and probably NOT a beginner's recipe, but my Lordy are they delicious. I brought some to a friend's house and they were demolished; her 2 year old ate about 3 of them...

There was no recipe this time last year.

Monday, 12 August 2013

Variations on a Theme: Neapolitan Coconut Ice

Yes, yes: I know I'm going on a little coconut ice trip recently, but it's totally delicious! This recipe is a little different from the traditional kind, as it uses a little cocoa powder, too. Introducing Neapolitan coconut ice!


Once I saw the usually white and pink coconut ice, it instantly made me think of the white, pink and brown striped appearance of Neapolitan ice-cream. Here in Ireland, Neapolitan ice-cream is actually vanilla, strawberry and lemon, making a white-pink-yellow appearance, but lemon doesn't go so well with coconut in my opinion; lime, yes, but lemon not so much.

This is made in three layers, like the usual two layers but with an extra chocolatey stripe. Because cocoa powder overpowers any already present colour, it can go into the pink mixture so you don't have to make another batch of ice. Just one third kept white, remaining two thirds coloured pink, pink third poured out, and remaining third coloured and flavoured with cocoa powder and set into the tin. Simples!

This is a little more fiddly than the usual coconut ice, but it's totally worth it!

HOW-TO
  • Make a quantity of coconut ice mixture according to this recipe, and stop before you do any pouring into tins or colouring of any kind.
  • Now, it's time for a little bit of maths. Overall, the weight of the entire mixture will be 24 ounces (680 grammes), so each coloured layer will be roughly 8 ounces (225 grammes). However, the chocolate layer will need to be a little thicker for two reasons: a) because most tins widen out as they get taller, so the chocolate layer will be thinner as a result, and b) there will be two layers of straight out coconut versus one layer of chocolate flavoured, so if it's a little thicker you'll get a little more chocolatiness.
  • So, set your 8 inch square tin (20 centimetre) on a weighing scales and set to zero. Take the raw, white coconut mixture and pour in 7 ounces (200 grammes) of the mixture into the tin and flatten out with a spoon.
  • Return the rest of the mixture to a low heat (just to keep it soft) and add in a few drops of food colouring to make it a delicate pink colour. Pour in another 7 or 8 ounces (200 or 225 grammes) of the pink mixture on top of the white. Flatten out with a spoon.
  • Once again, return the mixture to a low heat and add 2 tablespoons (60 millilitres) of sieved cocoa powder; mix well but gently to thoroughly combine, then pour this remaining mixture out onto the pink layer, flattening out with the spoon.
  • Leave to set as directed in the recipe.

And there you have it! Stripy coconut ice with an added cocoa flavoured layer. The texture of the chocolate layer is a little crumblier than the other two layers, due to the added cocoa powder and also the prolonged mixing, but it still holds up and has a delicate melt-in-the-mouth texture. I could eat a whole batch by myself, but I don't recommend that course of action!

Thursday, 1 August 2013

Traditional Coconut Ice

I promised in my post about the homemade chocolate box that I'd give you all the recipe for coconut ice, and here she is!

There are so many variations on the recipe for coconut ice, I've lost count of how many I've read. Some need cooking, some don't, some need a plethora of ingredients, others need only a handful. But through experimentation and learning from recipes for other kinds of sweeties, I've refined a foolproof way to make coconut ice: it's based on the recipe I would've used as a child, which I learnt from my favourite book in the world, Sweet Success by Sackett and Marshall.


I think I may have referenced this book already in a previous entry, but it is probably the best book I have ever read. Filled with some delicious and truly horrifying recipes (it is quite dated), this 1970s tomb of culinary genius has seen me through many a victory and a disaster in the kitchen, and has never been far from my bedside for night time reading. Although this book got me into the world of sugar craft, I now see it as merely a starting point: the measurements of ingredients are all correct, but the methods can be somewhat dubious; some recipes don't even have oven temperatures or baking times in.

As such, I use the coconut ice recipe from this book, but I have altered it slightly, including what I've learnt to be the most vital step in any boiled sugar treat that involves being beaten: leaving the syrup to cool slightly before beating. It makes the sweets gloriously smooth and melt-in-the-mouth. I don't know why leaving the syrup to cool before beating makes it softer, but it works every time.

I will point out, however, this is for traditional coconut ice. I've noticed a lot of Australian cooks on YouTube make coconut ice by mixing icing sugar, condensed milk and desiccated coconut, which is a nice simple no-cook version but I don't really like it. If you aren't familiar with cooking sugar and the different sugar boiling stages, check out the Exploratorium's explanation of sugar cooking.

INGREDIMENTS
This is a large quantity that will make about 1¼ pounds (570 grammes) of coconut ice, but I've found it can be easily halved or even quartered. Just be really careful when making small batches because it can burn or crystallise easily.
  • 1 pound (450 grammes) caster sugar
  • 5 fluid ounces (140 millilitres) milk
  • 4 ounces (115 grammes) desiccated coconut
  • A few drops of red or pink food colouring

HOW-TO
  • Prepare an 8 inch (20 centimeter) square tin by either greasing it lightly or lining it with non-stick baking paper. You could also use a silicone baking tin, which needs no greasing or lining.
  • Pour the milk into a medium sized heavy based saucepan or casserole dish. You want the milk to fill the pan by about half an inch (a centimeter).
  • Heat the pan gently on a low heat until starting to steam, and then pour the sugar into a pile in the middle of the milk. Using gentle circular motions, stir the sugar into the milk without touching the sides of the pan. This prevents the syrup from crystallising later.
  • Keeping the syrup on a gentle heat, mix until the sugar has dissolved into the milk and you are left with a slightly cloudy liquid. Using a wet pastry brush to wash away any sugar crystals that have formed on the sides of the pan.
  • Once all trace of any grittiness and crystaliness is gone, turn the heat up to medium-high. Allow the mixture to boil and once boiling clip a sugar thermometer onto the pan and don't stir. As tempting as it may be, just don't do it.
  • While the mixture is cooking away, fill your sink or wash basin with about 3 inches (7.5 centimeters) of cold water. This will become clear very soon.
  • Boil the mixture to soft-ball stage, which is 115°C (240°F) (or you could boil to 118°C (245°F) for slightly firmer ice). Once the temperature is reached, take away the thermometer, bring the pan and dip the bottom in the cold water in your sink. This instantly stops the sugar from cooking any more and reaching the wrong sugar cooking stage.
  • Leave the pan of syrup to sit for about 10 minutes, or until slightly cooled.
  • Pour in the desiccated coconut and mix until the mixture is starting to become thick and slightly creamy. Pour half of it into a tin, and then mix a little food colouring into the remaining mixture in the pan to get a delicate pink colour. If it gets a little stiff, just return it to a gentle heat and mix until the right texture. Pour this over the white layer.
  • Leave to set for about five minutes, and then score into pieces while still in the tin. This will make your life so much easier later.
  • Allow to set completely, preferably overnight, and then turn out and cut where scored. Please, don't set it in the fridge: even thinking about the fridge while touching the coconut ice can cause it to crystallise and have a crunchy texture.

This is delicious on its own, but even nicer when smothered in chocolate... as most things in life are. As you may have noticed the pink is a little red, but you could make it any colour you wanted.

Thursday, 23 May 2013

Coconut Custard Creams (Wheat Free)


I admit it: I’m currently suffering from a fixation with recreating biscuit barrel staples. I think I’ve reached the heights (or depths) of baking anorakness. Moving swiftly on!


These ones are very easy, though: just two plain cut out biscuits stuck together with traditionally vanilla buttercream. This time, they’re a little different: I’ve added desiccated coconut for a little interested. The nice thing about the cut-out biscuit recipe I use is that it holds its shape very well, and anything pressed into the top of the biscuit comes out pretty faithfully; so, you could press little patterns, or even words, into the tops of the biscuits like the shop bought ones.

Here’s the biscuit recipe.

INGREDIMENTS
For the biscuits:
  • 2 ounces (55 grammes) butter, at room temperature
  • 2 ounces (55 grammes) caster sugar
  • 1 egg yolk, at room temperature
  • 1 teaspoon (5 millilitres) vanilla essence
  • 1 ounce  (30 grammes) cornflour
  • 3 ounces  (85 grammes) white spelt flour
  • Pinch of salt

For the filling:
  • 8 ounces icing sugar
  • 5 ounces butter
  • 1 teaspoon vanilla essence
  • 1 tablespoon coconut milk, or normal milk if you can’t find coconut milk
  • Some desiccated coconut, for decoration


HOW-TO
First, make the biscuits:

  • Sieve together the cornflour, spelt flour and salt into a bowl and set aside for later.
  • Cream the butter and sugar together using an electric hand mixer, wooden spoon, or rubber spatula, until pale and fluffy.
  • Beat in the egg and vanilla essence until fully combined. Try not to be too vigorous, as you’re not trying to incorporate much air, just mix the ingredients.
  • Add the sieved flours and mix with a wooden spoon, or just get in there with your hands. If you’re starting with the spoon, make sure you finish it with your hands so that it’s nice and smooth. Don’t use an electric mixer, as this will make the dough tough. 
  • Roll into a ball and flatten into a disc an inch (2½ centimetres) in thickness. Chill in the fridge for about half an hour.
  • Preheat the oven to 160°C (320°F, Gas Mark 2½). Line one or two baking trays with non-stick baking paper.
  • Take the dough from the fridge and work a little with your hands to make it malleable. Roll out to an ⅛ inch (3 millimetre) thickness and cut out shapes. You could make them round using a 2 inch (5 centimetre) cutter, or just use a knife to cut squares or rectangles, like I did.
  • Arrange the biscuits 1 inch (2½ centimetres) apart on the trays, and prick with a cocktail stick. Bake for about 15 to 20 minutes, or until set and very lightly browned.
  • Remove from the oven and allow to cool on the trays for 5 or so minutes. Transfer to a wire rack and allow to cool completely.


Then fill them:
  • Make the buttercream using this method and then, using a piping bad fitted with a ½ inch (1 centimetre) nozzle, pipe one half of the biscuits with the filling and sandwich with the remaining biscuits. 
  • Sprinkle the edges with desiccated coconut, or you could use coloured sprinkles for the cute factor.

As you can see in the pictures, I also made little patterns on the top. Because these biscuits don’t have any raising agent or liquid in them, they don’t spread that much or change shape a lot. This means, they hold onto imprints very easily. Use the tip of a small round piping nozzle to print patterns into the top, or you could use anything that you like to create any pattern you like; push them about half way in for the best-lasting pattern.

Unfortunately, homemade sandwich biscuits don’t stay crispy for as long as the shop-bought ones. Naturally, the moisture from the icing permeates into the biscuits and they go softer over time. They’re not stale, don’t worry, as these will keep for up to a week in an airtight container.

Monday, 8 April 2013

You are a Pirate!

If asked the ultimate question 'Pirate or Ninja', I would always go for ninja. Jussayin'. I'd also go as far as to make a guilty confession that when the day comes that I am to be married I will not budge over my wish to have a fancy dress wedding where I would be dressed as a pirate. I was a kid when I saw 'The Pirates of the Caribbean: the Curse of the Black Pearl' in the cinema, and I was converted there and then... (although I did go out with a ninja; pirates are in short supply these days).


Okay, I have a confession: I'm a sucker for all things cute. I love cute things, small things, tacky things, kitch things; you name it, if it's ridiculous I'll probably like it. As for what that has to do with baking, well, let me tell you. I was in my local neighbourhood Dealz and I found a kit for making pirate cakes: it came with 24 pirate cake cases, and 24 little Jolly Roger cake decorations. Before I knew it, I had bought them... as if by magic.

I then began to ponder, what does a pirate cake taste like? What do pirates eat, or what kind of flavours would one associate with a pirate? I did a little brainstorm: pirates -> boats -> sunny places -> Caribbean -> bananas -> coconuts -> limes -> rum -> cane sugar -> spices. So much to work with!

In all honesty, I don't like bananas; I like banana bread, but that's about it, so bananas were off the list. I had made coconut and lime fairy cakes in the past, inspired by a cookery book I was given by an acquaintance for Christmas two or three years ago, and that was a delicious combination; but I didn't have the ingredients to make coconut cakes or icing. After some thought, I settled on rum and brown sugar cakes with lime buttercream icing, and they were the shizz.

(I apologise for the quality of the photos: I didn't have my trusty blur-banishing tripod with me, so I had to rely on my shaky hands.)

Following the same technique as outlined in my basic sponge cake post, I used this recipe:

  • 3 ounces (85 grammes) spelt flour
  • 1 ounce (30 grammes) cornflour
  • 3/4 teaspoon baking powder
  • 2 medium eggs, at room temperature
  • 3 ounces (85 grammes) soft brown sugar instead of caster sugar
  • 1 teaspoon rum essence (available from the Home Baking aisle of the supermarket) instead of vanilla essence
  • 1 ounce (30 grammes) butter or block margarine
  • 1 ounce (30 grammes) sunflower oil

I also made a basic buttercream using this recipe:
  • 2 ounces (55 grammes) butter, at room temperature
  • 6 ounces (170 grammes) icing sugar, sifted
  • Rind of 1 whole lime
  • 1 tablespoon lime juice
  • 1 - 2 drops each of green and yellow food colouring (I used the liquid kind)

As you can see, it's a normal sponge but I replaced all the caster sugar with soft, dark brown sugar, and added a teaspoon of rum essence with the vanilla essence. This was a little bit of an experimental guess, and although the cakes where quite nice, I wouldn't choose to make them again. The icing was the best bit, being made with shed-loads of lime juice and lime rind; in the process of beating the icing together, the green colour from the rind mildly coloured the buttercream. It didn't colour it enough for me, though: I added a few drops of green and a few drops of yellow to get the perfect limey green.

But my adventures with the pirate cases didn't stop there. A friend was visiting from Roscommon (of all places) and as an afternoon activity we made some pirate cakes for my brother, who was feeling ill. These were just vanilla cakes with raspberry icing, but in true Mr Freeze style I coloured the raspberry icing luminous blue. Why are raspberry flavoured sweets and lollies always coloured blue, I wonder...?


The dragon-smiley faced one in the middle was designed by my visiting friend. It's definitely the coolest one there.

And have a gratuitous shot of the inside of the cake... just for me to show off my fantastic taste in butter-flavoured sandwich spread, and whatever that is next to it on the work surface.

Hopefully the next time I get an inch for pirate cakes, I'll have the right ingredients to make coconut cakes and lime buttercream. Trust me, it's one of the nicest combinations there is for a cake. Don't forget to toast a handful of desiccated coconut in a frying pan or wok to sprinkle on top, because it's very yummy.

Here's some trivia for the day: desiccated coconut in German is kokosraspel. Lidl has taught me something today; and I'm not sponsored by Lidl, I promise.

It's been a while! Happy 9th Anniversary!

  It's been a while. The past two years have been a helluva a ride. This year is gonna hold some big changes for this blog. I'm comp...