Showing posts with label sweetie. Show all posts

Wednesday, 15 October 2014

Orange Chocolate Fudge

When designing my second Halloween dessert, the concept of something orange just flew into my mind, as orange is a very Halloweeny colour: whether it's the imagery of stripy witch's tights, or a crispy fallen leaf, orange - along with green, purple, black, and grey - rank highly in my mind when it comes of Halloween colour associations.


Another inspiration that came to me was the idea of celebratory food. Halloween is Celtic new year's eve, and all the traditional celebrations we have as part of Halloween stem from ancient Irish new year's eve customs. Traditionally, a lot of nice food, beer and mead would be consumed as part of the festivities. Nowadays, celebration food looks very different to how it did in pre-Christian Ireland, but the vibe is still there.


To me, Halloween is all about sweeties, chocolate and autumn fruits and nuts, so I thought I'd design a sweetie worthy of any trick or treat bucket: Orange Chocolate Fudge.

There is no finer combination in the world than orange and chocolate: it's just a match made in heaven. The warmth of the orange oil lends itself as a perfect match for the dark earthy quality of chocolate, and when both are wrapped up in fat and sugar what's not to like?


FREE FROM
☑ Soya (check for soya lecithin)
☑ Gluten
☑ Wheat
☑ Nuts
☑ Eggs

CONTAINS
☒ Dairy
☒ Cocoa
☒ Refined sugar products

 INGREDIMENTS

For the orange chocolate layer:
  • 8 ounces (225 grammes) condesned milk
  • 8 ounces (225 grammes) light brown sugar
  • 4 ounces (115 grammes) butter
  • 2 fluid ounce (60 millilitres) milk
  • 1 teaspoon (5 millilitres) vanilla or other essence
  • 1 to 2 tablespoons cocoa powder, depending on how dark you want it
  • Zest of 1 orange
  • Pinch of salt

For the coloured topping layer:
  • 3 ounces (85 grammes) condensed milk
  • 3½ ounces (100 grammes) white chocolate
  • Pinch of salt
  • Orange food colouring


THIS TIME LAST YEAR: Wheat Free Ice Cream Cones

Monday, 12 August 2013

Variations on a Theme: Neapolitan Coconut Ice

Yes, yes: I know I'm going on a little coconut ice trip recently, but it's totally delicious! This recipe is a little different from the traditional kind, as it uses a little cocoa powder, too. Introducing Neapolitan coconut ice!


Once I saw the usually white and pink coconut ice, it instantly made me think of the white, pink and brown striped appearance of Neapolitan ice-cream. Here in Ireland, Neapolitan ice-cream is actually vanilla, strawberry and lemon, making a white-pink-yellow appearance, but lemon doesn't go so well with coconut in my opinion; lime, yes, but lemon not so much.

This is made in three layers, like the usual two layers but with an extra chocolatey stripe. Because cocoa powder overpowers any already present colour, it can go into the pink mixture so you don't have to make another batch of ice. Just one third kept white, remaining two thirds coloured pink, pink third poured out, and remaining third coloured and flavoured with cocoa powder and set into the tin. Simples!

This is a little more fiddly than the usual coconut ice, but it's totally worth it!

HOW-TO
  • Make a quantity of coconut ice mixture according to this recipe, and stop before you do any pouring into tins or colouring of any kind.
  • Now, it's time for a little bit of maths. Overall, the weight of the entire mixture will be 24 ounces (680 grammes), so each coloured layer will be roughly 8 ounces (225 grammes). However, the chocolate layer will need to be a little thicker for two reasons: a) because most tins widen out as they get taller, so the chocolate layer will be thinner as a result, and b) there will be two layers of straight out coconut versus one layer of chocolate flavoured, so if it's a little thicker you'll get a little more chocolatiness.
  • So, set your 8 inch square tin (20 centimetre) on a weighing scales and set to zero. Take the raw, white coconut mixture and pour in 7 ounces (200 grammes) of the mixture into the tin and flatten out with a spoon.
  • Return the rest of the mixture to a low heat (just to keep it soft) and add in a few drops of food colouring to make it a delicate pink colour. Pour in another 7 or 8 ounces (200 or 225 grammes) of the pink mixture on top of the white. Flatten out with a spoon.
  • Once again, return the mixture to a low heat and add 2 tablespoons (60 millilitres) of sieved cocoa powder; mix well but gently to thoroughly combine, then pour this remaining mixture out onto the pink layer, flattening out with the spoon.
  • Leave to set as directed in the recipe.

And there you have it! Stripy coconut ice with an added cocoa flavoured layer. The texture of the chocolate layer is a little crumblier than the other two layers, due to the added cocoa powder and also the prolonged mixing, but it still holds up and has a delicate melt-in-the-mouth texture. I could eat a whole batch by myself, but I don't recommend that course of action!

Thursday, 25 July 2013

Sweeties Make Great Gifts, Hopefully

As I said in my previous post, next week I have two family events: my parents' thirtieth wedding anniversary and my sister's sixteenth birthday. I love family gatherings and events because it's a chance to get the family all in one place and have fun, but I dislike them due the the expectation of gift-giving.

The reason I dislike gift-giving isn't because I don't like spending money, but I don't like the concept of a contrived event where you are expected to give someone something they most likely don't want or won't use. Why can't you give people presents for no reason at any other time of the year? I also dislike Valentine's Day greatly for this reason: it's just forced and cold. Why can't I give my man-friend a nice present and a have a nice meal with him at any other time of year to celebrate our togetherness like, oh I dunno, our anniversary?

Because of this, I quite like giving people things they can eat as presents, because they're guaranteed to get use out of it or them; and people always like to eat sweeties! So, I'm guaranteed to please by giving someone a selection of sweeties for their birthday, or savouries if they don't like sweeties. I'm thinking maybe for my parents I'll make a selection of chocolate truffles and package them in a box, and for my sister a selection of bon-bons and package them in a jar. It's little effort for maximum result.

A side effect of this idea is that it has reignited my love of sweetie making and sugarcraft. Maybe you'll all be seeing tonnes more sweetie recipes and ideas after this! I may need to get one of these made...


Thursday, 30 May 2013

Classic Boston Brownies (and a simple formula for great chocolate glaze)

Boston Brownies, or simply brownies to those who live in the States, are just pure, chocolate indulgence: buttery, dense, squidgy slabs of chocolate cake with a paper thin crust, usually dotted with nuts or dried fruit to make the baker feel a little less guilty by including something ‘healthy’. These rich cakes are best enjoyed with some kind of warm beverage (coffee, for that truly Stateside feel) to wash down all the morsels that have attached themselves to your teeth.


Brownies were never really something I made over all my years of baking. The fifteen years that I’ve been baking overlapped a little with the fifteen years that I was allergic to chocolate; in fact, I never really developed my skills as a chocolatière because of said allergy. But around this time last year, I began experimenting with wheat-free brownies.

A few factors make a classic brownie: degree of squidginess, filling-to-cake ratio and richness of chocolate. If a brownie is too cakey, it’s just chocolate cake, if there’s too much filling there’s not enough squidge (all technical terms, of course) and the chocolate can’t be too dark. I know, I know people usually recommend dark chocolate for brownies, but in my experience using dark chocolate makes them too rich and intense, and in my mind a brownie is supposed to be sticky sweet. I recommend using half dark (60 – 70%) and half milk (25 – 40%), or if you can find semi-dark chocolate (45 – 55% cocoa), use that.

Obviously, you need to know a little bit about the filling. Here are a few tips on how to fill your brownies. You could leave them plain, though, if you want.
  • Nuts: traditionally, brownies include walnuts or pecan nuts (being American) but almonds and hazelnuts work very well, too.
  • Dried fruits: any fruit that would traditionally pair with chocolate in dried (or fresh if you don’t intend for your brownies to last long) form, like cherries, strawberry, or pear, oddly enough.
  • Crystallised fruits: my favourite brownies in the whole world have crystallised ginger in, but you could also add crystallised citrus peel. Mango works well, too.
  • If you want a complete sugar fest, you could include some chopped up bars: I made these once with chopped up Mars and Milky Way bars, and the way that they melt in the middle is absolutely magical.
Now, to business.

INGREDIMENTS
For 36 brownies
  • 5 ounces (140 grammes) white spelt flour
  • 2 ounces (55 grammes) cornflour
  • 2 medium eggs, at room temperature
  • 4 ounces (115 grammes) butter, melted
  • 2 ounces (55 grammes) sunflower oil
  • 3½ ounces (100 grammes) chocolate, melted and slightly cooled
  • 1 teaspoon (5 millilitres) vanilla essence
  • 4 ounces (115 grammes) brown sugar
  • 2 ounces (55 grammes) caster sugar
  • 4 ounces (115 grammes) filling of your choice: chopped nuts, dried fruits, chocolate chips, sweets, etc.
  • Pinch of salt
  • NO RAISING AGENT, FOR THE LOVE OF ALL THAT IS GOOD AND GRACIOUS


HOW-TO
  • Preheat the oven to 180°C (350°F, Gas Mark 4). Grease and thoroughly flour a 10 inch (20 centimetre) tin, or line with non-stick baking paper.
  • Melt the chocolate, butter, and oil together either in a bowl over a pan of simmering water, or in the microwave on the 'Defrost' setting in one minute bursts. Set aside.
  • Put the eggs and sugar in a heatproof mixing bowl (preferably glass) and set over a pan of simmering water. Beat the mixture with an electric hand mixer or balloon whisk until pale, thick and doubled in size. You could do with without the water bath, but it’s take too long to beat out the lumps in the brown sugar; the heat speeds this process up a little.
  • Beat in the melted chocolate and butter, a little at a time, until you have a nice moussey mixture.
  • Using a rubber spatula or metal spoon, fold in the filling and then sieve in the flour and salt; fold through completely. Folding the filling in first ensures that a) the filling is evenly distributed throughout the mixture, and that b) the flour doesn’t get overworked.
  • Pour the mixture into the prepared tin, and firmly tap it a few times off the kitchen top to release any trapped bubbles.
  • Bake for 30 to 35 minutes, or until spongy to touch and a cocktail stick stuck in the middle comes out with two or three sticky crumbs are clinging to it.
  • Remove from the oven and allow to cool completely in the tin. This is why making sure the tin is well floured, or lined with non-stick paper, is very important. Turn out and cut into squares.

If you want, you could ice them with some chocolate glaze. Chocolate glaze is really easy to make, really easy: just melt 4 parts chocolate and 1 part butter together in a bowl over simmering water, or in the microwave in 30 second blasts. For this quantity of brownies, I’d say use 4 ounces (115 grammes) milk chocolate and 1 ounce (30 grammes) of butter. If you can’t eat butter, don’t use margarine: its water content is too high, and it seizes the chocolate. Use block vegetable fat like Cookeen, or Crisco if you live in the States. Sprinkle liberally with chopped nuts, or hundreds and thousands.

Monday, 27 May 2013

Orange Bourbon Creams (Wheat Free)

For those of you have been reading my blog so far, you’ll probably have absorbed the fact that I absolutely love Bourbon creams. But I don’t like them just because they’re chocolatey and creamy, but there’s a story.


When I was about five or six years old, my parents noticed that when I ate chocolate bad things happened: not only would I get hyperactive, but I would get very, very angry; the kind of angry that incited rock throwing and hair-pulling of older brothers. Behavioural difficulties aside, chocolate would cause me to have severe stomach upset. I have this very vivid memory – whether it’s faithful or a blend of several different instances, I’m not sure – of asking my father for a chocolate biscuit or something of the like, and the conversation went something like this:

“Anna, you know that when you eat chocolate you get upset and a sore tummy?”
“Yes, Daddy,”
“So, do you think eating chocolate is a good idea anymore?”
“Not really.”

And, I didn’t eat chocolate again. I didn’t eat it for about fifteen years; I did have a few lapses, I will admit, and every time I ate chocolate in those fifteen years it resulted in severe migraine headaches that would have me bedridden for at least a day, sensation loss in limbs and extreme endless nausea included.

However, one day, somewhere between being twenty and twenty-one, I was offered a chocolate biscuit by a work colleague. He was a nice guy, and his English wasn’t fantastic, and I didn’t want to offend him, so I took the biscuit; he walked away, happy in his work. I looked at the biscuit… it looked back at me… so I looked at it again… and played with the thought of what would happen; then ate it anyway, out of curiosity.

Nothing happened. Well, I probably digested it, but that’s not the point.

As you can imagine, I’ve been making up for a lot of lost time between now and then. Still, though, if I eat too much I get a little twinge in the top right corner of my head, and I get a little stomach upset, but it’s nothing compared to what used to happen.

So, now when I eat a Bourbon, which was one of my favourite biscuits as a little girl, I get this feeling of reunion with a long lost love: I thought I’d never be with it again when I left it, all those years ago, but when I returned it was still as sweet and chocolatey as it had always been. Dunk, bite, nom! And even though this darned wheat intolerance business has made enjoying the odd Bourbon a tad more difficult, it hasn’t stopped me yet. In fact, it is the wheat intolerance that spurred me into trying to make my own Bourbons. Even if I do say so myself, my version is just as awesome.

Here’s the biscuit recipe.

INGREDIMENTS
For the biscuits:
  • 2 ounces (55 grammes) butter, at room temperature
  • 2 ounces (55 grammes) caster sugar
  • 1 egg yolk, at room temperature
  • 1 teaspoon (5 millilitres) vanilla essence
  • ½ ounce (15 grammes) cornflour
  • ½ ounce (15 grammes) cocoa powder
  • 3 ounces  (70 grammes) white spelt flour
  • Pinch of salt


For the filling:
  • 7 ounces icing sugar
  • 1 ounce cocoa powder
  • 5 ounces butter
  • 1 teaspoon vanilla essence
  • Grated zest of ½ orange
  • 1 tablespoon milk


HOW-TO
First, make the biscuits:
  • Sieve together the cornflour, spelt flour, cocoa powder and salt into a bowl and set aside for later.
  • Cream the butter and sugar together using an electric hand mixer, wooden spoon, or rubber spatula, until pale and fluffy.
  • Beat in the egg and vanilla essence until fully combined. Try not to be too vigorous, as you’re not trying to incorporate much air, just mix the ingredients.
  • Add the sieved flour and cocoa mixture and mix with a wooden spoon, or just get in there with your hands. If you’re starting with the spoon, make sure you finish it with your hands so that it’s nice and smooth. Don’t use an electric mixer, as this will make the dough tough. 
  • Roll into a ball and flatten into a disc, 1 inch (2½ centimetres) in thickness. Chill in the fridge for about half an hour.
  • Preheat the oven to 160°C (320°F, Gas Mark 2½). Line one or two baking trays with non-stick baking paper.
  • Take the dough from the fridge and work a little with your hands to make it malleable. Roll out to an ⅛ inch (3 millimetre) thickness and cut out shapes. You could make them round using a 2 inch (5 centimetre) cutter, or just use a knife to cut squares or rectangles, like I did.
  • Arrange the biscuits 1 inch (2½ centimetres) apart on the trays. Bake for about 15 to 20 minutes. Obviously, with chocolate biscuits you can’t tell doneness by browning, so when the biscuits are set and firm to the touch around the edges, they’re done.
  • Remove from the oven and allow to cool on the trays for 5 or so minutes. Transfer to a wire rack and allow to cool completely.

Then fill them:
  • Make the buttercream using this method: of course, you need to add the orange zest in with the butter at the beginning, and then sieve the cocoa in with the icing sugar. Adding the orange zest at the beginning means that the friction of beating draws the oil out gradually over the whole procedure. 
  • Using a piping bad fitted with a ½ inch (1 centimetre) nozzle, pipe one half of the biscuits with the filling and sandwich with the remaining biscuits. 

As you can see, I’ve made them a little more exotic by adding some orange zest to make orange-chocolate cream, but you could just leave out the zest if you like and have plain Bourbons. The good thing about making them from scratch is that you can fill them with whatever.

As you can see in the pictures, I also made little patterns on the top. Because these biscuits don’t have any raising agent or liquid in them, they don’t spread that much or change shape a lot. This means, they hold onto imprints very easily. Use the tip of a small round piping nozzle to print patterns into the top, or you could use anything that you like to create any pattern you like; push them about half way in for the best-lasting pattern.

Unfortunately, homemade sandwich biscuits don’t stay crispy for as long as the shop-bought ones. Naturally, the moisture from the icing permeates into the biscuits and they go softer over time. They’re not stale, don’t worry, as these will keep for up to a week in an airtight container.

Monday, 13 May 2013

Experiment: Homemade Sprinkles


Firstly, happy Coeliac Awareness Week! As you all know, this blog is dedicated to the pursuit of making wheat-free goodies that are as good as any wheat-ful kind you’ll buy in the shops. Please, utilise these recipes to enjoy a few sweeties this Coeliac Awareness Week, just substitute all the spelt flour for gluten-free blend, as spelt is not suitable for a gluten-free lifestyle, just for a select lucky few who are just wheat-intolerant.

Anyway: moving swiftly on.

I’ve always wanted to make my own sprinkles. Why, you ask, would you want to go to all that bother if you can get them in the shop relatively inexpensively? Two reasons: one, when one gets into the mode of making everything themselves from scratch to accommodate for a wheat-free lifestyle, it starts to become less of a necessity and more of a challenge to see how many shop items one can recreate as faithfully as – if not better than – the original version; two, because shop-bought sprinkles have loads of very suspect ingredients in, and my version has only four. Those four ingredients are icing sugar, egg white, lemon juice, and food colouring; if you can get your hands on natural food colourings, you can make completely natural sprinkles.

Also, when you make your own sprinkles, you can make them any shape you want, as long as your piping skill and array of icing nozzles facilitates. I had some left over royal icing from the other day, so I decided to try my hand at making some, and I did a few different shapes. They’re all quite pretty! I think for a first go, they’re pretty awesome...


  • For the traditional, sugar strand style sprinkles, I piped long straight lines of royal icing onto a piece of non-stick baking paper. Once they were completely dry, having been left to set overnight, I cut them into shorter pieces using a sharp knife. You could also break them up with your fingers.
  • I piped a large amount of little dots, and they were pretty cute. They weren’t flat enough to be confetti, but I think they were quite nice in their own right.
  • I also piped some teardrop shapes for added interest; I wouldn’t do that again, to be honest: I didn’t like them as much.


And there they are. I did two different colours and mixed them up, which was a nice touch. You could do any combination of colours: you could have a rainbow mix, or a pink mix with different shades of pink, or green or blue or whatever. Hell, go crazy!


As for the creation of these little beauties, the consistency of the royal icing itself is key. Here are a few tips:

  • Use the recipe in my iced biscuits post, but whip the royal icing to firm peaks. A flowing consistency will be too thin, and the sprinkles won’t keep their shape; very stiff peaks stage is a little too far, but firm peaks stage is just right.
  • Also, when colouring the icing, bear in mind the colour will deepen as the icing dries. Your delicate pink may turn out neon if you’re not careful, but maybe that’s what you want.


This is only my first adventure in homemade sprinkles, so watch this space for more adventures in Sprinkleville!

Monday, 8 April 2013

You are a Pirate!

If asked the ultimate question 'Pirate or Ninja', I would always go for ninja. Jussayin'. I'd also go as far as to make a guilty confession that when the day comes that I am to be married I will not budge over my wish to have a fancy dress wedding where I would be dressed as a pirate. I was a kid when I saw 'The Pirates of the Caribbean: the Curse of the Black Pearl' in the cinema, and I was converted there and then... (although I did go out with a ninja; pirates are in short supply these days).


Okay, I have a confession: I'm a sucker for all things cute. I love cute things, small things, tacky things, kitch things; you name it, if it's ridiculous I'll probably like it. As for what that has to do with baking, well, let me tell you. I was in my local neighbourhood Dealz and I found a kit for making pirate cakes: it came with 24 pirate cake cases, and 24 little Jolly Roger cake decorations. Before I knew it, I had bought them... as if by magic.

I then began to ponder, what does a pirate cake taste like? What do pirates eat, or what kind of flavours would one associate with a pirate? I did a little brainstorm: pirates -> boats -> sunny places -> Caribbean -> bananas -> coconuts -> limes -> rum -> cane sugar -> spices. So much to work with!

In all honesty, I don't like bananas; I like banana bread, but that's about it, so bananas were off the list. I had made coconut and lime fairy cakes in the past, inspired by a cookery book I was given by an acquaintance for Christmas two or three years ago, and that was a delicious combination; but I didn't have the ingredients to make coconut cakes or icing. After some thought, I settled on rum and brown sugar cakes with lime buttercream icing, and they were the shizz.

(I apologise for the quality of the photos: I didn't have my trusty blur-banishing tripod with me, so I had to rely on my shaky hands.)

Following the same technique as outlined in my basic sponge cake post, I used this recipe:

  • 3 ounces (85 grammes) spelt flour
  • 1 ounce (30 grammes) cornflour
  • 3/4 teaspoon baking powder
  • 2 medium eggs, at room temperature
  • 3 ounces (85 grammes) soft brown sugar instead of caster sugar
  • 1 teaspoon rum essence (available from the Home Baking aisle of the supermarket) instead of vanilla essence
  • 1 ounce (30 grammes) butter or block margarine
  • 1 ounce (30 grammes) sunflower oil

I also made a basic buttercream using this recipe:
  • 2 ounces (55 grammes) butter, at room temperature
  • 6 ounces (170 grammes) icing sugar, sifted
  • Rind of 1 whole lime
  • 1 tablespoon lime juice
  • 1 - 2 drops each of green and yellow food colouring (I used the liquid kind)

As you can see, it's a normal sponge but I replaced all the caster sugar with soft, dark brown sugar, and added a teaspoon of rum essence with the vanilla essence. This was a little bit of an experimental guess, and although the cakes where quite nice, I wouldn't choose to make them again. The icing was the best bit, being made with shed-loads of lime juice and lime rind; in the process of beating the icing together, the green colour from the rind mildly coloured the buttercream. It didn't colour it enough for me, though: I added a few drops of green and a few drops of yellow to get the perfect limey green.

But my adventures with the pirate cases didn't stop there. A friend was visiting from Roscommon (of all places) and as an afternoon activity we made some pirate cakes for my brother, who was feeling ill. These were just vanilla cakes with raspberry icing, but in true Mr Freeze style I coloured the raspberry icing luminous blue. Why are raspberry flavoured sweets and lollies always coloured blue, I wonder...?


The dragon-smiley faced one in the middle was designed by my visiting friend. It's definitely the coolest one there.

And have a gratuitous shot of the inside of the cake... just for me to show off my fantastic taste in butter-flavoured sandwich spread, and whatever that is next to it on the work surface.

Hopefully the next time I get an inch for pirate cakes, I'll have the right ingredients to make coconut cakes and lime buttercream. Trust me, it's one of the nicest combinations there is for a cake. Don't forget to toast a handful of desiccated coconut in a frying pan or wok to sprinkle on top, because it's very yummy.

Here's some trivia for the day: desiccated coconut in German is kokosraspel. Lidl has taught me something today; and I'm not sponsored by Lidl, I promise.

Monday, 1 April 2013

Different Sponge Cake Flavours (no April Fool, it's after 12pm)

Yes, it is April Fool's day, but I got up late today and thus missed the 12pm cut-off for practical jokes. Although, not many people know this is a rule.

And so, we move onto how to flavour the 
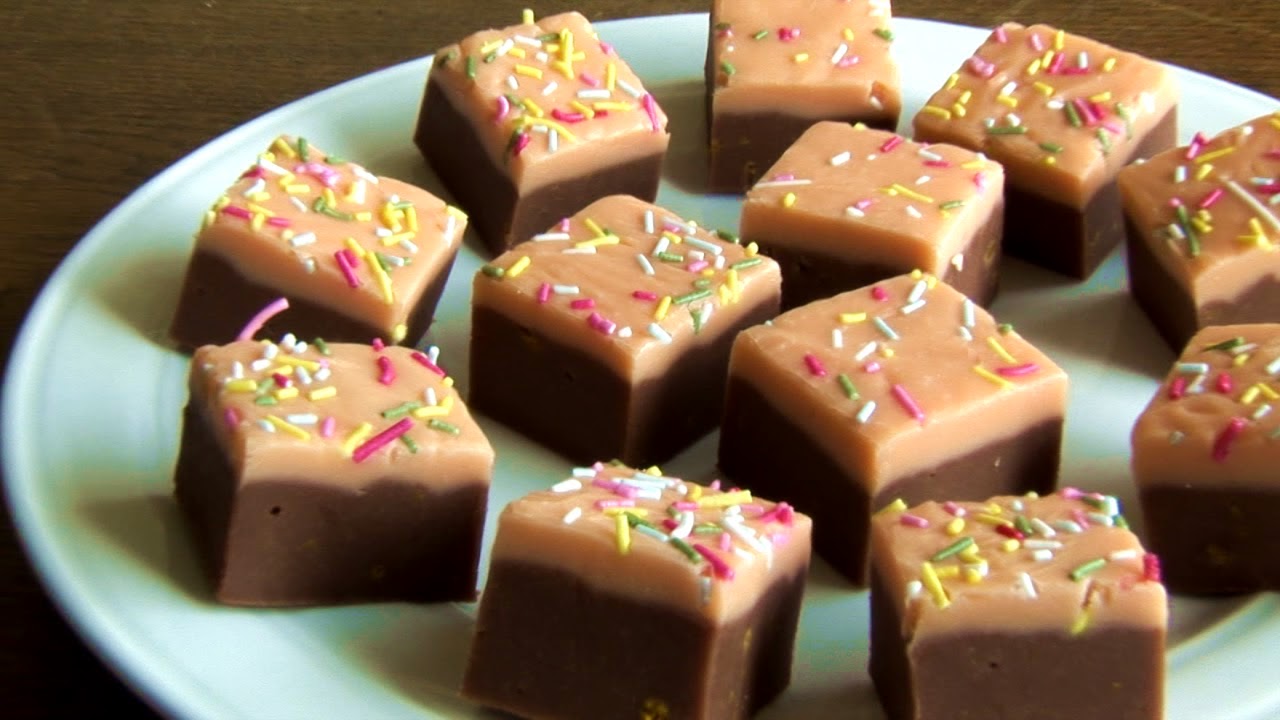
basic sponge cake recipe. Last week I uploaded a blog on a coffee cake, so I thought I'd be kind an tell people how to make the normal vanilla flavour sponge into a coffee sponge, and various other kinds of sponge. In the picture, there is a vanilla cake, a coffee cake and a chocolate cake for sake of demonstration.

The following changes are specifically for the three-egg quantity as explained in the basic sponge cake recipe. If you've changed the amount of cake mixture, the alterations will need to be changed accordingly. To jog your memory, here is the recipe again.

  • 4 ounces (115 grammes) white spelt flour
  • 2 ounces (55 grammes) cornflour
  • 1 teaspoon baking powder
  • 3 medium eggs, at room temperature
  • 4½ ounces (130 grammes) caster sugar
  • 1 teaspoon vanilla essence (preferably the pure and natural kind)
  • 1½ ounces salted butter (if lactose intolerant, see notes); if using unsalted, add ¼ teaspoon of salt to the flour.
  • 1½ ounces sunflower oil
  • 3 tablespoons (45 milliliters) hot water

If you want an orange, lemon or other citrus cake, take 1 whole citrus and grate off its zest. You want only the orange or yellow outer layer of skin, not any of the white bit underneath – known as pith – because it’s very bitter. Add this to the eggs and sugar before beating. Instead of the hot water, add the same amount of the citrus juice or a mixture of citrus juice and hot water if you want a less intense flavour.

If you would like a chocolate cake, replace 1 ounce of the white flour (not corn flour) with 1 ounce of cocoa powder. Because coca powder is very dry, add an additional tablespoon of hot water. This makes a very rich, dark chocolate cake, so if you don’t like it as dark you can reduce the substitution, or use hot drinking chocolate power, which is sweeter. Also, for a fudgier taste, you can replace half of the caster sugar with soft brown sugar, or even a mixture of caster sugar, brown sugar and golden syrup. Only replace 1 ounce of sugar with golden syrup, though, otherwise weird things happen.

If you would like a coffee cake, replace the milk with the same amount of very strong black coffee, either made with instant espresso powder or from a filter. If you want even more coffeeness, you can replace 2 teaspoons of the white flour with ground coffee beans, or replace the vanilla essence with coffee essence, or both if you’re truly coffee mad.

For toffee or caramel cake, simply replace the caster sugar with soft dark brown sugar, and then also replace one ounce of the sugar with one ounce of golden syrup (only 1 ounce, as aforementioned). If you can get it, you can use butter-vanilla flavouring instead of the vanilla essence; I managed to get a few vials of such flavouring from Lidl, and it adds a lovely note.

For any kind of berry or soft fruit cake, such as strawberry, banana or raspberry, replace the water with the same quantity of fruit purée. You can make this by squidging fresh or defrosted frozen fruit through a sieve. For extra special fruitiness, you can replace one ounce of sugar with the same quantity of fruit jam put through a sieve.

For coconut cake, replace 1 ounce of the plain white flour with desiccated coconut, and the water with the same quantity of coconut milk or juice. In Ireland, coconut milk comes in both liquid and solid form, so if you can only get your hands on solid form, dissolve it in hot water to make up to the quantity needed. Coconut cake is one of my especial favourites, especially with nice pillowy icing on it.

For spiced cake, you don’t need to replace flour with spices, you just add the spices to your dry ingredients at the beginning and sieve them as well. I tend to add a maximum of 2-3 teaspoons total of ground spices, whether you want to add 2-3 teaspoons of one spice (which is quite extreme), or a mixture of spices that amounts to 2-3 teaspoons (as in ½ a teaspoon of cinnamon, ½ a teaspoon of ginger, ¼ a teaspoon of coriander, et cetera).

For Queen cakes, which is basically a vanilla fairy cake with dried fruit in, just add 3 ounces of raisins or currants - tossed well in flour - to the mixture. You could also add chocolate chips for chocolate chip cakes, or even chopped crystallised ginger.

A nice idea for children’s parties (especially little girls) is to add 2 tablespoons of hundreds and thousands. This will make the cake spotty on the inside. Don't use dragées, as they are big and crunchy to find in a delicate little cake.

When adding colouring to your mixture, you can use either gel or liquid colouring, just not powder; it doesn't mix in properly. You can add up to 1 fluid ounce of liquid colour before a) the mixture starts to get too thin, or b) the colour is frightening deep/dark/nuclear. I don't really go in for colouring the actual cake, though, as I like to leave the cake natural and get my colour hit through the icing.

So go forth, and flavour!

Thursday, 28 March 2013

Coffee Sponge Slice with Raspberry Fondant Icing (Wheat Free)


'Coffee and raspberry?', I hear you (or imagine hearing you) say? Yes: raspberry and coffee go very well together.

If you think about it, coffee is very similar to chocolate in its flavour; if one were to draw a comparison, one could say that coffee is the more acrid and sharp version and chocolate is the warmer, richer version of the same taste. So, basically anything that goes well with chocolate tends to pair with coffee, too (with a few exceptions, of course).

Coffee and mint, coffee and vanilla, coffee and hazelnut, coffee and orange, coffee and caramel, and coffee with raspberry; these are all very pleasing combinations. Just imagine yourself going to a café to order a coffee and seeing what kind of syrups you can add to it.

As for the anatomy of this particular piece of patisserie, it's basically a coffee favoured sponge with a raspberry pouring fondant topping. The sponge is flavoured with both strong coffee and coffee grinds, which gives it a nice speckled appearance akin to a poppy-seed cake, and also means that it tastes quite strongly of coffee.The topping is a boiled sugar pouring fondant, flavoured with strained raspberry jam; it's best to use a jam with a high fruit percentage (sixty percent or more is preferable) to make sure it's nice and fruity.  I like very strong flavours, you might've already guessed.

And you will soon learn that I just have a thing for sliced cakes and tray bakes. That's what I get for being an Irish Protestant... it's just in my blood.

So, to make this deliciousness, you will need:

INGREDIMENTS
For one 6x9 inch (15x23 centimetre) cake:
  • 4 ounces (115 grammes) spelt flour
  • 2 ounces (55 grammes) cornflour
  • 1 teaspoon baking powder
  • 1 tablespoon ground coffee
  • 3 medium eggs, at room temperature
  • 4½ ounces (130 grammes) caster sugar
  • 1½ ounces (45 grammes) melted butter
  • 1½ ounces (45 grammes) sunflower oil
  • 4 tablespoons (60 milliliters) strong black coffee

For icing:
  • 8 ounces (225 grammes) caster sugar
  • 2 fluid ounces (60 milliliters) water
  • ¼ teaspoon white vinegar, or lemon juice
  • 1 ounce (30 grammes) strained raspberry jam
  • Optional: about 4 tablespoons of raspberry- or coffee-flavoured syrup.

HOW-TO

  • Prepare the cake using this recipe, and bake it into a 7x9 inch (17x23 centimeter) cake tin for 20-25 minutes, or until springy to touch and a cocktail stick stuck into the thickest part comes out with one or two crumbs stuck to it. Leave to cool.
  • If you want to make the sponge a little moister, you can sprinkle the cake, while still a little warm, with raspberry- or coffee-flavoured syrup.
  • Once the cake is completely cold, start preparing your pouring fondant using this technique. As you already know (or at least you ought to know / for I have often told you so) that pouring fondant must be used immediately after making, as it can't be stored in liquid form like beaten icings.
  • Pour your prepared fondant onto the cake and, working very quickly, spread the icing around with a palette knife. You can make swirls on the top if you want but I tend to do streaks.

While the fondant is still sticky, you can sprinkle any kind of pretty shiny things, like hundreds and thousands or vermicelli, but I like leaving mine plain and simple. Allow to fondant to set for about 10 minutes before cutting.

A handy trick I've learnt when it comes to cutting cakes is making sure your knife is nice and hot. I do this by keeping a tall glass or vase full of hot water by my make while I'm cutting, dipping the knife in it before every cut, and using some kitchen paper to wipe off the crumbs between every cut. This means you'll get a perfect, clean cut every time, as if you did it by laser... 


Monday, 25 March 2013

Basic Sponge Cake (Wheat Free)


Behold the beauty; marvel at the moistness; love the lightness; and do an admiring-action-that-begins-with-'N' about the nommage. This is the Anna-Victoria Sponge (see what I did there?)

As a non-wheat eater, it's sometimes hard to find a recipe that works and tastes nice that doesn't contain wheat. I'm always massively underwhelmed by the 'free-from' products that can be bought from most supermarkets, and and similarly disappointed with gluten-free flour mixtures and taste and feel like dust. Now, I will stress that I'm lucky enough to not be full-on coeliac, and as such I'm not allergic to all kinds of gluten, I'm just intolerant to wheat. As such, I can use spelt flour, which is a God-send. So to my fully coeliac friends, spelt is not gluten-free only wheat-free, as mentioned in my last post. Don't use this recipe if you tend to have near-death-experiences when you eat gluten.

This recipe is very different from the usual fairy-cake/sheet-cake/birthday-cake recipe where the butter and sugar are creamed together and so on, because in my experience those kinds of cakes aren't as nice when made with spelt. So, there will be a few explanatory details thrown in with this recipe.

So, without further adon't, here's the recipe.

INGREDIMENTS:
This will yield one 7x9 inch (17x24 centimeter) rectangle, 7 inch (18 centimeter) round, or 8x4 inch (21x10 centimeter) loaf cake.


  • 4 ounces (115 grammes) white spelt flour
  • 2 ounces (55 grammes) cornflour
  • 1 teaspoon baking powder
  • 3 medium eggs, at room temperature
  • 4½ ounces (130 grammes) caster sugar
  • 1 teaspoon vanilla essence (preferably the pure and natural kind)
  • 1½ ounces salted butter (if lactose intolerant, see notes); if using unsalted, add ¼ teaspoon of salt to the flour.
  • 1½ ounces sunflower oil
  • 3 tablespoons (45 milliliters) hot water


For the whys and what-fors, read the notes section at the end. If the scientifics don't bother you, bake away.

HOW-TO:
  • Preheat the oven to 180°C (350°F, Gas Mk.4, or moderate). If I turn my oven on directly before preparing the cake mixture, it's usually preheated by the time the mixture is ready.
  • Prepare your tin for baking by greasing it on all sides then dusting with flour. Alternatively, you can line the tin with non-stick baking paper, or waxed paper. Here in Ireland, we have this marvelous sillicone-greased paper, and it works a treat.
  • Sieve the spelt flour, cornflour, and baking powder (and salt, if using) into a bowl and set aside.
  • In a little saucepan, or a bowl suitable for microwaving, melt together the butter and sunflower oil and set aside.
  • In a large mixing bowl, whisk the eggs and sugar together with an electric hand mixer for about 4 or 5 minutes. It's ready when it is doubled in size, lemon-coloured, and leaves ribbon trails on itself when the beaters are lifted. If you don't have an electric hand mixer, you can use a balloon whisk, just set the bowl over a saucepan of simmering water. Gently heating the egg mixture speeds up the process, and this means you won't snap off your arm by whisking for hours.
  • Add the vanilla essence and, while still whisking, gradually pour in the melted butter and oil mixture.
  • Sieve in half of the flour mixture and fold in using a spatula, balloon whisk, or metal spoon. Use any of these but please don't use a wooden spoon or electric beater: you WILL undo the last 10 minutes spent on getting air into the eggs and sugar.
  • Fold in the hot water until fully incorporated, followed by sieving in the second half of the flour. Fold until just mixed.
  • Pour the cake mixture into the prepared tin, and bake in the oven for about 20 to 25 minutes. Don't be tempted to open the door until after three-quarters of the cooking time has elapsed: the cake will sink.
  • Once 20 minutes is up, you can test the cake. If it's done, it should be springy to touch, set on top, and a cocktail stick or skewer stuck into the thickest part will come out with one or two crumbs sticking to it. You don't want the skewer to come out clean, because the cake will be too dry, but yet there should be no raw, liquidy mixture on the stick either. If it's not done, put it in to complete the whole 25 minutes; if it's not done after 25 minutes, your oven has a cold.
  • When the cake is baked, let it cool completely in the tin. Once completely cold, you can decorate it however you like.
NOTES:
For the scientifically minded, the basic formula of this cake is: for every egg use 1 ounce of liquid fat, 1½ ounces of sugar, 2 ounces of flour, and 1 tablespoon of hot water. 1 teaspoon of baking powder is added for every 6 ounces of flour, or one can use self-raising flour.

A note on the flour: I use a mixture of 2 parts spelt flour to 1 part cornflour for two reasons. The now-first reason, which I discovered by accident while doing it for the what-is-now-the-second-but-was-the-first reason, is because the texture is way lighter and fluffier when cornflour is added. The now-second reason is because spelt flour is quite expensive and when I was in my poor student days, I wanted to pad out the spelt flour with a cheaper flour to save money. The fluffy texture was a serendipitous side effect of my frugality.

A note on the sugar: Caster sugar is the best for this because the grains are small and dissolve easily into the eggs as you're whisking. If you want, you can use a soft brown sugar, either replacing it completely or in part, just don't use coarse sugar, like Demerara or table sugar: the eggs just won't reach the same volume, and the cake will have a grainy texture.

A note on the butter and oil: When I say liquid fat, I mean fat that isn't in solid form, like room temperature butter or block cooking margarine. For the fat to be dispersed evenly throughout the cake mixture, I whisk liquid fat into the eggs and sugar, as opposed to creaming. However, the reason I don't use all oil is for a) flavour, and b) sturdy structure once the butter has returned to solid form after cooling the baked cake. If you don't want to use butter for whatever reason, you can use block margarine, just don't replace it all with oil.

A note on the shape and size of the cake: If you don't want to make one big cake, this recipe is ideal for fairy cakes. This three-egg quantity will yield 14 or so cakes, which is a weird number, but to make the usual 12 fairy cakes one would need to make a mixture from 2½ eggs, which is as akward as Hell. As such, I just make 24 cakes with a 5 egg mixture; simples.

It's been a while! Happy 9th Anniversary!

  It's been a while. The past two years have been a helluva a ride. This year is gonna hold some big changes for this blog. I'm comp...