Showing posts with label candy. Show all posts

Monday, 9 December 2019

Super Fluffy Nougat Bars, and How Not to Temper Chocolate

Looking for a super sweet treat? Why not try your hand at the super fluffy nougat that you'd find in a Mars of Milky Way bar!


I won't lie: nougat isn't the easiest of sweets to make. It involves working with egg whites which are fragile and finicky, and working with boiling sugar syrup, which is also fragile and finicky. But the results are just like what you find in a nougat bar like a Snickers, and it's worth all the effort!

This is my first foray into making nougat, so it can only continue to improve! I actually wanted to learn how to make this kind of fluffy nougat so I could recreate on of my childhood classics, the strawberry Milky Way, which is no longer available in Ireland. So, watch this space for further nougat flavours!

But not only did I learn how to make this kind of nougat, but I finally started my journey with tempering chocolate, which went quite well. However, if you're going to try tempering chocolate, here are some little tips for you:

  1. Don't temper chocolate in small batches! It should be done with at least 300 grammes (11 ounces) of chocolate.
  2. Don't temper assorted chocolate! Stick to one kind of chocolate. Milk with milk, dark with dark, and white with white. The different chocolates need different tempering temperatures.
I used the Supervalu website directions on tempering, which worked perfectly well for me. I now just have to work out how to get rid of the streakiness, but that was probably caused by mixing chocolate.


INGREDIMENTS

2 cups (1 pound, 455 grammes) caster sugar
1 cup (12 ounces, 340 grammes) golden syrup, or golden corn syrup/glucose syrup
½ cup (4 fluid ounces, 120 millilitres) water
2 medium egg whites, room temperature
Up to ½ teaspoon salt, to taste
1 tablespoon (15 millilitres) vanilla essence

To coat
18 ounces (510 grammes) milk chocolate, tempered


METHOD
  • Put the egg whites in the bowl of a stand mixer with whisk attachment, or into a large heatproof mixing bowl and use an electric hand whisk.
  • In a medium saucepan, cook the sugar, syrup, and water, stirring as little as possible; you can swirl the pan, though. As soon as the mixture begins to boil, whip the whites to medium peaks. 
  • Once the syrup reaches 120°C (248°F), take about a ¼ cup of the hot syrup and drizzle it into the whites while whipping to make a fluffy meringue with stiff peaks. Stop the mixer while you cook the rest of the syrup.
  • Cook the remaining syrup up to 140°C (284°F), and then drizzle very, very, very slowly into the meringue while whipping. It'll go through some phases: first, it'll be like a big fluffy meringue, then it'll become something that is much stiffer, but still fluffy. Eventually, it'll be quite frosting-like. 
  • Near the end of the whipping process, flavour the nougat with the vanilla and season with salt to taste.
  • Once fully whipped, press into a 4 by 9 inch (10 by 23 centimetre) mould for thick sweets, or a 10 inch (23 centimetre) square mould for thin sweets, and set for at least 4 hours.
  • Cut into fingers (I got about 16 thin sweets because I used a larger square mould, but the smaller mould will get 8 thick fingers), and dip in tempered chocolate.

Wednesday, 20 March 2019

Variation on a Theme: Cappuccino Fudge

Along with a cake, I made Stefi an edible present: I present to you Cappuccino Fudge!


As long term readers of my blog well know, I absolutely adore fudge. Over the years, I’ve found ways of refining my fudge recipes and process, and it has ranged from using condensed milk, to evaporated milk, to caster sugar, to brown sugar, to salted butter, to unsalted butter. I discovered a better way of making fudge when I made my Southern States Caramel cake, when I was looking for a good boiled icing recipe that wouldn't set too hard.

My current fudge recipe suits my tastes because it’s not sickly, crystal sweet, but round, rich, fatty, and smooth. The consistency is firm and can even be moulded like fondant if you treat it right! It reminds me of the high quality all-butter fudges you get from Thorntons or other chocolate shops. 

But another thing I really love about my current recipe is how easily it can be adapted to other flavours and combinations. Fat is a great vehicle for flavour, and seeing as nowadays I make fudge with copious amounts of butter and full-fat whipping cream, it holds flavours exceptionally well, even better than when I did that orange chocolate fudge video back in the early days of my YouTube channel. 


And so, I share with you my first proper venture into an unusual fudge flavour since I started using my updated recipe: cappuccino! This is essentially fudge with instant coffee added to taste, topped off with a stiff vanilla buttercream, and dusted with drinking chocolate powder. 

Find yourself a good quality finely ground instant espresso powder. It should be more like powder than granules. This can be mixed directly into the fudge mixture to taste, starting small and adding if you want it stronger. Alternatively, if you only have coffee granules, you can dilute them in the vanilla essence to get a concentrated coffee essence. That's what I did.

I made the topping using a fairly stiff buttercream flavoured with a splash of vanilla essence. I piped it on with a star nozzle, but you could equally as easily swoop it on to look more like milk foam. I used Cadbury drinking chocolate to dust it, but you could also use the chocolate topping that comes in boxes of instant cappuccino sachets. My dad loves that stuff, so there’s never any of it around me to use! 


INGREDIMENTS

1¼ pounds (570 grammes) caster sugar
8 fluid ounces (225 millilitres) whipping cream, slightly warmed
8 ounces (225 grammes) unsalted butter
¼ to ½ teaspoon (1 to 3 millilitres) fine salt
1 tablespoon (15 millilitres) vanilla essence

For the topping
3 ounces (85 grammes) unsalted butter
9 ounces (250 grammes) icing sugar
Milk, at room temperature, for mixing
Vanilla to taste
Hot chocolate powder, for dusting


HOW-TO
  • In a large saucepan with a metal or enamel interior (don't use a dark coated pan), add the sugar, cream, and half of the butter. Stir well over medium-low heat until everything has dissolved nicely and is a syrup with no gritty sugar on the bottom. Bring to a simmer.
  • When it begins to simmer, turn the heat to medium-low and simmer gently for up to 30 minutes, until it reaches soft-ball stage (112°C to 115°C (235° F to 240° F)). On reaching this temperature, remove from the heat immediately and allow to cool for 10 to 15 minutes, or until the bubbling has completely stopped.
  • Cut the remaining butter into small cubes, and then beat the syrup with an electric hand mixer on medium speed for about 2 minutes.
  • As the syrup begins to thicken and lose its gloss, taking on a matte appearance, start adding the butter, a cube at a time while beating, making sure to beat in each cube fully before adding the next. The whole process should take about 5 to 6 minutes.
  • Eventually, you will get a deliciously thick, fudge mixture. If the fudge begins to split, leaving oily patches or film, add in half a teaspoon of cold water and beat until it comes together again.
  • To flavour, dissolve the coffee granules in the vanilla essence and beat in thoroughly. Salt to taste: you'll need a surprising amount of salt.
  • Pour out into a 7 inch (20 centimetre) square tin, that has been lined with non-stick paper. You could use a silicone tin, which is what I do.
  • Allow the fudge to cool to room temperature before icing, then make a stiff buttercream with the icing ingredients, and pipe or dollop on top of the fudge. Dust with hot chocolate powder.
  • Allow the whole confection to set for at least 6 hours at room temperature before cutting into equally sized pieces. I recommend one inch (2.5 centimetre) squares.

Saturday, 5 January 2019

When a Failure Becomes a Success! Old-Fashioned Toffee

Sometimes, things go horribly wrong in the kitchen. It happens to all of us. But other times, things look like they're about to go horribly wrong before you put your Lateral Thinking cap on. I bring to you the results of such an occasion: Old-Fashioned Toffee!


I was making some gingerbread men and popped my usual equal weights of butter, sugar, and golden syrup into a pan. I then completely forgot about it as I got distracted by checking addresses for wedding invitations. Once I got back, it was cooked to firm ball stage; far too cooked to use in gingerbread men. I got quite upset about it, until I embraced the failure and decided to cook it even further to make a hard-crack snappy toffee out of it.


I mixed a little bicarbonate of soda into it to make it more brittle and light, and then sprinkled some chopped walnuts over the top. I had some left over from making the Esterhazy torta.

So, I present to you my accidental recipe for old-fashioned toffee! This, of course, is written as if you're actually making toffee and not salvaging the remains of some syrup for gingerbread!

INGREDIMENTS


4 ounces (115 grammes) salted butter
4 ounces (115 grammes) golden syrup
4 ounces (115 grammes) soft brown sugar
1 level teaspoon (5 millilitres) bicarbonate of soda
Optional: chopped nuts, to decorate

METHOD
  • Lightly oil a large flat baking sheet, and sieve the bicarbonate of soda into a small cup. Set aside.
  • In a saucepan over medium-low heat, heat the butter, syrup, and sugar until the butter is melted and the sugar dissolves.
  • Increase the heat to medium high and boil for about 10 minutes until it reaches the hard-crack stage, or 146 to 154°C (295 to 309°F) on a sugar thermometer.
  • As soon as it reaches temperature, remove from the heat and quickly stir in the bicarbonate of soda: it should puff up slightly, but not too much. Pour out onto the flat baking sheet and sprinkle with nuts, if using. If you want even pieces, score the toffee while it's still warm.
  • Leave to cool completely, about 1 hour, before breaking along the score lines, or hitting firmly with the end of a rolling pin to break into shards.

Monday, 14 December 2015

Peanut Brittle (Dairy- and Gluten Free)

For more festive sugar craft: peanut brittle! A good and simple treat, made with only two ingredients (or three if you want a little buttery richness).


My oldest brother seems to subsist almost entirely on dry roasted peanuts, crackers, and the odd bowl of curry and rice. I have no idea how he is as alive and fit as he is, but he manages somehow. So, for this Christmas, I decided to make him some lovely sweet and crunchy brittle,

This is a very simple sugar craft project that even people who have never worked with sugar can make: only two ingredients, a frying pan, and no sugar thermometer.

FREE FROM
☑ Soya
☑ Yeast
☑ Dairy
☑ Gluten

CONTAINS
☒ Nuts
☒ Refined sugar products

INGREDIMENTS:
  • 7 ounces (200 grammes) roasted salted peanuts
  • 7 ounces (200 grammes) caster sugar
  • 1 tablespoon (15 millilitres) water
  • Optional: 1 tablespoon (15 millilitres) butter

HOW-TO:
  • Cut out a large sheet of non-stick paper, about a foot (30 centimetres) long. Brush lightly with flavourless oil.
  • Place all the ingredients in a large frying pan over low heat. Heat gently until the sugar has dissolved into the water and become a syrup; if using the butter, heat gently until the butter and sugar melt together.
  • Increase the heat to medium-high, and cook while continuously stirring. The mixture will go through a few stages: first, the sugar will melt, then it will seize up into a crumbly mess, and then it will melt again, turning a golden brown colour. Please be patient, and don't think it's gone horribly wrong when it goes crumbly.
  • Once the brittle starts turning brown, be very careful not to burn it. Cook it to a nice, deep, nutty brown colour, but no further: the sugar will burn, turn black, taste disgusting, and possibly catch fire. 
  • Pour the mixture out onto the oiled paper and spread out thinly, making sure the peanuts are all touching off each other and compact. Neaten the edges into a rectangle. Do this quickly, because it doesn't take long to set.
  • Score the brittle into squares or rectangles with a long blade sharp knife. Allow to cool completely and set; about an hour.
  • Snap into pieces and wrap well in either clingfilm or cellophane, then keep in an airtight container; this brittle gets sticky quickly on exposure to air.

Friday, 4 December 2015

Turkish Delight (Naturally Free From Everything)

Here's another recipe in the Christmas gifts series: Turkish delight!


I'm going to be honest: I really don't like Turkish delight. I think it's vile: flower flavoured jelly. However, I do know that my brother really likes it, and it's associated with the festive season. Even thought I don't like it, it's a good simple and quick homemade sweet to give to someone as a gift.

Traditionally, Turkish delight is made my boiling a sugar syrup to soft ball stage, while simultaneously cooking cornflour, lemon juice, and water in another pot until it becomes gluey. The syrup is added bit by bit to the flour, mixing all the time, and then when fully incorporated it is cooked on a low heat for about an hour until pale yellow. The long slow cooking allows the acid in the lemon juice to work on the cornflour, chemically changing the starch. It takes forever, and uses a lot of equipment. I had given up on making Turkish delight when I found out that it was so complicated. But then I found another way of making it in a manner which I didn't expect.

I follow a lot of Indian cookery blogs and YouTubers: what can I say, I love curry and Indian sweets. Usually, when I watch a video that's suggested to me on the YouTube homepage, I also end up watching a load of other related videos that are shown in the sidebar, even if I don't know what they are. I came across a video for Bombay Halwa, also known as Mumbai or Karachi Halwa, which is remarkably similar to Turkish delight, but a lot simpler.

Bombay Halwa has more cornflour than Turkish delight and also uses a lot of ghee, but a quicker technique that doesn't require a thermometer, sugar testing, or multiple saucepans. So, I used the cornflour to sugar ratio from the Turkish delight recipe, and the water quantities and cooking technique from the Halwa recipe. The results were very good!

FREE FROM
☑ Soya (check for soya lecithin)
☑ Dairy (use substitute in italics for dairy free)
☑ Gluten
☑ Nuts

CONTAINS
☒ Refined sugar products

INGREDIMENTS:
  •  7 ounces (200 grammes) caster sugar
  • 1 ounce (30 grammes; 4 tablespoons) cornflour
  • 5½ fluid ounces (160 millilitres) water, or the syrup
  • 8 fluid ounces (240 millilitres) water, for the cornflour
  • 1 tablespoon (15 millilitres) lemon juice
  • 1 tablespoon (15 millilitres) rosewater, or 2 teaspoons (10 millilitres) lemon zest if you don't like the rose flavour
  • Red or yellow food colouring
  • Icing sugar for coating
  • Cornflour for coating


HOW-TO:
  • Line a loaf tin with non-stick baking paper, and brush the paper with flavourless oil. Alternatively, you can use a sillicone loaf tin and brush it with oil.
  • In a bowl, mix together the cornflour and the according water together until all the cornflour has dissolved and there are no lumps.
  • In a large saucepan, heat the sugar, lemon juice, and the according water until the sugar dissolves . Once dissolved, bring to a boil and cook until it had slightly thickened.
  • Remove the pan from the heat, and add in the cornflour slurry (making sure to give it a little stir first to lift any cornflour that's settled on the bottom of the bowl). Stir until combined.
  • Turn the heat down to medium, and return the pan to the heat. Cook, gently but definitely bubbling, until the mixture has become transparent, thick, and gluey; about 20 minutes. You must stir often, otherwise it will burn.
  • Once it has become thick and jellyish, take it from the heat and stir in the rosewater and enough red food colouring to tint it pink.
  • Pour the mixture into the tin and allow to set at room temperature overnight, or at least 8 hours.
  • Once set, mix some icing sugar in equal parts with cornflour (about 3 tablespoons (45 millilitres) each) and sprinkle some of this mixture onto the work surface. Turn the jelly out onto the dusted surface, peeling off any paper.
  • Cut the jelly out with a long oiled knife. Coat each piece in the icing sugar and cornflour mixture. Keep in an airtight container with any leftover coating mixture.
  • You can also coat the jellies in chocolate. Dust off any excess icing sugar, and then dip in tempered chocolate.

Wednesday, 15 October 2014

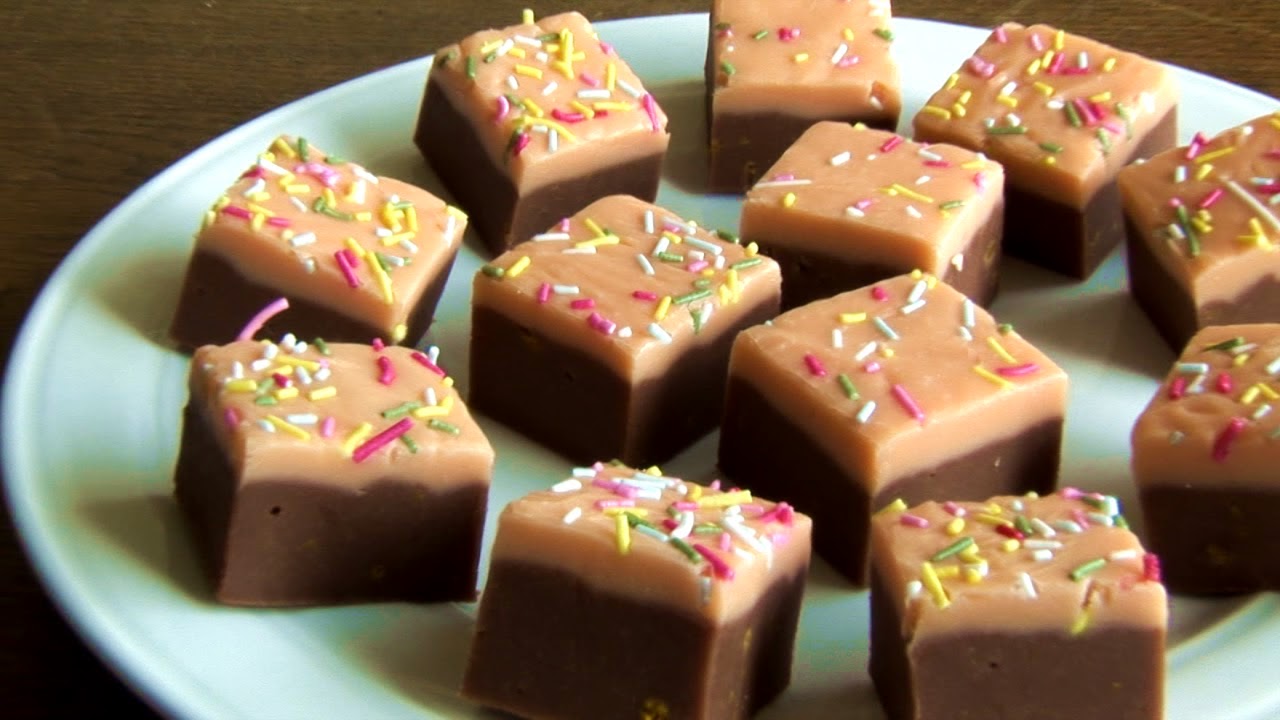
Orange Chocolate Fudge

When designing my second Halloween dessert, the concept of something orange just flew into my mind, as orange is a very Halloweeny colour: whether it's the imagery of stripy witch's tights, or a crispy fallen leaf, orange - along with green, purple, black, and grey - rank highly in my mind when it comes of Halloween colour associations.


Another inspiration that came to me was the idea of celebratory food. Halloween is Celtic new year's eve, and all the traditional celebrations we have as part of Halloween stem from ancient Irish new year's eve customs. Traditionally, a lot of nice food, beer and mead would be consumed as part of the festivities. Nowadays, celebration food looks very different to how it did in pre-Christian Ireland, but the vibe is still there.


To me, Halloween is all about sweeties, chocolate and autumn fruits and nuts, so I thought I'd design a sweetie worthy of any trick or treat bucket: Orange Chocolate Fudge.

There is no finer combination in the world than orange and chocolate: it's just a match made in heaven. The warmth of the orange oil lends itself as a perfect match for the dark earthy quality of chocolate, and when both are wrapped up in fat and sugar what's not to like?


FREE FROM
☑ Soya (check for soya lecithin)
☑ Gluten
☑ Wheat
☑ Nuts
☑ Eggs

CONTAINS
☒ Dairy
☒ Cocoa
☒ Refined sugar products

 INGREDIMENTS

For the orange chocolate layer:
  • 8 ounces (225 grammes) condesned milk
  • 8 ounces (225 grammes) light brown sugar
  • 4 ounces (115 grammes) butter
  • 2 fluid ounce (60 millilitres) milk
  • 1 teaspoon (5 millilitres) vanilla or other essence
  • 1 to 2 tablespoons cocoa powder, depending on how dark you want it
  • Zest of 1 orange
  • Pinch of salt

For the coloured topping layer:
  • 3 ounces (85 grammes) condensed milk
  • 3½ ounces (100 grammes) white chocolate
  • Pinch of salt
  • Orange food colouring


THIS TIME LAST YEAR: Wheat Free Ice Cream Cones

Friday, 26 September 2014

Variation on a Theme: Double Chocolate Chip Cookies (Wheat Free)

There's nothing I like more than a chocolate chip cookie, but when the cookie part is chocolate as well? Now that's a kind of magic.


As you can see in the picture, the chocolate chips are colourful, that's because I used M&Ms; I didn't feel like chopping up a bar of chocolate, and M&Ms just happened to be on offer in Dunnes. I think the only thing that could have improved these is if they had been Peanut M&Ms....


Also, these look a little different to the ones I usually make using this recipe because this batch I made using plain wheat flour. Once again, white spelt flour is rare and expensive, and seeing as I was making these as a gift for a friend who isn't wheat intolerant, I used normal flour.

To make these, I simply followed my usual recipe as linked above but replaced 1 tablespoon (30 millilitres) of the flour with cocoa powder, and used 7 ounces of M&Ms instead of chocolate chips. That simple: no voodoo here.

My brother, who is also able to eat wheat, sampled one and said they were delicious, but when he was eating one it sounded a tiny little bit crunchier than the ones I usually make. They're a little bit more like the packets of chocolate chip cookies you buy here in Ireland, that are crunchy not soft like they are in the States.


Either way, they were very pretty and reliable sources say they were tasty, which is my job done.

THIS TIME LAST YEAR: (coincidentally) Variations on a Theme: Chocolate Chip Cookies

Friday, 19 September 2014

Recipe Revision: Vanilla Fudge Recipe


Last year I published a recipe for soft vanilla fudge, which is no doubt delicious, but can at times be very temperamental. Recently I've been finding out ways of making fudge a little easier to make, and this is the resulting fudge!


Beautiful isn't it?

It turns out that the first thing I discovered is that condensed milk is actually really useful. My original recipe didn't use condensed milk, because it's quite expensive and at the time I couldn't justify the cost of using it when it's perfectly feasible to make fudge without it. But when I discovered a really simple 2 ingredient condensed milk cheat, it suddenly became a lot cheaper. So, I'm reconciled with it.


The second thing is that traditional fudge is too sugary for my liking and not rich enough. I remedied this by upping the butter amount in the recipe. Very simple, but now the flavour is a lot fuller and not as one-dimensional.

This fudge is really soft and melts in the mouth. Depending on how long you beat it for is how firm and grainy it gets: the less you beat it, the softer; the more you beat it, the firmer.

I'm going to be adapting all my previous fudge recipes using this new improved version. Stay tuned!

INGREDIMENTS
This is a large quantity that will make about 1 pound (450 grammes) of fudge, but I've found it can be easily halved or even quartered. Just be really careful when making small batches because it can burn or crystallise easily.
  • 8 ounces (225 grammes) condesned milk
  • 8 ounces (225 grammes) light brown sugar
  • 4 ounces (115 grammes) butter
  • 2 tablespoons (30 millilitres) milk
  • 1 teaspoon (5 millilitres) vanilla or other essence

HOW-TO
  • Prepare an 4 by 6 inch (10 by 15 centimeter) loaf tin by lining it with non-stick baking paper. You could also use a silicone baking tin, which needs no lining.
  • In a heavy-based large saucepan, heat the all the ingredients in a heavy bottom saucepan the sugar has completely dissolved. Using a pastry brush dipped in hot water, wash the sugar crystals from the side of the pan. Alternatively, you can just pop the lid on the pan for a minute to allow the steam to wash it all away instead.
  • Once the sugar has dissolved and there is no evidence of sugar crystals left, bring the mixture to the boil and once boiling clip a sugar thermometre to the side of the pan. Cook over medium-high heat until the whole thing reaches 118°C (245°F), stirring occasionally to prevent the dairy from burning to the pan.
  • Once the fudge has reached temperature, take the pan from the heat and add the vanilla essence. B beat vigorously with a wooden spoon until thick, creamy and opaque. The mixture will slightly lose its shine and become more matte, and the consistency will be like freshly made Mr Whippy ice-cream. 
  • Pour into your prepared tin and allow to cool at room temperature overnight.

Do not even think of setting it in the fridge: you can store it in the fridge once set, but setting the fudge in the fridge will cause crystallisation. Store in an air tight container to avoid it catching any unwanted odours or flavours.

THIS TIME LAST YEAR: The Grand Christmas Cake Creation of 2013 (Part 2)

Monday, 7 July 2014

Variation on a Theme: Chocolate Fudge

I do so love fudge. In my last post I made Scots tablet, which is a nice crumbly grainy sweet, but today I went for the more traditional approach, and made it into every woman's best friend by adding some cocoa powder, nom!

I used my basic soft fudge recipe, but added 1 tablespoon of cocoa powder at the beginning to make it nice and chocolatey. You could also add a 2 ounce (55 grammes) block of dark chocolate at the beginning too and let it melt into the milk.

I've found over time that there's not need to add the sugar after the milk, cream and butter, it works just as well if you add everything to the pot at the start and just cook it all together.


This is how deliciously sleek and amazing it looked when I poured it into the tin. As you can see, it's still glossy, but it's opaque. This is the kind of consistency I talk about when I mean creamy, thick and opaque in my posts about the various kind of beaten sweets I make.


Generally when the fudge it set, I tend to cut it into pieces and allow each piece to set and crust on the outside before storing, like one you freeze you cakes individually before freezing all together. It stops them from clumping in storage.


Have some more gratuitously artsy and #fdporn photographs for the road. You're welcome.


THIS TIME LAST YEAR: My Search for the Perfect Chocolate Chip Cookie Continues

Monday, 30 June 2014

Vanilla Scots Tablet

I have recently been spending so much time hanging out with my new pash (which is ice-cream, if you haven't noticed already) that I've been neglecting my other fields of confectionery expertise; and while packing to moving into my new house, I was reacquainted with my sugar thermometer.

Even though the thermometer itself is banjaxed and I could seriously do with getting a new one, it put my mind back in the frame of sugarcraft. So I though of something I could make.


When I worked in Thorntons they sold bags of butter tablet, which is a kind of crumbly butter sweet somewhere between fudge and hard toffee. It has the texture of a Kendal Mint Cake, if you've ever eaten on of those. It's delicious and melts in the mouth way too easily to maintain any sense of decent portion control.


I used to make a recipe for vanilla fudge from a cookery book when I was little which in retrospect was more like tablet than fudge, and the basic difference is only how long you beat it and how soon after cooking you beat it. Tablet it brittle and grainy because the sugar is agitated more leading to more solid crystalisation.

Tablet looks nice if broken into pieces by hand, sort of rustically like shown. It you want, you can score it into pieces before it's fully set so it snaps easily into little squares.

So, less talk more cooking!

FREE FROM
☑ Soya (check for soya lecithin)
☑ Yeast
☑ Gluten
☑ Wheat
☑ Eggs
☑ Nuts

CONTAINS
☒ Dairy
☒ Refined sugar products

INGREDIMENTS
This is a large quantity that will make about 1¼ pounds (570 grammes) of fudge, but I've found it can be easily halved or even quartered. Just be really careful when making small batches because it can burn or crystallise easily.
  • 1 pound (450 grammes) caster sugar
  • 4 fluid ounces (115 millilitres) milk
  • 4 ounces (115 grammes) butter
  • 1 teaspoon (5 millilitres) of vanilla essence

HOW-TO
  • Prepare an 8 inch (20 centimeter) square tin by either greasing it lightly or lining it with non-stick baking paper. You could also use a silicone baking tin, which needs no greasing or lining.
  • In a heavy-based large saucepan, heat the milk and butter until the butter has melted.
  • Pour the sugar into the middle of the pan so that it forms a little mountain in the middle, then gently bring in the milk mixture from the edges. Your aim here is to get as little sugar as possible on the edges of the pan, as this can cause your fudge to go grainy.
  • Stir the mixture over medium-low heat until the sugar has completely dissolved. Using a pastry brush dipped in hot water, wash the sugar crystals from the side of the pan. Alternatively, you can just pop the lid on the pan for a minute to allow the steam to wash it all away instead.
  • Once the sugar has dissolved and there is no evidence of sugar crystals left, bring the mixture to the boil and once boiling clip a sugar thermometre to the side of the pan. Cook over medium-high heat until the whole thing reaches 118°C (245°F).
  • At this point, unlike fudge where you don't stir at all on pain of hard crumbly fudge, you keep stirring every so often.
  • While the fudge is cooking, fill your sink or wash basin with about 2 inches (5 centimetres) of cold water.
  • Once the fudge has reached temperature, take the pan from the heat and dip the bottom in the cold water to stop cooking immediately.
  • Add the vanilla essence and beat vigorously with a wooden spoon until creamy and opaque. Move quickly! Unlike soft fudge, it WILL seize into a completely solid mass if you don't pour it into the container as soon as it turns opaque.
  • Pour into your prepared tin and allow to cool at room temperature overnight.

I like the dotted effect that the vanilla pod leaves! I actually made some vanilla sugar by dumping a vanilla pod whose seeds I'd used in my stracciatella ice-cream into a jar of caster sugar. The vanilla pod fascination continues...


THIS TIME LASTE YEAR: Mini Blueberry Cheesecakes

Thursday, 8 August 2013

Chewy Caramel

I promised in my post about the homemade chocolate box that I'd give you all the recipe for chewy caramels, and here she is!

(Sorry for crap picture: did it in a hurry)

These are a little trickier than the fudge and coconut ice recipes that I've uploaded as it's a little more fiddly. However, it's not very complicated: it just needs to have an eye kept on it a lot of the time. This recipe I arrived at via many a ruined batch so you don't have to!

The chewiness of these caramels can be altered by what temperature you let the final mixture cook to (if you aren't familiar with cooking sugar and the different sugar boiling stages, check out the Exploratorium's explanation of sugar cooking):
  • 115 to 118°C (240 to 245°F) for soft caramels
  • 119 to 124°C (245 to 255°F) for firm caramels (which is the temperature used for the pictured caramels)
  • 125 to 130°C (255 to 265°F) for quite hard caramels
  • 131 to 135°C (265 to 275°F) for tooth-breaking caramels that need an angle grinder to eat 

Keep this in mind for when you're making them and choose which kind of caramel you want before cooking: it's impossible to uncook the mixture if you go too far.

INGREDIMENTS
This is a large quantity that will make about 1¼ pounds (570 grammes) of caramels, but I've found it can be easily halved or even quartered. Just be really careful when making small batches because it can burn or crystallise easily.
  • 4 fluid ounces (115 millilitres) cream
  • 4 fluid ounces (115 millilitres) milk
  • 2 ounces (55 grammes) butter
  • 14 ounces (400 grammes) caster sugar
  • 2 ounces (55 grammes) dark brown sugar
  • 1 teaspoon salt
  • 2 fluid ounces (60 milliltres) water

HOW-TO
  • Prepare an 8 inch (20 centimeter) square tin by either greasing it lightly or lining it with non-stick baking paper. You could also use a silicone baking tin, which needs no greasing or lining.
  • Put the cream, milk and butter into a jug and heat gently in the microwave until the butter melts; set aside.
  • Heat the water in a heavy based saucepan on medium-low heat until steaming and then pour the sugar into a pile in the middle of the pan. Using gentle circular motions, stir the sugar into the water without touching the sides of the pan. This prevents the syrup from crystallising later.
  • Keeping the syrup on a gentle heat, mix until the sugar has dissolved into the water and you are left with a transparent brown solution. Using a wet pastry brush to wash away any sugar crystals that have formed on the sides of the pan.
  • Once all trace of any grittiness and crystaliness is gone, turn the heat up to medium-high. Allow the mixture to boil and once boiling clip a sugar thermometer onto the pan and don't stirAs tempting as it may be, just don't do it.
  • Cook the mixture to 150°C (300°F). This isn't the temperature that defines the softness/hardness of your caramels, that comes later. However, cooking the syrup to this stage is important for the caramels to set.
  • Take off the heat once the temperature is reached and pour in the warm cream and milk mixture. It will bubble up violently and release a lot of steam so take care! Gently stir in the cream mixture and return to the heat.
  • Continue to cook without stirring to your desired temperature.
  • Fill your sink or wash basin with about 2 inches (5 centimetres) of cold water. This seems batty, but all will be made clear.
  • Once the temperature has been reached, take your pan off the heat and dip the bottom in the water to stop cooking immediately. Pour the caramel into your prepared tin without scraping the sides. This is vitally important to prevent your caramels from going all grainy and horrible. Some caramel will be regretably wasted in the process, but you can eat that out of the pan later with a spoon.
  • Pour into your prepared tin and allow to cool at room temperature overnight.

Do not even think of setting it in the fridge: you can store it in the fridge once set, but setting the fudge in the fridge will cause crystallisation. Store in an air tight container to avoid it catching any unwanted odours or flavours.

Monday, 5 August 2013

Soft Vanilla Fudge

I promised in my post about the homemade chocolate box that I'd give you all the recipe for fudge, and here she is!

As I mentioned in my post on coconut ice, I have for many years been experimenting with different recipes for all my favourite sweet treats, and I think I've finally found a recipe for fudge I really like. I've tried lots of different cooking temperatures, different ratios of ingredients, adding the ingredients at different times (including once where I added the butter after cooking and it took me 35 minutes to beat to setting consistency; I don't recommend you do that), and now I feel I've cracked it. 

Once again, the trick was leaving about ten minutes between cooking and mixing: the longer you wait to beat the mixture after cooking, the softer it is. Ten minutes is about right, but you can of course wait longer or shorter depending on your taste.

This is beautifully soft and melts in the mouth, and the vanilla flavour is very delicate. I recommend that you use some white sugar and some brown sugar, as suggested in the method: it makes the fudge extra rich and creamy tasting without adding extra cream or butter; but you can use completely white if you prefer. The texture is very supple, due to the high fat content.

INGREDIMENTS
This is a large quantity that will make about 1¼ pounds (570 grammes) of fudge, but I've found it can be easily halved or even quartered. Just be really careful when making small batches because it can burn or crystallise easily.
  • 1 pound (450 grammes) light brown sugar
  • 4 fluid ounces (115 millilitres) cream
  • 4 fluid ounces (115 millilitres) milk
  • 4 ounces (115 grammes) butter
  • 1 teaspoon (5 millilitres) of vanilla essence

HOW-TO
  • Prepare an 8 inch (20 centimeter) square tin by either greasing it lightly or lining it with non-stick baking paper. You could also use a silicone baking tin, which needs no greasing or lining.
  • In a heavy-based large saucepan, heat the cream, milk and butter until the butter has melted.
  • Pour the sugar into the middle of the pan so that it forms a little mountain in the middle, then gently bring in the milk mixture from the edges. Your aim here is to get as little sugar as possible on the edges of the pan, as this can cause your fudge to go grainy.
  • Stir the mixture over medium-low heat until the sugar has completely dissolved. Using a pastry brush dipped in hot water, wash the sugar crystals from the side of the pan. Alternatively, you can just pop the lid on the pan for a minute to allow the steam to wash it all away instead.
  • Once the sugar has dissolved and there is no evidence of sugar crystals left, bring the mixture to the boil and once boiling clip a sugar thermometre to the side of the pan. Cook over medium-high heat until the whole thing reaches 118°C (245°F). Please don't stir!
  • While the fudge is cooking, fill your sink or wash basin with about 2 inches (5 centimetres) of cold water.
  • Once the fudge has reached temperature, take the pan from the heat and dip the bottom in the cold water to stop cooking immediately. Then, leave the mixture to cool for 16 minutes (a minute per ounce (28 grammes) of sugar).
  • Add the vanilla essence and beat vigorously with a wooden spoon until thick, creamy and opaque. The mixture will slightly lose its shine and become more matte, and the consistency will be like freshly made Mr Whippy ice-cream. 
  • Pour into your prepared tin and allow to cool at room temperature overnight.
Do not even think of setting it in the fridge: you can store it in the fridge once set, but setting the fudge in the fridge will cause crystallisation. Store in an air tight container to avoid it catching any unwanted odours or flavours.

It's been a while! Happy 9th Anniversary!

  It's been a while. The past two years have been a helluva a ride. This year is gonna hold some big changes for this blog. I'm comp...