Monday, 18 March 2019

Happy 6th Birthday, Sweetie Pie!

This weekend has been all about birthdays! Today, the blog turned 6!

I started doing "Sweetie Pie Bakes Stuff" on Monday March 18th 2013, and it has since then garnered over 40,000 views, I've written over 350 blogs, and made some wonderful culinary discoveries along the way.

I know these past 12 months havent been as prolific as the 2016-2017 period, but I have had a wedding to plan his year, and a black belt to train for. It's been insane!

As is traditional, ere's a list in order of the year's most popular posts, from most popular to not as popular:
  1. Ten Points to Gryffindor! Quidditch Pitch Birthday Cake
  2. First Attempt at Whoopie Pies (Wheat Free with a Dairy Free Option)
  3. Zesteratops: the Return of the Novelty Dinnersaurus!
  4. Hot Cross Buns, and Iced Buns: Almost No-Knead Bread (Wheat Free with Dairy Free Option)
  5. Rich Tea Biscuits (Dairy- and Egg Free, with Wheat Free Option)
  6. Question: "How much chocolate and cornflakes should I use to make Cornflake Cakes?", with Video
  7. Having Fun with Dough: Biscuit Creatures
  8. Crystalised (Candied) Chili Peppers
  9. Modern Simnel Cake 2.0: "Can any cake be a Simnel cake? Or must it be fruit cake?" (Wheat Free with Dairy Free Option)
  10. Cake for Aimée: Madeira Loaf with Strawberry "Eyes" (Warning: Long Post)
On reflection, these past 12 months have been good for videos! Hopefully after the wedding, I can continue to make more informative and entertaining videos. I'm looking forward to another year of culinary creations and sharing my knowledge with fellow wheat-free bakers across the world!

Thank you so much for your continuing support,
Sweetie-Pie
xxx

Sunday, 17 March 2019

Dulce de Leche Cake (Wheat Free, with Gluten Free Option)

Happy birthday, Stefi! 


This month my brother’s partner celebrated her birthday, which gave me another excuse to make cake! Unlike my other family members, I still have room to experiment with her birthday cakes because her tastes aren’t as definite as my parents and siblings. She migrated to Ireland from Ecuador, where they celebrate birthdays differently, with different kinds of cake and sweets. 

However, I know she likes caramel! At home, she would make a caramel sauce by slow cooking milk, sugar, and baking soda together until dark brown and syrupy. When she and my brother went to Ecuador, they brought me back a big ol’ tub of dulce de leche, which was summarily consumed in banoffi pies and on ice cream. 

So, I thought I’d return the favour by making her a delicious caramel flavoured cake, with browned butter and buttery caramel icing. Browning the butter adds a delicious note of caramelly goodness to the cake mixture, and this non-crusting icing is more like a caramel cream than a buttercream. And I love jazzing things up with sugar confetti! 


I used my Madeira cake recipe, adding a little bit of lemon zest and almond essence. I also cooked the butter until it was a deep brown and then let it cool before adding it to the mixture. Take note, however, that when you brown butter it will evaporate a lot of water, which needs to be replaced. To do this, simply pop the cooked butter in a bowl on the scales and top it up with water until it’s its original weight. 

I made the icing by whipping unsalted butter and thick dulce de leche until light and whippy, and then I added salt and vanilla essence to taste. After sandwiching the cake with straight up dulce de leche, I iced the cake with swoops of caramel cream icing, and topped it off with colouredy sprinkles! 

Despite it being absolutely loaded with sugar, the fattiness of the butter in the icing and the warm zestiness of the lemon in the cake makes sure that the whole cake isn’t too sweet. Although, I still recommend eating it in small doses. You can also add lemon juice to any part of this to cut through the richness even more, if you like.


INGREDIMENTS

One 8 inch lemon Madeira cake, made with spelt or gluten free flour, cut in half for filling
About 14 ounces (397 grammes) of dulce de leche, either shop bought or homemade
2 teaspoons (10 millilitres) vanilla essence
6 ounces (170 grammes) soft unsalted butter
Colourful sprinkles


METHOD

  • Trim the dome off the cake and cut in half horizontally to get two layers. As you can see in the picture above, I didn't actually have enough cake to cut off the dome because I accidentally used a 9 inch tin when I only had enough mixture for an 8 inch. Lesson learnt!
  • Set aside 9 ounces (250 grammes) of the caramel for the icing, and use the remaining caramel to fill the cake in a nice thin layer. (You'll have some leftover, which you can eat secretly with sliced banana on digestive biscuits later)
  • In a mixing bowl, whip with butter with an electric hand mixer until light and fluffy. Add in the caramel and whip until creamy. Add more vanilla and salt, to taste: some people like saltier caramel than others.
  • Use the icing to coat the top and sides of the cake, and swoop and swirl the icing to make it look extra delicious. Decorate with sprinkles.

Homemade Dulce de Leche: 3 Different Methods

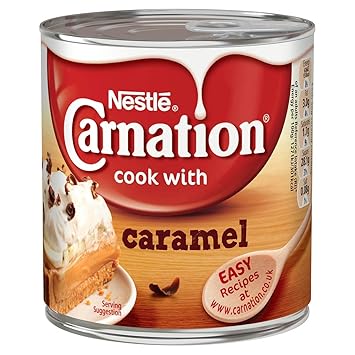
If you live in a part of the world where canned caramel (dulce de leche) is available to you, by all means walk to the shop and get some. Here in Ireland and UK, you can buy cans of Carnation Caramel that weigh 397 grammes (about 14 ounces), and in the States and Ecuador (only because Stefi tells me) you can buy Alpina Arequipe, that comes in larger packets:

Image result for carnation caramelRelated image

However, if you live somewhere where this is not available, here are lots of options open to you, so don't fret. You can make a quick, cheat caramel on the stove stop, or you can do a long, slow caramel on the stove top or in the oven.

The cheat caramel is the fastest, but it's not an authentic, true dulce de leche (hence cheat). It's also the easiest to overcook and completely wreck. Sometimes in life, good things really do come to those who wait.

The stove-top method is the most traditional and widely used, so it's obviously a fairly consistent and reliable way of doing it. However, I find that it's impossible to tell if your caramel is dark enough for your liking if it's hidden inside a completely hermetically sealed can.

By far my favourite way is to cook the condensed milk in the oven. It's a nice halfway house between cheat caramel and and boil-in-the-can, as it only takes 90 minutes, as opposed to three hours, and doesn't have as narrow a margin for error as the cheat method.


Quick Cheat Caramel

2 ounces (55 grammes) caster sugar
One 14 ounce (400 gramme) can of condensed milk
Vanilla essence and salt, to taste
  • Caramelise the caster sugar in 2 tablespoons of water in a small heavy saucepan. Once dark brown, remove from the heat and stir in the condensed milk. 
  • Return to a medium low heat and cook, stirring constantly, until it has thickened and is a rich brown colour. Do not allow to boil.
  • Pour the caramel into a bowl and allow to cool completely to room temperature. Once cool, add a teaspoon of the vanilla and some salt to taste

Stove-Top Slow Caramel

One 14 ounce (400 gramme) can of condensed milk
Vanilla essence and salt, to taste
  • Take the label off the can and leave it completely closed. Place the can in a saucepan of cold water, making sure it is completely submerged. Bring to the boil on the stove top.
  • Once boiling, reduce the heat and simmer the can for 3 hours, topping up the water as necessary.
  • After 3 hours, allow the water and can to cool completely to room temperature. Once cool, refrigerate overnight.
  • When ready to use, salt and flavour to your own taste.

Oven-Baked Slow Caramel

One 14 ounce (400 gramme) can of condensed milk
Vanilla essence and salt, to taste
  • Preheat the oven to 220C (450F, Gas Mk.9).
  • Clean an 8 inch (22 centimetre) round cake tin very well. Make sure it has a solid bottom, not a removable one.
  • Pour the condensed milk into the tin and cover the top tightly with tin foil. Place the tin in a large roasting dish and fill with hot water, until the level of the water reaches halfway up the side of the metal cake tin.
  • Place the water bath and tin onto the centre shelf of the oven and bake for 90 minutes. After 90 minutes, remove from the oven and check: if it's the brown-ness you want, then it's ready! If you want it darker and thicker, cook for a little longer, but no more than 30 minutes in total.
  • Once cooked, remove the tin from the water bath gently, and place on a wire rack to cool. Allow to cool completely before chilling. When it's ready to use, salt and flavour to taste.

Tuesday, 26 February 2019

Kitchen Experiment: "White Velvet" Cake

One of my personal favourite recipes on this blog is the red velvet cake I made back in 2017 when living in Roscommon with my fiancé. It's my go to recipe for chocolate cake, but normally when I want a plain cake I use my normal sponge recipe or the super fluffy sponge I used in the Japanese shortcake. So, I wondered: can I use the red velvet recipe for plain cake?


From my superficial research on Pinterest (which, to be fair, is all the research I have time for these days) American bakers make something called white cake, which essentially has the same constituent parts as the red velvet (without the cocoa and red colouring, obviously) but added together slightly differently. The main difference is that white cake uses only egg whites.

I tried making this cake the American way without egg yolks, but it always turned out too gummy. I think one needs the emulsifying nature of yolks to keep everything together. So, this is essentially the same as my red velvet recipe, only the butter is replaced entirely with oil and the egg whites are whipped separately for lots of volume.


I made a small rectangular cake by whipping 1 egg white with 1½ ounces (40 grammes) of caster sugar to medium peaks. In another jug, I mixed another 1½ ounces (40 grammes) of caster sugar with the egg yolk until smooth, then mixed in 2 ounces (55 grammes) sunflower oil, 1 teaspoon of vanilla essence, and a few drops of almond essence until evenly blended. I folded the yolk mixture into the white mixture gently until fully mixed. I then alternately added 3 ounces (85 grammes) of sifted white flour and raising agents with 2 fluid ounces (55 millilitres) of buttermilk. For this amount of cake, I added ¼ teaspoon baking powder, ⅓ teaspoon baking soda, and ¼ teaspoon of fine salt. I then baked it in a 180C oven for 20 minutes.

After baking and cooling, I filled and iced the cakes with the same kind of cooked milk frosting as the red velvet cake. This time, however, I made it by cooking half a pint of milk, 5 teaspoons of cornflour, and 8 ounces of sugar into a custard. I then whipped the custard with 8 ounces of unsalted butter. Cooking the sugar into the custard made for a much nicer mouthfeel. I only used half of this amount of icing for this small cake, before packing the sides with slivered almonds.

Now, was this cake any fluffier than just using the regular recipe and swapping out the cocoa and food colouring? No. Even though this was paler than a normal vanilla butter cake, I have other recipes that would be just as good for making a pale, fluffy sponge.

Thursday, 14 February 2019

Happy St. Valentine's Day! Strawberry Creme Hearts

Happy St Valentine's Day! Want a cute but simple treat for your valentine? Or something sweet to nibble on after dinner? Well here are some super cute strawberry creme hearts!


I remember making peppermint cremes as a kid and never having much success: the traditional recipe is a pound of sugar with an egg white and maybe a little golden syrup and Bob's your uncle, a soft malleable fondant that can be shaped into whatever you like (usually little balls pressed on with a fork). However, it never turned out so simply. The fondant was either too sticky, or too dry, and had no dimension to it other than unrelenting sweetness.

For me, the missing ingredient was always a little bit of fat to keep everything held together and to break up the sugariness. Also the vagueness of "one egg white" meant you could only make loads of it or none at all.


I've developed a simple recipe that uses only three base ingredients: icing sugar, vegetable shortening, and syrup. Not a single egg white in sight! I use glucose syrup, but white corn syrup is a perfect substitute.

INGREDIMENTS

1 tablespoon (15 grammes) white vegetable shortening
1 ounce (30 grammes) glucose syrup, or white corn syrup
4 ounces (115 grammes) sifted icing sugar
A few drops of cold water, for mixing
Salt for seasoning
Strawberry essence, to taste
Pink food colouring
Cornflour, for dusting


METHOD

  • In a mixing bowl, mix the vegetable shortening and glucose syrup until creamy. 
  • Stir in the icing sugar, then add in water drop by drop until you have a nice dough. It should be stiff, but not dry. 
  • Knead in your flavour essences, colouring, and salt until it tastes and looks exactly how you like. You'll be surprised by how much salt you need to season it.
  • Dusting your work surface with a little cornflour, you can either roll out and cut shapes like I did, or you could model it like clay.
  • Allow the sweets to set for at least 2 hours, ideally 8 hours.

Thursday, 24 January 2019

"Jacob's Mikado" Cupcakes: Coconut, Raspberry, and Marshmallows

Mikadoo, doo, doo, push Pineapple shake the tree.... 


Y’all know I love Mikado biscuits. I don’t think I’ve ever done a Mikado recipe on this blog before, but I’ve probably enthused about this all-Irish treat at some point on some blog post in the past. A Mikado, produced by a company called Jacob’s, is a small rectangular biscuit topped with two parallel rows of pink marshmallow, between which is a row of tangy raspberry jam; the whole confection is dusted with desiccated coconut. Although they are available all year round, they are especially popular at Christmas time, where they’re sold in massive plastic tubs to make sure you have enough for all the guests you’ll be entertaining throughout the Christmas season. 

Mikados are just one biscuit in a range of marshmallow biscuits produced by Jacob’s: there are Coconut Creams, which are round plain biscuits topped with a splodge of coconut sprinkled marshmallow (which are either pink or white); and there are Kimberleys, which are a sandwich biscuit made of gingerbread and marshmallow, the exposed edges of which are encrusted with coarse white sugar crystals. And all of these, of course, come in a chocolate coated variety for greater indulgence at special occasions (there’s even a triple chocolate Kimberley, where the biscuit and the marshmallow within the chocolate coating are also cocoa flavour. It’s sinfully delicious). 


This simple combination of plain, buttery biscuit, jam, marshmallow and coconut is easily adapted to all sorts of baked goods, including these here cupcakes! These are a nice vanilla almond cake (a flavour which is commonly referred to as “birthday cake” flavour in the States, sans the sprinkles) filled with seedless raspberry jam and topped with pillowy 7-minute frosting, before being dunked in desiccated coconut. The whole thing is then crowned with a Mikado. 

I make 7-minute frosting by mixing 2 egg whites, 2 tablespoons of water, 1 teaspoon of lemon juice, and 8 ounces of caster sugar in a heatproof bowl. I then gently heat this over simmering water until the sugar dissolves and it’s warm to the touch. I take it off the heat and whip it with an electric hand mixer for a full 7 minutes, until it is marshmallowy light and cool to the touch. This is easily flavoured and coloured: in hindsight, I should have coloured mine pink to mirror the biscuits, but the white it also pretty; I flavoured mine with vanilla. 


This is best eaten within three days, as after three days the icing turns all dusty as the sugar re-crystalises. To avoid this, you can replace up to a third of the sugar with glucose syrup. 

Tuesday, 15 January 2019

Medovik: Russian Layered Honey Cake

Continuing with my Eastern European experiments, I present my take on the Russian classic: Medovik!


This confection appears throughout the former Soviet countries under several similar-sounding names and it essentially layers of honey flavoured biscuits and sweetened whipped sour cream, which is then coated in biscuit crumbs. The biscuit layers have the texture of a soft gingerbread, and the creamy layers are reminiscent of cheesecake.

I discovered it by accident while researching Eastern European bakery—which generally speaking involves varying ludicrous quantities of cream, butter, eggs, honey, and nuts—and thought to myself oooh, that looks like some kind of cross-breed between a cream gateau and a cheesecake. And my my, I was not disappointed: this is one of the tastiest things I've eaten in recent years.


Like many cakes from this part of the world, however, it does take a bit of making: there are several individual layers of cake that all need to be rolled out and baked separately like giant cut-out biscuits, and if you only have one flat tray like I do, it's time consuming. Also, the dough needs to be chilled overnight, and the whole finished cake has to set overnight too, so it takes two days to make.

Although eight layers is traditional, you may have noticed my cake only has seven: the first cake layer I rolled wasn't as big as the others because I hadn't got into the rhythm yet. I recommend measuring your layers to make sure they're all the same size before trimming them exactly.

Also, another adjustment I made is that the recipe includes more cream than I used, because I think the cake here didn't have enough.

INGREDIMENTS


For the cake layers

12 ounces (340 grammes) plain white flour: wheat, spelt, or gluten free
¾ teaspoon (4 millilitres) baking soda
4 ounces (115 grammes) salted butter
4 ounces (115 grammes) honey
4 ounces (115 grammes) caster sugar
Salt, to taste

For the cream

12 ounces (340 grammes) sour cream
18 ounces (510 grammes) whipping cream
4 ounces (115 grammes) icing sugar
2 teaspoon (10 millilitres) vanilla essence


METHOD

First, make the cake layers
  • In a large mixing bowl, sieve together the flour and baking soda, making sure the sieve is held high. Set aside.
  • In a medium saucepan, mix together the butter, honey, and sugar. Dissolve over medium heat, stirring frequently, until it begins to bubble. Add salt and carefully taste: the mixture should taste rich and sweet, but not flat and characterless.
  • Pour the melted liquid into a well in the centre of the dry ingredients and mix thoroughly with a wooden spoon.
  • Scrape the mixture onto some cling film, wrap tightly, and chill for at least 4 hours, or overnight for better results.
  • Once chilled, preheat the oven to 200°C (400°F, Gas Mk.7) and line as many large flat trays as you have, at least 10 inches (25 centimetres) in size, with non-stick baking paper. 
  • Gently work the dough into a sausage and cut into eight pieces. Keeping the other layers covered as you work, roll each piece into a circle, about an eighth of an inch (3 millimetres) thick.
  • Lay a circle onto each tray, and bake for 6 or 7 minutes, or until beautifully golden brown and crisp. Cool completely on wire racks. How long this process takes will depend on how many trays you have.
Then, make the cream
  • In a mixing bowl, mix the sour cream, vanilla, and icing sugar together until completely smooth and blended.
  • Add in the whipping cream and stir to combine. Using an electric whisk, whip the cream mixture until it hold peaks that fall over slightly.
Now, assemble the masterpiece

  • Take each cake piece and, using a bowl or a plate as a guide to keep them all the same size, trim them into circles about 6 or 7 inches (15 to 17 centimetres) across.
  • Take all the cake trimmings and using a plastic bag and a rolling pin, or a food processor, turn into crumbs.
  • On a board or cake turntable, place the bottom sheet of cake. Ice with a generous dollop of cream, and pop on the next layer. Repeat until all the cake layers are sandwiched with cream.
  • Ice the top and sides of the cake with the leftover cream, then coat the top and sides with crumbs.
  • Pop the whole cake in the fridge overnight, or for best results a full 16 hours. Transfer the cake to a plate or cake stand before serving.

Saturday, 5 January 2019

When a Failure Becomes a Success! Old-Fashioned Toffee

Sometimes, things go horribly wrong in the kitchen. It happens to all of us. But other times, things look like they're about to go horribly wrong before you put your Lateral Thinking cap on. I bring to you the results of such an occasion: Old-Fashioned Toffee!


I was making some gingerbread men and popped my usual equal weights of butter, sugar, and golden syrup into a pan. I then completely forgot about it as I got distracted by checking addresses for wedding invitations. Once I got back, it was cooked to firm ball stage; far too cooked to use in gingerbread men. I got quite upset about it, until I embraced the failure and decided to cook it even further to make a hard-crack snappy toffee out of it.


I mixed a little bicarbonate of soda into it to make it more brittle and light, and then sprinkled some chopped walnuts over the top. I had some left over from making the Esterhazy torta.

So, I present to you my accidental recipe for old-fashioned toffee! This, of course, is written as if you're actually making toffee and not salvaging the remains of some syrup for gingerbread!

INGREDIMENTS


4 ounces (115 grammes) salted butter
4 ounces (115 grammes) golden syrup
4 ounces (115 grammes) soft brown sugar
1 level teaspoon (5 millilitres) bicarbonate of soda
Optional: chopped nuts, to decorate

METHOD
  • Lightly oil a large flat baking sheet, and sieve the bicarbonate of soda into a small cup. Set aside.
  • In a saucepan over medium-low heat, heat the butter, syrup, and sugar until the butter is melted and the sugar dissolves.
  • Increase the heat to medium high and boil for about 10 minutes until it reaches the hard-crack stage, or 146 to 154°C (295 to 309°F) on a sugar thermometer.
  • As soon as it reaches temperature, remove from the heat and quickly stir in the bicarbonate of soda: it should puff up slightly, but not too much. Pour out onto the flat baking sheet and sprinkle with nuts, if using. If you want even pieces, score the toffee while it's still warm.
  • Leave to cool completely, about 1 hour, before breaking along the score lines, or hitting firmly with the end of a rolling pin to break into shards.

Tuesday, 1 January 2019

Kitchen Experiment: Esterhazy Torta, a First Attempt

Happy 2019, everyone! I hope that 2018 treated you well, and that 2019 will be even better to you. And for my first offering of 2019, I present to you a little kitchen experiment: Esterhazy Torta!


I thought I'd kick off the year with someone I've been wanting to try ever since I did the Doboš Torte in 2017. Decadent confections of Central Europe hold a lot of fascination for me, and this delight from the former Austro-Hungarian Empire is quite an unusual treat. A good start to what I hope is a year of shameless experimentation.

2018 was my least prolific year on this blog since 2016, which makes sense as 2017 was the most prolific year of my blog ever. I suppose I used up all my ideas in 2017! And this year had a punishingly long hot summer, which curbed the baking output somewhat. But I have a lot of good plans for this year, including more videos (I got a nice bit of practise in last year, and learnt from a multitude of mistakes) and designing a cookery book for my own personal entertainment. Who knows, I might release it some day.

But in my own real life outside of the blog, I already know that 2019 will bring at least two wonderful things to my family. Firstly, I'm getting married in June to my best friend and the love of my life, which will be the best thing to happen to me in my life so far. And secondly, I will be an aunt! My oldest brother's daughter is due at the end of April, or the beginning of May, and she will be born in Cavan, where my brother and his wife will be living from February onward.

Once the Christmas feasting is over and forgotten about, I will start on my wedding cake trials. I will try a cupcake wedding cake, and a traditional tiered cake.

But, back to the cake!


Esterhazy Torta is a dacquoise cake, which is basically a fancy French term for a layered cake made from nutty meringues, sort of like macaroons. Dacquoise cakes can be layered with all sorts of things, like creme patissiere, whipped cream, melted chocolate, or buttercream. This cake is made of delicate walnut dacquoise layers, sandwiched with vanilla and amaretto flavoured French buttercream, which is a style of buttercream that uses an egg yolk custard. It's very, very similar to Ermine buttercream, like in my red velvet cake.

Having made this cake, I can assure you it's absolutely not my thing at all. It sounded great on paper, but in reality it was far too rich and sickly. Nuts, vanilla, eggs, butter, and amaretto together is just unrelentingly sweet. If you like sugarbombs, then this is for you.


How I Made this Cake


To make the dacquoise layers, I made a simple French meringue with one egg white and one ounce (30 grammes) caster sugar. I folded in an ounce of ground walnuts, which had been lightly toasted in a dry frying pan. I divided the mixture in four (although, in retrospect, in three would have got nicer, thicker layers) and spread it out thinly into four 4 inch circles. I baked them at 180C for 6 minutes.

To make the buttercream, I gently cooked the egg yolk, an ounce of sugar, and an ounce of milk in a heatproof bowl over simmering water until I had a nice, thick custard. I allowed this to cool completely before whipping in two ounces of room temperature butter to make an icing.

To assemble, I brushed the cake layers with amaretto, and layered the cake and iced the outside. I packed chopped walnuts onto the sides, and feathered the top with some dark chocolate.

How I Would Do This Cake Differently in Future

I think in future to take the edge off the sweetness, I would use some cream cheese in the icing to add a note of tanginess. I would also use dark rum in place of amaretto, which has a much harsher quality. I would also make the dacquoise layers thicker and the icing layers thinner, more like a glue to hold it together. I would also use a traditional glacé icing topping, maybe made with a little lemon juice, to balance the sickliness with some more tang.

Keep your eyes peeled for further experiments!

It's been a while! Happy 9th Anniversary!

  It's been a while. The past two years have been a helluva a ride. This year is gonna hold some big changes for this blog. I'm comp...