Showing posts with label mint. Show all posts

Monday, 13 August 2018

Choco-Cinnamint Cupcakes: a Flavour Experiment

I am finally back from a week-long summer camp where I taught teenagers how to play the bass guitar! And just before I left I made some delicious little cupcakes, including these fabulous Choco-Cinnamint cakes!


I think I may have mentioned it before, but I really like the combination of cinnamon and mint (I love "cinnamint" tea) and I especially love the combination of chocolate, cinnamon, and mint. I first discovered it when I ordered a hot chocolate from a coffee stand in the train station, and had forgotten that I'd asked for mint syrup and asked for cinnamon sprinkled on top instead of cocoa powder. The accidental discovery of this warm and aromatic flavour combination is one of my best culinary experiences.


I've always wanted to try making a cake using the choco-cinnamint theme, and my recent experimentations with cupcakes seemed like the perfect opportunity! I think cupcakes are a great outlet for flavour curiosities because they are single serving and can be made in small batches. As seen above, I made these with some delicious lemon cupcakes around the same time.


I made these cupcakes by making a two-egg quantity of my most recently revised cupcake recipe and replacing an eighth of the flour with cocoa powder, and adding half a teaspoon of ground cinnamon. I also made some chocolate buttercream with a little pinch of cinnamon, and then half as much buttercream flavoured with peppermint essence and tinted green. I filled a piping bag fitted with a star tip, keeping the minty icing to one side and the chocolate icing to the other, then piped each cake with a swirl. As you can see, I didn't quite get the icings even on either side so some cakes are greener than others!

If you feel like something different, I encourage you to give this interesting flavour combination a try!

Saturday, 8 July 2017

Ice-Cream Month: Mint Toffo Sundae

Happy Ice-Cream Month, everyone! July is recognised as the month where we celebrate his delicious frozen confection, which is what I plan to do, starting with this delectable offering: Mint Toffo sundae!


Ice cream has been eaten in one form or another in Europe since the 17th century, but its only since the end of the 19th century that it became available to the regular Joe Soap, both in Italy and England. Since then it has done nothing but expand in popularity, helped along by the introduction of the domestic freezer in the 1950s.

Nowadays, ice-cream contributes nearly $40 million to the US economy alone, and is easily commercially available in nearly every supermarket. And seeing as nearly everyone has a freezer these days, it's super easy to make at home.

Over the years I've run this blog, I've dabbled in ice-cream making, but this month will be taking it to the next level: from simple no-churn ideas, to designer ice-cream flavours, to sundaes, to cheating at "churned" ice-cream with a food processor, this month will be epic!

So, let's start with the aforementioned Mint Toffo Sundae.


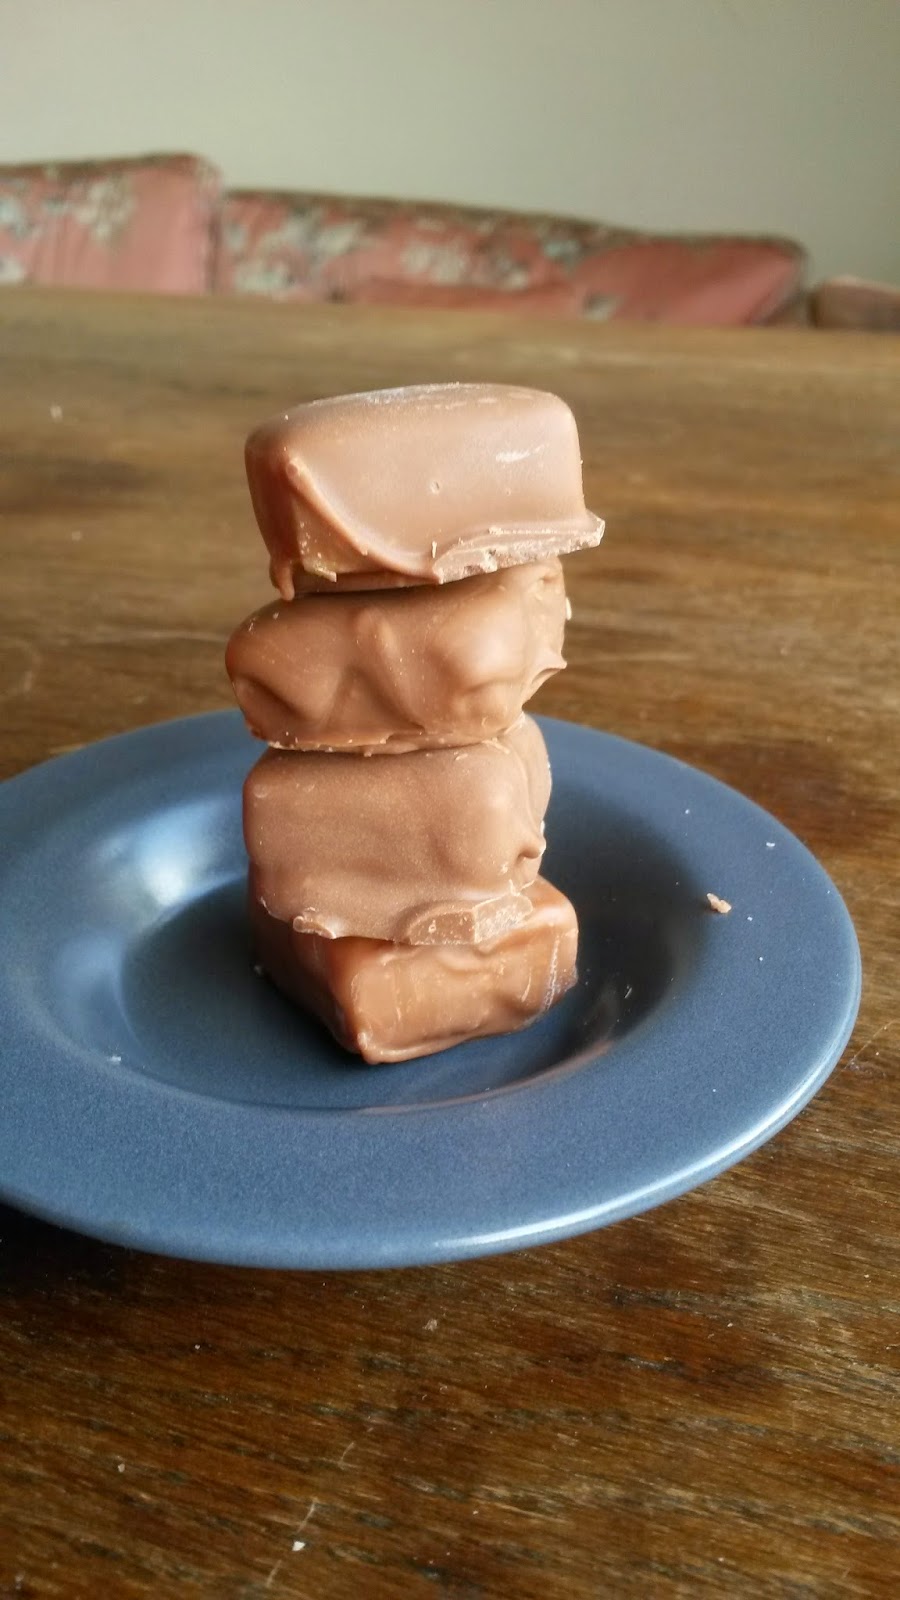
The inspiration for this recipe lies in childhood nostalgia: when I was a little girl, you could buy a brand of chewy caramel sweets called "Toffo", produced by Mackintosh (and later Nestlé), and they came in plain vanilla and mint flavours. The sweets were individually wrapped in red or green waxed paper, then wrapped up in a roll of gold foil, then packaged in a paper label.

These are one of the things that made my childhood.

I absolutely love the combination of toffee and mint, and I thought it would translate well into an ice-cream sundae. I wasn't wrong! I also gold-dusted a wafer fan with some fondant dust, and it looked great! I make my own wafers with a new updated recipe, which I'll be sharing later in the week.

I'm really enjoying designing sundaes. I think I got the sundae bug last year when I went to the Creams ice-cream parlour in Maidstone.

INGREDIMENTS
Makes four sundaes, with one scoop of each flavour

For two-thirds of a pint (370 millilitres) caramel ice-cream,

  • 8 fluid ounces (230 millilitres) whipping cream
  • 3 fluid ounces (85 millilitres) condensed milk
  • 1 tablespoon (15 grammes) butter
  • 1½ ounces (45 grammes) caster sugar
For two-thirds of a pint (370 millilitres) mint ice-cream,
  • 8 fluid ounces (230 millilitres) whipping cream
  • 6 fluid ounces (170 millilitres) condensed
  • Up to ½ teaspoon (3 millilitres) natural peppermint essence
  • ¼ teaspoon (2 millilitres) vanilla essence
  • Two drops green food colouring
To serve
  • Caramel ice-cream sauce
  • Wafer fans, or follow the directions at the end of the article to make your own
  • Gold dust fondant colouring

METHOD

The night before serving, prepare the ice-creams, starting with the caramel.
  • To make the caramel ice-cream, mix the caster sugar with a teaspoon or two (5 to 10 millilitres) of water in a saucepan with a pale interior. Heat over medium heat, stirring consistently, until it begins to turn brown.
  • When it browns, turn the heat down to low to continue cooking the sugar to a deep, dark brown. If it burns, don't worry: sugar is cheap, and burnt caramel comes off with hot water and soap.
  • Once it comes to the right shade of brown, remove from the heat and mix in the butter and condensed milk. Return to the heat and cook gently until everything is dissolved together.
  • Add in the cream, and stir until the mixture is smooth and consistent in colour. Remove from the heat, and cool completely to room temperature.
  • Once it comes to room temperature, transfer to a mixing bowl big enough to whip the ice-cream, and then pop into the freezer for 20 minutes.
  • After chilling, beat with an electric whisk until it reaches medium-firm peaks. Transfer it to a one-pint (580 millilitre) pudding basin, cover with the lid or some cling film. Then, prepare the mint ice-cream.
For the mint ice-cream,
  • In a large mixing bowl, mix together all the ingredients, except the peppermint essence, with a wooden spoon. Add a few drops of peppermint essence, give it a taste, then decide if you want a stronger flavour: peppermint essence is intense, and you can always add more, but you can't take it out once you've added it. 
  • If the bowl fits into the freezer, chill in there for 20 minutes. If not, chill in the fridge for an hour.
  • After chilling, whip with an electric whisk until it holds medium-firm peaks. Transfer to a one-pint (580 millilitres) pudding basin, cover with the lid or some cling film, then pop into the freezer, along with the caramel ice-cream, and freeze overnight, or for a minimum of 6 hours.
Paint the wafers, then assemble the masterpieces,
  • Using a nice soft paint brush, brush the wafers with the gold dust until to the gold-ness you like.
  • Serve the sundaes with one scoop of each ice-cream flavour, a gold wafer fan, and some caramel sauce.

Saturday, 18 March 2017

Happee 4th Birthdaee, Sweetie Pie Bakes Stuff!

Happy birthday to you,
Happy birthday, my dear blog,
Happy birthday to you!


It has been a whole four years since I started writing this little blog. It started as a hobby, and now has a life of its own, with readership all over the world, and nearly 22,000 views overall! I am so proud of my blog: she's fabulous!

For the second and third anniversaries, I made little birthday cakes, so why break the tradition? Seeing as it was St Patrick's Day yesterday, I thought I'd make a green cake, like I did for the second anniversary.

Green is not really a common colour in baking, as not many flavours evoke that colour as a mental image: for me, I only think of mint or lime. On asking my companion, he said apple and kiwi, which are two thoughts that had never occured to me.

In keeping with a green cake, I decided to go with mint. But mint by itself in a cake I feel would be a little toothpasty, as mint usually needs a carrier, and works best as a secondary flavour. Last time I used coffee (which is actually a fabulous combination), and this time I went for the more common used chocolate.

I then got out my sketchbook and came up with some ideas and came up with something like this:

mint chocolate chip ice cream <= CHOCOLATE CHIPS => choc-chip muffins

As such, I made a chocolate chip muffin in the shape of a small cake, and iced it with mint flavoured green buttercream icing. I also grated some chocolate into the icing, and decorated with chocolate icing and chocolate chips.


So chocolatey and minty!


As usual, I will include the recipe, and my traditional list of the top posts of the last year. Even though 2016 was light on blogs on account of life and health difficulties, I think I made some really interesting things, and made huge strides in pastry and yeast dough techniques. I also did some really cool layer cakes and gâteaux

So here are the most popular blogs in order of the last 12 months:
  1. Neapolitan Cheesecake Gâteau
  2. Spotted Dick: a Traditional English Pudding
  3. Buttermilk Scones
  4. Caramel Macchiato Ombre Gateau
  5. Milky Ice Pops: Chocolate Flavour
  6. American Style Cookie Dough Ice-Cream
  7. American Style Chocolate Chip Muffins
  8. Chocolate Lime Cupcakes
  9. I've Finally Cracked It! Working with Yeast and Spelt: Iced Finger Buns
  10. Birthday Cupcakes and Centre Piece Cake: Wheat-Free Lemon Sponge
And finally, the recipe.

INGREDIMENTS
for one 4 inch (10 centimetre) round cake

For the sponge cake:
  • 3 ounces (225 grammes) white spelt flour
  • 1 teaspoon (5 millilitres) baking powder
  • 2 ounces (55 grammes) butter
  • 2 ounces (115 grammes) caster sugar
  • 1 medium egg, beaten
  • 2 tablespoons (30 millilitres) warm water
  • 1½ teaspoons (7 millilitres) cocoa powder
  • 1 teaspoon (5 millilitres) vanilla essence
  • 2 tablespoons (30 millilitres) chopped chocolate, or chocolate chips
For the icing:
  • 1½ ounces (40 grammes) white vegetable fat, very soft
  • 1½ ounces (40 grammes) butter, very soft
  • 6 ounces (170 grammes) icing sugar, sifted
  • 1 teaspoon (5 millilitres) cocoa powder
  • 1 or 2 tablespoons (15 to 30 millilitres) milk
  • 2 teaspoons (10 millilitres) grated chocolate
  • Peppermint essence, to taste
  • Green food colouring

HOW-TO

Prepare the cake,
  • Preheat the oven to 180°C (350°F, Gas Mk.4), and grease and flour a tall 4 inch round cake tin. I use a tin from a shop bought steamed pudding.
  • Cream the butter and sugar together until light and fluffy. Gently and gradually incorporate the egg, beating between each addition, until pale and creamy.
  • In a cup or small bowl, place the cocoa powder and gradually mix in the water. Sieve half the flour and baking powder into the butter and sugar mixture, and fold with a spatula. Add in the cocoa water and vanilla, and fold again. Finally, add the last bit of the flour and fold until completely mixed.
  • Gently fold in the chocolate chips, and then scoop the mixture into the prepared tin and smooth out as much as possible. Bake in the centre of the preheated oven for about 25 to 30 minutes.
  • Check for doneness with a cocktail stick, and if it is fully cooked, cool in the tin for about 10 minutes before turning out onto a wire rack to cool completely.
Prepare the icing,
  • Make the buttercream according to this recipe, if you don't know how to make buttercream already, omitting the cocoa powder. Only use as much milk as is needed to keep the icing soft and spreadable.
  • Split and fill the cake and ice the outside, leaving about 3 ounces of the icing leftover. Mix the cocoa powder with a little milk in a cup or bowl to make a paste, and mix into the remaining icing to make it chocolatey.
  • Use this icing to pipe the top and bottom borders and decorate with chocolate chips.
  • Allow to set completely, either in the fridge for up to an hour, or on the work surface for up to 3 hours.

Friday, 8 May 2015

Peppermint Ice (Totally not a rip off of Kendal Mint Cake at all. I promise)

My companion and I were having a conversation about my sugar crafting abilities recently, and Kendal Mint Cake came up in conversation. As such, I made a a batch, that he ate promptly and reported to his sister. She also wanted some, so I obliged.


Kendal Mint Cake is a glucose sweet flavoured with peppermint oil that originates from Kendal in Cumbria, England. It is popular among climbers and mountaineers as a source of energy. It is based on a traditional recipe known as mint cake, peppermint tablet or peppermint ice. It is also a standard part of the 24-hour ration pack issued to the Irish Defence Forces.

There are a few brands of this kind of sweet, all made in Cumbria, and some are covered in chocolate or made with brown sugar. This, however, is the good auld traditional way.


INGREDIENTS
  • 8 ounces (225 grammes) caster sugar
  • About 4 or 6 tablespoons (60 to 90 millilitres) water, for dissolving
  • 1/4 teaspoon of white vinegar, lemon juice, or cream of tartar
  • 1/2 to 1 teaspoon of natural peppermint essence, depending on how strong you want it


METHOD
  • In the saucepan, add the water, sugar, and vinegar (or lemon juice or cream of tartar). Over a low heat, gently stir and dissolve all the sugar in the water until it's a clear liquid. Make sure that no little grains of sugar stick to the sides of the pan.
  • When every little grain of sugar has dissolved, increase the heat and bring the syrup to a rough simmer, just about boiling. If you have a sugar thermometer, attach it to your pan now, and cook to 115ºC/240ºF. If you do not have a thermometer, you will need to do traditional cold water testing.
  • After 5 minutes of cooking, you can begin to test the syrup in cold water. Take a teaspoon of the syrup and drop it into the cold water: if the syrup sets enough to pick up and roll into a little squishy ball, the syrup is read. If it's still to runny, cook for another minute or two and test again. Keep cooking and testing until the texture is right.
  • Once you have got the right texture, remove the saucepan from the heat and leave to cool until the syrup forms a skin and the pan is cool enough to touch.
  • Add in your peppermint essence, and then stir the mixture with a spoon quite vigorously until it turns cloudy and thickens a little. Working quickly, pour the mixture into the tin, scraping the edges of the pan as little as possible; if you don't work quickly enough, the mixture could seize up into a big, solid lump.
  • Allow the mixture to cool and set up completely, about 1 or 2 hours. Take out of the tin and break into pieces.

NOTES
If you plan on making mint cake often, I would recommend buying the organic peppermint essence from the health food shop, which comes in 100ml bottles and is about €8. It will last for ages, and is made using natural essential oil of peppermint, mixed with a flavourless carrier oil. However, the peppermint essence in little bottles from the supermarket will do if you're making this recipe once off, but I prefer not to use it because it's artificial and the flavour fades over time into a nasty plastic taste.

Monday, 16 March 2015

March Afternoon Tea Party: St. Patrick's Day

I'm back! But only for a this one blog. Right after my film project (which unfortunately we'll have to extend due to a camera hiccough) my mother got ill and I've had to take on a few of her responsibilities, meaning I'm not at home half the time at the moment.

So on Saturday we had this month's afternoon tea party at the community centre, and we themed it obviously around St. Patrick's Day, meaning lots of green.


I have very fond memories on St. Patrick's Day. My older brother is called Patrick, and every year as children we'd sort in a way treat is like his second birthday: my mother would dye her usual daily bread loaf green, and make green biscuits, and we used to put green dye in lemonade; my Dad even put green dye in his lager. And to this day, even at my ripe old age of 482, I make green cakes and things for St. Patrick's Day.

Coincidentally, this month's tea party fell on the same day as Pi day, so I made a no bake key lime pie with the symbol Pi on it for added nerd factor. I also made some minty chocolate chip cookies, decorated with milk chocolate drizzle and green homemade sprinkles.


To make the key lime pie, I used the recipe available on the BBC Good Food website. However, I halved the filling quantity because I used a smaller tin, but used the same amount of biscuit base so I could make a biscuit base with sides; I also replaced digestives with gingernuts for the green-white-and-gold vibe. I decorated the top with a Pi symbol made up of green Jelly Tots.


Sorry that the photographs aren't great, and that my blog posts are sporadic at the moment, but work is work! Hopefully I'll be back to my baking self soon.

Monday, 22 December 2014

A Multitude of Different Kinds of Fudge

Christmas is the time for indulgence in all things rich and sweet, and as such I treated many people this year with bags of fudge. Fudge is basically sugar held together with dairy fat; what's not to like?


In a bid for greater efficiency, I made a giant batch of fudge using this recipe, and cut it up into one inch pieces. I then separated them into a few different cups so I could coat them all differently. Previously, I would have made many different batches, each of different flavours, but I decided this time to do what is done to jelly beans: make the centres all the same flavour, and then just flavour the coatings.


I decided that peppermint is a very Christmassy flavour, so lots of people got peppermint flavoured fudge. I made a few bags of fudge fully dipped in peppermint milk chocolate (I added a few drops of peppermint essence to the melted chocolate), and a few that were half dipped in peppermint white chocolate, decorated with sprinkles.


I also half dipped some in dark chocolate and sprinkled with coarse sea salt, which made for a rather interesting flavour and texture experience. I also gave away a few batches of plain old vanilla fudge, which was just the original fudge without any coating.


Overall, they were a big success. I think I still have some left over in my fridge to crack out if I have forgotten anyone!

Thursday, 1 May 2014

Minty Mint Brownies of Mintiness, with Marbled Glaze (Wheat Free)

Woo, 80 posts! Only 20 away from the big milestone...

First of all, I would like to announce that I have now in my possession a fancy new Samsung Galaxy S4 Mini which has a lovely crisp camera. Seeing as said phone can connect to the internet, it makes attaching photos to my blog posts so much easier than the way I had been doing it up until this point, which was using my point-and-click camera and uploading the photos from the SD card, which could be fiddly at times.

But back to the recipe.

I love mint. I absolutely love mint. I love mint so much I wish everything in the world could taste of mint. Mint, mint, mint!

And in saying that, I think mint chocolate is one of the World's best things (apart from orange chocolate), which means a mint chocolate brownie is probably infinitely better than than a regular brownie. So, I thought it would be appropriate to mark my return to baking after six weeks of a hiatus with something awesome: I baked a whole tray of mint brownies for a birthday party I had been invited to and they went down very well!


When I was decorating the surface with dark chocolate glaze and white chocolate glaze (half white, half green) I noticed that it had a very camouflage look about it, and thought that it would be cool for an airsofting party or anything army themed.

Also, I have come to appreciate the convenience of recyclable foil tins. This was a large tin so I increased the recipe by half to fit.

FREE FROM
☑ Soya (check for soya lecithin)
☑ Yeast
☑ Wheat

CONTAINS
☒ Gluten
☒ Dairy (use ingredients in italics for a dairy-free version)
☒ Eggs
☒ Refined sugar products
☒ Cocoa products

INGREDIMENTS

For the brownies:
  • 5 ounces  (115 grammes) spelt flour
  • 2 ounces  (55 grammes) cornflour
  • Pinch of salt
  • 4 ounces (115 grammes) brown sugar
  • 2 ounces (55 grammes) caster sugar
  • 2 medium eggs, at room temperature
  • 4 ounces (115 grammes) butter, melted
  • 2 ounces (55 grammes) sunflower oil
  • 3½ ounces (100 grammes) chocolate (at least 55% cocoa), melted and slightly cooled
  • 1 teaspoon (5 millilitres) vanilla essence
  • ½ teaspoon (3 millilitres) peppermint essence
  • NO RAISING AGENT, FOR THE LOVE OF ALL THAT IS GOOD AND GRACIOUS

For the glaze:
  • 4 ounces (115 grammes) white chocolate
  • 2 ounces (55 grammes) milk or dark chocolate
  • 1½ fluid ounces (45 millilitres) sunflower oil
  • Peppermint essence
  • Green food colouring

HOW-TO

For the brownies:


  • Preheat the oven to 160°C (325°F, Gas Mark 3). Grease and thoroughly flour a 9x7 inch (23x18 centimetre) tin, or line with non-stick baking paper.
  • Sieve together the cornflour, spelt flour and salt into a bowl and set aside for later.
  • Put the eggs and sugar in a heatproof mixing bowl (preferably glass) and set over a pan of simmering water and stir until sugar has melted. 
  • Remove from the heat and beat the mixture with an electric hand mixer or balloon whisk until pale, thick and doubled in size. You could do with without the water bath, but it’s take too long to beat out the lumps in the brown sugar; the heat speeds this process up a little.
  • Like with my sponge cake recipe, melt the butter and oil together and pour into the eggs and sugar mixture gradually, beating all the time.
  • Add the vanilla essence and then, in a thin stream, beat in the cooled, melted chocolate.
  • Using a rubber spatula or metal spoon, fold in the the flour mixture, bit by bit.
  • Pour the mixture into the prepared tin, and firmly tap it a few times off the kitchen top to release any trapped bubbles.
  • Bake for 25 to 30 minutes, or until spongy to touch and a cocktail stick stuck in the middle comes out with two or three sticky crumbs are clinging to it.
  • Remove from the oven and allow to cool completely in the tin.

For the glaze:
  • Melt the white chocolate with 1 fluid ounce of the oil and a few drops of peppermint essence either in a bowl over hot water or in short bursts in the microwave.
  • Melt the milk or dark chocolate with the remaining oil and another few drops of peppermint essence in the same way.
  • Drizzle half the white chocolate over the top of the brownies, then colour the remaining white chocolate a pale minty green. Use the remaining chocolate glazes to decorate the brownies.
  • Allow to set completely before cutting into squares.

THIS TIME LAST YEARHow to Use and Abuse Royal Icing

Thursday, 15 August 2013

Minty Millionaire's Shortbread (Wheat Free)

This is post number 40, woo! If anyone has any ideas for post number 50, I'd be happy to know...

Here in Ireland, we have something that is mysteriously yet appropriately named 'Millionaire's Shortbread'. I understand that in other countries it is called caramel shortbread, but it's basically a shortbread base topped with a caramel layer then glazed with chocolate; a far cry from the usual shortbread, which is traditionally associated with poor Scottish folk who couldn't afford fancy ingredients.


It's quite a simple recipe, ingredients and cooking wise, but it's not so easy when it comes to cutting it up as all those three layers have different levels of cutting tolerance. I've found the best way around this is to take the shortbread out of the tin and turn it all upside down - chocolate side facing the cutting surface - on a piece of non-stick paper. This is also made a million times (pardon the pun) easier if the shortbread is pre-cut before layering with the soft caramel layer and chocolate glaze.


For this particular one also, keeping with the minty theme, I marbled the chocolate: milk chocolate and green tinted white chocolate. Remember, though, when colouring chocolate you must not use a water based colour: use an alcohol- or oil-based colour so the chocolate doesn't seize up and go all lumpy and disgusting. I use Sugarflair paste/gel food colours, and they work perfectly.

So, onto the making of said delight!

INGREDIMENTS
Makes 1 8 inch (20 centimeter) round biscuit
For the biscuit base
  • 4 ounces (115 grammes) white or wholemeal spelt flour
  • 1½ ounces (40 grammes) cornflour or rice flour
  • Pinch of salt (omit if using salted butter)
  • ½ ounce (15 grammes) cocoa powder
  • 4 ounces (115 grammes) butter, at room temperature
  • 2 ounces (55 grammes) caster sugar

For the caramel topping

  • 8 ounces (225 grammes) caster sugar
  • 2 fluid ounces (55 millilitres) cream (or just use milk if you don't have any cream)
  • 2 fluid ounces (55 millilitres) milk
  • 1 ounce (30 grammes) butter
  • ½ teaspoon (2½ millilitres)  vanilla essence
  • ½ teaspoon (2½ millilitres)  peppermint essence
  • A few drops green colour

For chocolate topping
  • One 3½ ounce bar (100 grammes) milk chocolate
  • Half a 3½ ounce bar (100 grammes) white chocolate
  • 1¼ ounces in weight (35 grammes) sunflower oil
  • Green paste/gel food colouring

HOW-TO
  • Preheat your oven to 160°C (320°F, Gas Mk.2½, or very moderate) and line the bottom of an 8 inch (20 centimeter) round sandwich tin, preferably with a loose bottom.
  • Sieve together the flours, cocoa and salt, if using, onto a piece of grease-proof paper. Set aside.
  • In a mixing bowl, beat the living daylights out of the butter until soft and creamy. Use a wooden spoon: it needs more elbow grease, but you have much more control over how soft you make your butter.
  • Pour in the caster sugar, and cream until light and fluffy. Then add the dry ingredients and mix until the flour is combined; you may need to use your hands as the dough gets very stiff.
  • Press the dough evenly into the sandwich tin and prick all over with a fork or skewer, making sure the holes go right to the bottom of the tin. Score into 12 or 16 equal wedges, depending on how big you want them.
  • Bake in the oven for 35 to 40 minutes, until thoroughly cooked and dry. It seems like a ridiculous amount of time, but shortbread isn't so much baked as it is cured.
  • On removing from the oven, cut the shortbread in the tin along the score lines to make it easier to cut later. Allow to cool in the tin for about 10 to 15 minutes. Transfer to a wire rack, and cool completely before breaking into wedges.

Now, to reassemble the shortbread


  • Clean the sandwich tin and re-line, bottom and sides, with non-stick baking paper. If your tin doesn't have a loose bottom, make two thin strips of paper and run them along the bottom and up the sides of the tin, underneath the lining. This will give you handles to lift out your biscuit with once you've caramelled and chocolated it.
  • Reassemble the shortbread in the tin, butting it all in and making sure the wedges are in the correct order.
  • Prepare the caramel layer using this recipe (yes, it's technically a fudge layer) and the above ingredients. Once you have beaten the caramel mixture, pour in on top of the shortbread. Allow to cool to room temperature before setting for at least 3 hours in the fridge, preferably overnight.
  • Once set, prepare the chocolate glaze. Put the chocolates in separate bowls, and add about 1 ounce (25 grammes) of the oil to the milk chocolate, then the rest to the white chocolate. Melt the chocolates either in the microwave or conventionally. Mix a little green into the white chocolate to get a delicate minty shade.
  • Using a tablespoon, drizzle a spoonful of each chocolate alternately on top of the caramel layer, not worrying to much about how they land. When all the chocolate is used up, gently tilt the tin all around to level out the surface and get the topping over the whole biscuit. Allow to set completely in the fridge.

To cut, as I mentioned before, turn the whole lot out chocolate side down and cut along the pre-cut wedges. It's much easier this way! This will keep best at room temperature in an airtight tin, but you can keep it also in said airtight tin in the fridge.

Monday, 3 June 2013

Mint Toffee Slice

Mint and toffee go very, very well together. There’s so many different kinds of sweeties that combine the creaminess of toffee and the warmly tingly tones of mint: Murray mints, Toffos, Humbugs, Mint Special Toffee... the list goes on! And very few people don’t like mint toffee; I haven’t come across one yet, anyway.


But when it comes to mint and cake, the relationship is very precarious: mint on its own doesn’t work in a cake. Mint works well as the only flavour in sweeties because it’s just sugar and mint, but our associations with mint and our associations with cake don’t marry well. Whenever I’ve eaten mint flavoured cake, I’ve just thought ‘toothpaste cake’, and that is not an image that I want people eating my cakes to imagine.

To make mint work in a cake, it needs to be a secondary, or accent, flavour: it needs to the second half of a classic something-and-mint combination, so when the person is eating the cake they imagine that nice combination of something-and-mint, and remember how nice it is. For example, mint and chocolate, mint and toffee, mint and coffee, mint and strawberry are all combinations found in the dessert world that contain mint. This works very nicely as the mint is just in the icing, not in the cake. This means it’s a caramel cake, which people are used to, and mint toffee icing, which people are also used to.

This rule applies to any kind of unusual cake flavouring. I’ve made cakes with really unusual flavourings, but because the icing and the cake can be considered separately, it works. For example, who’d have thought chocolate and cinnamon cake with mint chocolate glaze would be so popular? I made it, and it was.

Enough of my rambling theories! You’re here for a recipe.

INGREDIMENTS
For the cake
  • 4 ounces  (115 grammes) white spelt flour
  • 2 ounce  (55 grammes) cornflour
  • 1 teaspoon baking powder
  • Pinch of salt
  • 2 ounces (55 grammes) golden syrup
  • 2½ (70 grammes) brown sugar
  • 3 medium eggs, at room temperature
  • 1½ ounces (40 grammes) butter, or margarine, melted
  • 1½ ounces (40 grammes) sunflower oil
  • 1 teaspoon (5 millilitres) vanilla essence
  • If you have it: a few drops of butter-vanilla flavouring

For the icing
  • 7 ounces (230 grammes) caster sugar
  • 1 ounce (30 grammes) golden syrup
  • 2 fluid ounces (60 millilitres) milk
  • 2 ounces (55 grammes) butter, or margarine
  • 1 teaspoon (5 millilitres) peppermint essence
  • Optional: different kinds of green sprinkles

HOW-TO
First, bake the cake:
  • Preheat the oven to 180°C (375°F, Gas Mark 5). Grease and flour a 9x7 inch (23x18 centimetre) tin, or line with non-stick baking paper.
  • Follow the instructions for making sponge cake here, but when it comes to the sugar and egg mixture, beat the sugar, syrup and eggs with the bowl set over a pan of simmering water. Without the assistance of heat, any clumps in the brown sugar would take too long to break down, and also the syrup would just stay stuck to the bowl.
  • Pour into the prepared tin and bake as instructed. Allow to cool to a touchable temperature in the tin then transfer to cool on a wire rack. The golden syrup makes it too fragile to handle while it’s warm. If you cooked it with non-stick paper, leave the paper stuck to the cake: this will be very useful when it comes to icing it later.

Next, the icing:
  • Take the same tin as you baked the cake in. If you didn’t use non-stick paper, wash it and line it with non-stick paper. If you did, just put the cooled cake back in with the paper attached.
  • Run the cold tap into your sink to fill the basin about 4 inches (10 centimetres) full of water. This is used to cool the pan later.
  • Put all the ingredients, except for the peppermint essence, into a heavy-bottomed saucepan and stir over a gentle heat until all the ingredients have melted together.
  • Bring to the boil, and then cook until soft-ball stage is reached. Remove from the heat and dip the bottom of the pan in the cold water in the sink. Allow the pan to sit and cool for about 5 or 10 minutes.
  • Add the peppermint essence and then beat until opaque but still a pouring consistency. Pour over the cake and smooth out with a palette knife.

My homemade sprinkles got their first appearance with this delight! I thought they were very cute.

It's been a while! Happy 9th Anniversary!

  It's been a while. The past two years have been a helluva a ride. This year is gonna hold some big changes for this blog. I'm comp...