Monday, 15 September 2014

Wheat-Free Autumn Apple Crumble

Here in Ireland we've been having a massive late summer/early autumn heatwave, and every day this September has been in excess of 20 degrees Celcius outside, whih is not what I expect for autumn; in fact, I'm disappointed in autumn this year. For me, it has always been a month of hearty, warming comfort food, but the weather outside is just too darn hot for heavy food.

My solution: eat the same old comfort food, but make them a little lighter; same autumnal flavours, but without the heaviness.

Here is one of those recipes: a nice autumnal spiced apple crumble, made with a granola style crust. 


This recipe has been made a little less rich than is traditional by adding a nice dose of lemon juice to the apple mixture, and by using oil instead of butter. Oddly enough, despite using autumnal flavours, it has quite a summery feel to it.


I also really like the little oven dish I bought from my local Dealz (PoundLand) for a quid-fifty. It's about 4 by 7 inches (10 by 17 centimeters) which is just the right size to serve two or three people with this crumble. The recipe amounts are to fit a dish of this size, but obviously you can increase it if you want to fill a larger dish.


FREE FROM
☑ Soya (check for soya lecithin)
☑ Yeast
☑ Wheat
☑ Nuts
☑ Dairy

☑ Eggs
☑ Cocoa

CONTAINS
☒ Gluten (oats and spelt)
☒ Refined sugar products

 INGREDIMENTS

For the apple filling:
  • 2 large sharp firm apples, for example Granny Smith, Pink Lady, Jazz, Braeburn etc.
  • 2 ounces (55 grammes) raisins or sultanas
  • 1 ounce (30 grammes) golden syrup
  • Juice of ½ a lemon
  • ½ teaspoon (3 millilitres) salt
  • 1 teaspoon (5 millilitres) ground cinnamon
  • ½ teaspoon (3 millilitres) ground ginger
  • Pinch of ground cloves

For the crumble topping:
  • 3 ounces (85 grammes) rolled oats
  • 1 ounce (30 grammes) wholegrain spelt flour
  • 1 ounce (30 grammes) brown sugar
  • 1½ fluid ounces (45 millilitres) sunflower oil
  • 1 tablespoon (15 millilitres) water
  • Pinch of salt

HOW-TO
  • Preheat your oven to 200°C (4000°F, Gas Mk.6, or hot).
  • Prepare the filling by cutting the apples. To do this, cut each apple into quarters then cut out the core on each quarter; thinly slice each quarter. You can peel the apples if you like, but I prefer leaving the skins on.
  • Place the apple slices into a bowl and sprinkle over the salt and golden syrup. Mix well. As you mix, the salt will pull the juice from the apples and the mixture will thin out. Add the rest of the ingredients and pour into your chosen dish.
  • Prepare the crumble by mixing all the ingredients together in a bowl until it is fully combined, making a loose but moist mixture. Sprinkle over the filling spread out evenly.
  • Bake in the preheated oven for 25 to 30 minutes, or until the topping is crisp and golden brown.
  • Serve hot with cream, custard, yogurt, or ice cream.
As well as being a nice dessert, I discovered (merely out of laziness) that this also makes a very nice breakfast when eaten with thick Greek yogurt. Obviously, it's not an every day breakfast, but does well as an occasional treat. Also, instead of apples one could use peaches, pears, or nectarines.


THIS TIME LAST YEAR: There was no recipe.

Tuesday, 9 September 2014

Millionaire's Cheesecake (Wheat Free)

To be honest, I have absolutely no idea how and why I invented this dessert, but it certainly exists now if it didn't before. A blend of cheesecake and millionaire's shortbread, I bring you the Millionaire's cheescake!


The other day I made some millionaire's shortbread, which went wrong because I overcooked the caramel, and I still haven't been able to get the idea of cheesecake out of my head since my sister's birthday over a month ago. And yesterday I woke up with this concept jammed in my brain.


Shortbread biscuit base, caramel flavoured cheesecake layer, topped off with delicious dark chocolate ganache sauce: a Hipster's dream dessert, I'm ashamed to say.


My only issue with the dessert is that the layers are not very defined, and I also could have found a way to make the caramel cheesecake taste more caramelly, but this was my first attempt at making this so there's only room for improvement!

I used a heart shaped sillicone mould to make these, and it had eight hearts in it. Alternatively you can use a regular muffin tin, lining each hole with a paper cake case, or in an 8 inch (20 centimetre) round sillicone or springform tin.

Now for the recipe.

FREE FROM
☑ Soya (check for soya lecithin)
☑ Yeast
☑ Wheat
☑ Nuts

CONTAINS
☒ Gluten
☒ Refined sugar products
☒ Dairy
☒ Eggs
☒ Cocoa


 INGREDIMENTS

For the base:
  • 4 ounces (115 grammes) spelt flour
  • 2 ounces (55 grammes) cornflour
  • 4 ounces (115 grammes) butter or margarine
  • 2 ounces (55 grammes) caster sugar
  • Pinch of salt

For the cheesecake mixture:
  • 1 ounce (30 grammes) golden syrup
  • 1 ounce (30 grammes) butter
  • 2 ounces (55 grammes) dark brown sugar
  • 1 fluid ounce (30 millilitres) whipping cream
  • 8 ounces (225 grammes) cream cheese
  • 1 medium egg
  • Pinch of salt

For chocolate sauce:
  • 4 ounces (115 grammes) dark chocolate, broken into pieces
  • 1 fluid ounce (30 millilitres) golden syrup
  • 3 fluid ounces (90 millilitres) whipping cream
  • Pinch of salt

HOW-TO
To make the biscuit base:
  • Preheat your oven to 160°C (320°F, Gas Mk.2½, or very moderate).
  • Make the biscuit base according to this shortbread recipe using the above ingredients, and distribute among the holes in your lined muffin tin. Prick the surface of each shortbread and bake in the preheated oven for about 20 minutes.
  • Once baked, remove from the oven and allow to cool.
For the cheesecake:
  • While the bases are cooking, prepare the caramel base for the cheescake. In a saucepan, gently heat the golden syrup, cream, butter and sugar until all the sugar has dissolved and the mixture is smooth. Once it reaches a boil, simmer gently for one minute only while stirring. Remove from the heat and allow to cool.
  • Once the shortbread bases come out of the oven and reduce the oven temperature to 150°C (300°F, Gas Mk.2, or cool). 
  • Allow the bases to sit for 10 minutes. By this stage, everything will be at the right temperature to continue.
  • In a large mixing bowl, beat together the cream cheese, caramel mixture and salt until smooth. Add in the egg and mix with a wooden spoon until fully combined.
  • Distribute among the individual bases and return to the oven for 20 to 22 minutes, until the cakes are set around the edge but still soft in the centre.
  • Remove from the oven and allow to cool to room temperature before chilling in the fridge for at least 2 hours before service.

To serve, make the sauce:
  • In a microwave safe jug, heat the chocolate, syrup and cream together in one minute bursts on 'Defrost', mixing between bursts until it becomes a sauce. Alternatively, you can melt all the ingredients in a heatproof bowl set over a pan of simmering water.
  • Serve the cheesecakes with the sauce poured over them, or present each diner with a cheesecake and serve the sauce in a jug for each diner to pour over themselves.

Friday, 5 September 2014

Variation on a Theme: Malted Chocolate Ice-Cream with Caramel Swirl (Egg and Wheat Free)

As I'm sure you can imagine, this ice-cream was inspired by a very popular kind of chocolate bar made of malted chocolate nougat, topped with a layer of caramel, and enrobed in chocolate; you guessed it, a Mars bar.


Let me explain how I came to conceive of this ice-cream in my mind:

Over the course of my life I have come to learn that there are a few kinds of food products that are specifically enjoyed by English people, and it only dawned on my recently - being made more aware of my immigrant nature through talking to a Polish friend - that in Irish supermarkets you have the "English immigrant" foods. Examples of these products are crumpets, Marmite, Ovaltine, iced fingers and steak and kidney pies in tins, and I remember trying to explain to my peers why I was so excited when Cherry Coca Cola was eventually made available in Ireland. Now, generally speaking I consider myself and Irish person, but sometimes I get the little reminder that I also half belong to another race of people.

Within the last six months, however, one of these English interest products has vanished from Irish shelves: white Ovaltine. Ovaltine is a malted hot chocolate drink that is sold in powder form, which is mixed with hot milk and drunk as a bedtime drink. Due to my allergy to chocolate, I developed a taste for the white version, which is basically malt powder without the chocolate added. This version has sadly been discontinued here. Horlicks is similar, but nowhere near as nice, and also contains wheat. So, I went on the search for something that could replace my beloved white Ovaltine.

The other day I went to the local health food shop to get my usual spelt pasta and flour, and I spotted on the shelf a jar of pure barley malt extract, and my mind went BINGO! I had found the replacement for white Ovaltine. Barley malt extract is in syrup form, however, not powder. Since then, I've kind of been baking it into everything (including some really delicious malt granola that tastes just like Shreddies), and decided to make a flavour of ice-cream inspired by a malted milkshake, like the ones you can get in American style diners.

First I thought of making malted strawberry ice-cream, which would also be awesome, but I didn't have any strawberry jam. Instead, my mind wandered down the road of malted chocolate things, and finally it arrived at the doorstep of the Mars bar.

So, Mars bar: this is my ice-cream tribute to you!


I do understand that barley malt is unsuitable for coeliacs, but for those of you who can eat it, I recommend you give this a go.

FREE FROM
☑ Soya (check for soya lecithin)
☑ Yeast
☑ Wheat
☑ Eggs
☑ Nuts

CONTAINS
☒ Dairy
☒ Gluten
☒ Refined sugar products
☒ Cocoa (yes, I thought I'd contain it because I was allergic to cocoa for a time)


INGREDIMENTS

For the ice-cream
  • 8 fluid ounces (225 millilitres, 1 US cup) whipping cream, 35%-40% fat content
  • 6 fluid ounces (170 millilitres, ¾ US cup) condensed milk
  • 3 tablespoons (45 millilitres) cocoa powder (see notes below)
  • 4 teaspoons (20 millilitres) barley malt extract
    • You could also replace the cocoa and malt extract with 4 tablespoons (60 millilitres) of original Ovaltine
  • Pinch of salt

For the caramel swirl
  • 2 tablespoons (30 millilitres) condensed milk
  • 1 ounce (30 grammes) butter
  • 2 ounces (55 grammes) soft light brown sugar
  • 2 tablespoons (30 millilitres) cream

HOW-TO
  • To make the caramel sauce, melt all the ingredients together in a saucepan over low heat until the sugar has completely dissolved, stirring all the time. Bring to the boil and then simmer for 1 minute. Remove from the heat and allow to cool.
  • Once the caramel sauce has cooled, make the ice-cream following the instructions here, but adding the malt extract (if using) to the condensed milk and cocoa mixture.
  • Pour a third of the ice-cream mixture into the freezing container, then drizzle over half the caramel sauce. Pour another third of the ice-cream mixture over it, then drizzle the remaining caramel sauce over that layer. Finish with the final third of the ice-cream mixture.
  • Using a knife, gently swirl all the layers together by zigzagging the knife through the container once. Decorate the top with sprinkles, if you like, then freeze for a minimum of 6 hours of overnight.

Monday, 1 September 2014

Hazelnut Chocolate Gâteau (Wheat Free)

Yesterday was my sister's boyfriend's 19th birthday, so I made him a cake as usual. I asked my sister to find out what kind of cake he wanted, and he requested a cake that "tasted like Nutella". So, here's what I came up with: a chocolate hazelnut gateau!


 In my time I have tasted many a chocolate hazelnut spread and I can say, even though this may be blasphemous, some supermarket own-brand kinds are nicer than the famous Nutella, despite it being the most popular. If one were to make this cake with actual brand Nutella it would be rather expensive, as I used an entire 400 gramme (14 ounces) jar to make this cake.


This recipe uses a quantity of buttercream that uses a pound (450 grammes) of icing sugar, and as you can see from the pictures the layers and outer icing are quite thin. This is how I like it, but you could always increase the buttercream quantity by half to make the layers and the outer coating thicker.


INGREDIMENTS:
For two 8 or 9  inch (20 or 23 centimeter) round sandwich cakes
  • 6½ ounces (185 grammes) spelt flour
  • 1½ ounces (40 grammes) cornflour
  • 2 ounces (55 grammes) cocoa powder
  • 2 teaspoons baking powder
  • 5 medium eggs, at room temperature
  • 2½ ounces (70 grammes) soft brown sugar
  • 5 ounces (140 grammes) caster sugar
  • 1 teaspoon vanilla essence
  • 2½ ounces (70 grammes) sunflower oil
  • 2½ ounces (70 grammes) butter or block margarine
  • 5 to 7 tablespoons (75 to 105 millilitres) warm water
  • 3 ounces (85 grammes) chopped hazelnuts
For filling and crumb coat:
  • 4 ounces (85 grammes) room temperature butter or block margarine
  • 4 ounces (85 grammes) chocolate hazelnut spread
  • 1 pound (450 grammes) icing sugar, sieved
  • 2 tablespoons (30 millilitres) room temperature milk or water, or more if needed
  • 1 teaspoon vanilla essence
For assembly (optional):
  • Roughly chopped hazelnuts
  • Chocolate hazelnut spread

HOW-TO:
First, prepare the cakes:
  • Preheat your oven to 180°C (350°F, Gas Mk.4, or moderate).
  • Prepare the cake mixture as per the basic sponge recipe, and pour into two greased and floured 9 inch (23 centimeter) cake tins. Cook for 20 to 25 minutes until ready. Allow to cool completely in tins.
  • Once cold, cut each cake in half horizontally, and cut the domes off both cakes. Decide how you will assemble the layers, making sure the bottom layer of one cake, bottom side up, is on the top of the pile.
Then, fill and crumb coat the cake:
  • Cut a circle of card that's the same size as the bottom of the cake.
  • Make the chocolate buttercream icing following this recipe, beating the chocolate spread and butter together first.
  • Smear a little buttercream on the card circle and stick the bottom layer of cake to it.
  • Spread the cake with a thin scraping of chocolate hazelnut spread, and then spread just a little less than a quarter of buttercream. Use the same amount per layer
  • Spread the next layer with chocolate spread in the same way, and place on top. This means that each layer will be, cake -> chocolate spread -> buttercream -> chocolate spread -> cake. Repeat until you have run out of cake layers.
  • Coat the whole cake in a thin layer of buttercream to hold in the crumbs. Chill in the fridge for about an hour; you should have just under a third of the buttercream left.

Assemble the masterpiece:
  • Remove the cake from the fridge and coat with the remaining buttercream, leaving a nice back-and-forth rippled effect on the surface. Pile the roughly chopped hazelnuts on the top. Allow to set for about an hour before service.

And that's it! It's not very complicated, just a matter of spreading, but my Lordy was it delicious. We still have a little left in the fridge....


THIS TIME LAST YEAR: The Making of Videos (and Subsequent Technical Difficulties)

Friday, 29 August 2014

Spelt Doughnuts (Wheat Free)


For those who have been missing the taste of doughnuts since discovering their allergies, here's a nice recipe so that you can be reacquainted!


I have always found doughnuts very visually appealing: fluffy cakey rings covered in caster sugar, or glazed with icing or chocolate and doused in illegally brightly coloured sprinkles. Usually the reality of eating a doughnut from the bakery isn't as nice as looking at them on the shelf, as here in Ireland there are only two or three kinds of doughnut, all of which are rather plain. I always considered the doughnut a second rate confection until in 2008 I visited Germany. 


While on holiday in Hamburg, I went to a bakery with a friend and was amazed not only by how popular the doughnut is, but also how many different kinds of doughnut you could buy! Jam filled, Nutella filled, custard filled, long ones split and filled with whipped cream and jam, spherical ones glazed completely in glacé icing, ones dusted with icing sugar, cocoa, cinnamon... and ring doughnuts glazed in every colour imaginable. It was a veritable doughnut wonderland!

I didn't think about them again until I visited Germany for a second time in 2012, and in Hauptbanhof in Berlin my boyfriend at the time and I found a "Dunkin' Doughnuts" shop. Yes I know it's an American chain, but once again I was fascinated by the sheer variety and imagination of some of the flavours.

Of course, this doughnut recipe that I developed through a few trials and errors is a fairly plain recipe, but hopefully as time goes on I will come up with some nice flavour and colour combinations.

So, here's the recipe:


FREE FROM
☑ Soya (check for soya lecithin)
☑ Yeast
☑ Wheat
☑ Nuts

CONTAINS
☒ Gluten (unless you use gluten-free bread flour)
☒ Refined sugar products
☒ Dairy dairy free options in italics
☒ Eggs


 INGREDIMENTS
Makes about 12 3 inch doughnuts, and 12 doughnut holes
  • 6 ounces (170 grammes) spelt flour
  • 2 ounces (55 grammes) cornflour
  • 1 tablespoon (15 millilitres) baking powder
  • 2 ounces (55 grammes) caster sugar
  • Pinch of salt
  • Optional: 1 teaspoon of cinnamon
  • 1 medium egg
  • 3 to 4 tablespoons (45 to 60 millilitres) warm milk, or warm water
  • 1 ounce (30 grammes) sunflower oil
  • 1 teaspoon (5 millilitres) vanilla essence, or the seeds of 1 vanilla pod

To coat:
  • Caster sugar
  • Icing sugar
  • Cinnamon
  • Glacé icing
  • Chocolate glaze
  • Sprinkles


HOW-TO 
  • In a heavy saucepan, heat about 3 inches (8 centimetres) of flavourless oil to 180°C (350°F), measuring with a sugar thermometer. Alternatively you can use a deep fryer, if you have one. The temperature is important so make sure your thermometer is accurate.
  • Sieve the flour, baking powder, salt, and caster sugar (and cinnamon, if using) into a large mixing bowl.
  • In a separate bowl, mix together the egg and the oil. Make a well in the centre of the flour and add in the egg mixture. Mix a little until messy but not combined.
  • Add 3 tablespoons of milk or water to start with, and mix until combined. If it's not coming together properly, add up to 1 more tablespoon of liquid.
  • Once the dough is formed, turn out onto a work surface and knead lightly until smooth, about 3 minutes.
  • Roll the dough out on a floured surface to a half inch (1 centimetre) thickness. Using a 3 inch (8 centimetre) round cutter, cut as many doughnuts as you can. Using a 1 inch round cutter (2½ centimetre), or the screw top from a wine bottle, punch holes out of the middle of the doughnuts. When cutting them, press the cutter into the dough then twist as you take the cutter away.
  • Gently drop the doughnuts into the oil in batches of 2 or 3. Cook the doughnuts for about 3 to 4 minutes, flipping once.
  • Lift the doughnuts out with a slotted spoon or tongs and drain on kitchen paper. Allow to cool.
  • To coat, dip them in caster sugar or icing sugar, or you can ice and decorate them.


THIS TIME LAST YEAR: Free-From Gingerbread Men


Friday, 15 August 2014

Honey and Cinnamon Popcorn (Gluten Free)

Is there anything in this world that can't be improved by adding cinnamon and honey? I really don't think there is, and the satisfying crunch of nice salty buttery popcorn is no exception.


For a time, as I may have mentioned, I was very allergic to chocolate. Between the ages of 6 and 21 I couldn't touch the stuff or I would get severe migraine headache with full aura, stomach upset and become incredibly bad tempered. During that time, I tried eating it once or twice but always resumed to abstinence.

When at 21 I realised that I could eat it again, I began making up for lost time by eating shedloads of it quite often, and now it has become quite a part of my life. However, I have recently noticed that after I eat chocolate I get stomach upset and my skin breaks out in spots. 
  
It seems that from birth to death I will always have some difficulty with chocolate in one expression or another, and because of this I am removing it once again from my diet, except for special occasions or if I'm feeling homicidally pre-menstrual and nothing else will do. I can't tell at the moment if it's the cocoa that's causing it, or the dairy and the cocoa in conjunction, but I'm just cutting it out anyway and reducing my dairy intake in general.

Luckily for me during my 15 years of chocolate abstinence I developed a taste for varying different kinds of flavours and desserts, my favourites being anything to do with toffee or fudge. Also, since making my diet a lot more raw food based I have begun to fully appreciate the wonders of honey, and I feel this is sounding in an era of more natural based sweets and confectionery into my diet.


Earlier this week I went to a movie night, and every movie night needs popcorn. I opted to make a sweet popcorn instead of my usual chocolate brownies tactic to remove the temptation of being in the same vicinity of something chocolatey and delicious.

FREE FROM
☑ Soya (check for soya lecithin)
☑ Yeast
☑ Wheat
☑ Gluten
☑ Eggs
☑ Nuts
☑ Refined sugar products

CONTAINS
☒ Dairy (but the butter can be replaced with margarine or left out)

INGREDIMENTS


  • 4 tablespoons (60 millilitres) popping corn kernels
  • 3 tablespoons (45 millilitres) sunflower oil
  • 1 tablespoon (15 millilitres) butter or margarine, or omit
  • 2 teaspoons (10 millilitres) ground cinnamon
  • 1 teaspoon (5 millilitres) salt
  • 4 tablespoons (60 millilitres) honey

HOW-TO

  • Preheat the oven to 180°C (350°F, Gas Mk.3, or moderate).
  • Add the oil, butter and cinnamon to a large heavy-based saucepan and gently heat until the butter melts. Add the kernels and cover; heat on medium to pop the kernels, shaking often to prevent burning.
  • Lightly oil a large mixing bowl and add the honey to the bottom. Once the corn has popped, pour into the bowl, sprinkle with the salt, and mix very thoroughly. You can't over mix this mixture, but you can definitely under mix it, much like granola.
  • Pour the honeyed popcorn out onto a baking sheet lined with baking paper. Dry out in the oven for about 10 minutes, tossing half-way through.
  • Allow to cool slightly before serving.

THIS TIME LAST YEAR: Minty Millionaire's Shortbread

Monday, 11 August 2014

Chocolate Truffles (Gluten and Dairy Free)

This weekend was the 25th birthday of one of my longest standing and closest friends, and her boyfriend organised a surprise birthday party for her inviting me and all her other friends to Dublin where they live and work.


About this time last year she was diagnosed with a large amount of food allergies and I had to keep this in mind when coming up with a present for her, which actually turned out to be rather easy. I've had enough practise at developing recipes for people with obscure food allergies at this stage I can pretty much make these things up as I go along.


In truth when you buy chocolate truffles by the bagful from any sweet shop they're not made using the traditional chocolate and fresh cream ganache approach. I was suspicious of this in the first place when I saw speciality truffles advertised as being "made with fresh cream", which made me think what are they usually made of? After reading the backs of a few bags of cheap sweet shop truffles I learnt the answer to this: they are usually made of chocolate, vegetable or coconut oil, and gluscose syrup.


I know this approach is to cut costs for the chocolate manufacturers, but in my case it would be necessary to create chocolate truffles that my friend could eat without exploding.


In the box I also included some chocolate dipped coconut ice which I made using this recipe, however I replaced the milk with half coconut milk, half water.


FREE FROM
☑ Soya (check for soya lecithin)
☑ Yeast
☑ Wheat
☑ Gluten
☑ Nuts
☑ Eggs
☑ Dairy
☑ Refined sugar products

CONTAINS
☒ Cocoa


 INGREDIMENTS

For the truffles:
  • 7 ounces (200 grammes) dark chocolate, at least 70%
  • 2 fluid ounces (55 millilitres; 4 tablespoons) sunflower oil
  • 2½ fluid ounces (75 millilitres; 5 tablespoons) honey
  • Pinch of salt
  • Optional: 1 teaspoon (5 millilitres) vanilla essence

For coating:
  • 5½ ounces (150 grammes) dark chocolate, at least 70%
  • 2½ tablespoons (37 millitres) sunflower oil
  • Or desiccated coconut, cocoa powder, coloured sprinkles, chocolate sprinkles, flood consistency royal icing


HOW-TO 
  • Melt all the truffle ingredients except the essence, if using, in either a heatproof bowl set over a pan of simmering water, or in the microwave set to "Defrost" in one minute bursts. Melt until smooth then remove from the heat.
  • Stir in the vanilla essence and then allow to cool to room temperature. Chill in the fridge until fully set, about 6 hours or overnight.
  • When it's time to roll the truffles, remove the ganache from the fridge and allow to come to room temperature for about an hour. Using a teaspoon, scoop out the ganache and roll into balls with your hands.
  • If you are going to chocolate dip them, set them on a plate and allow to chill in the fridge for about 20 minutes. If you are not, simply drop the truffles into a coating of your choice and roll around to coat. Put the truffles into little cases if you have some.
To chocolate dip:
  • To make the chocolate coating, melt the chocolate and oil together as above. Using a fork, lower each chilled truffle into the chocolate and roll around to coat. Raise the coated truffle from the chocolate and gently tap off the excess, allowing it to fall through the fork back into the bowl.
  • Put the dipped truffles onto a tray lined with baking paper and allow to set completely at room temperature for at least 2 hours. If you like, you can add sprinkles or other decorations while the chocolate is still wet.
  • Once set, put the truffles into little paper cases if you have some.

In my opinion, these are actually a lot nicer than regular cream-ganache truffles because they seem a little lighter and cleaner on the palate. You could also add other flavourings instead of the vanilla such as peppermint essence, grated orange zest, or fine espresso powder.

Friday, 8 August 2014

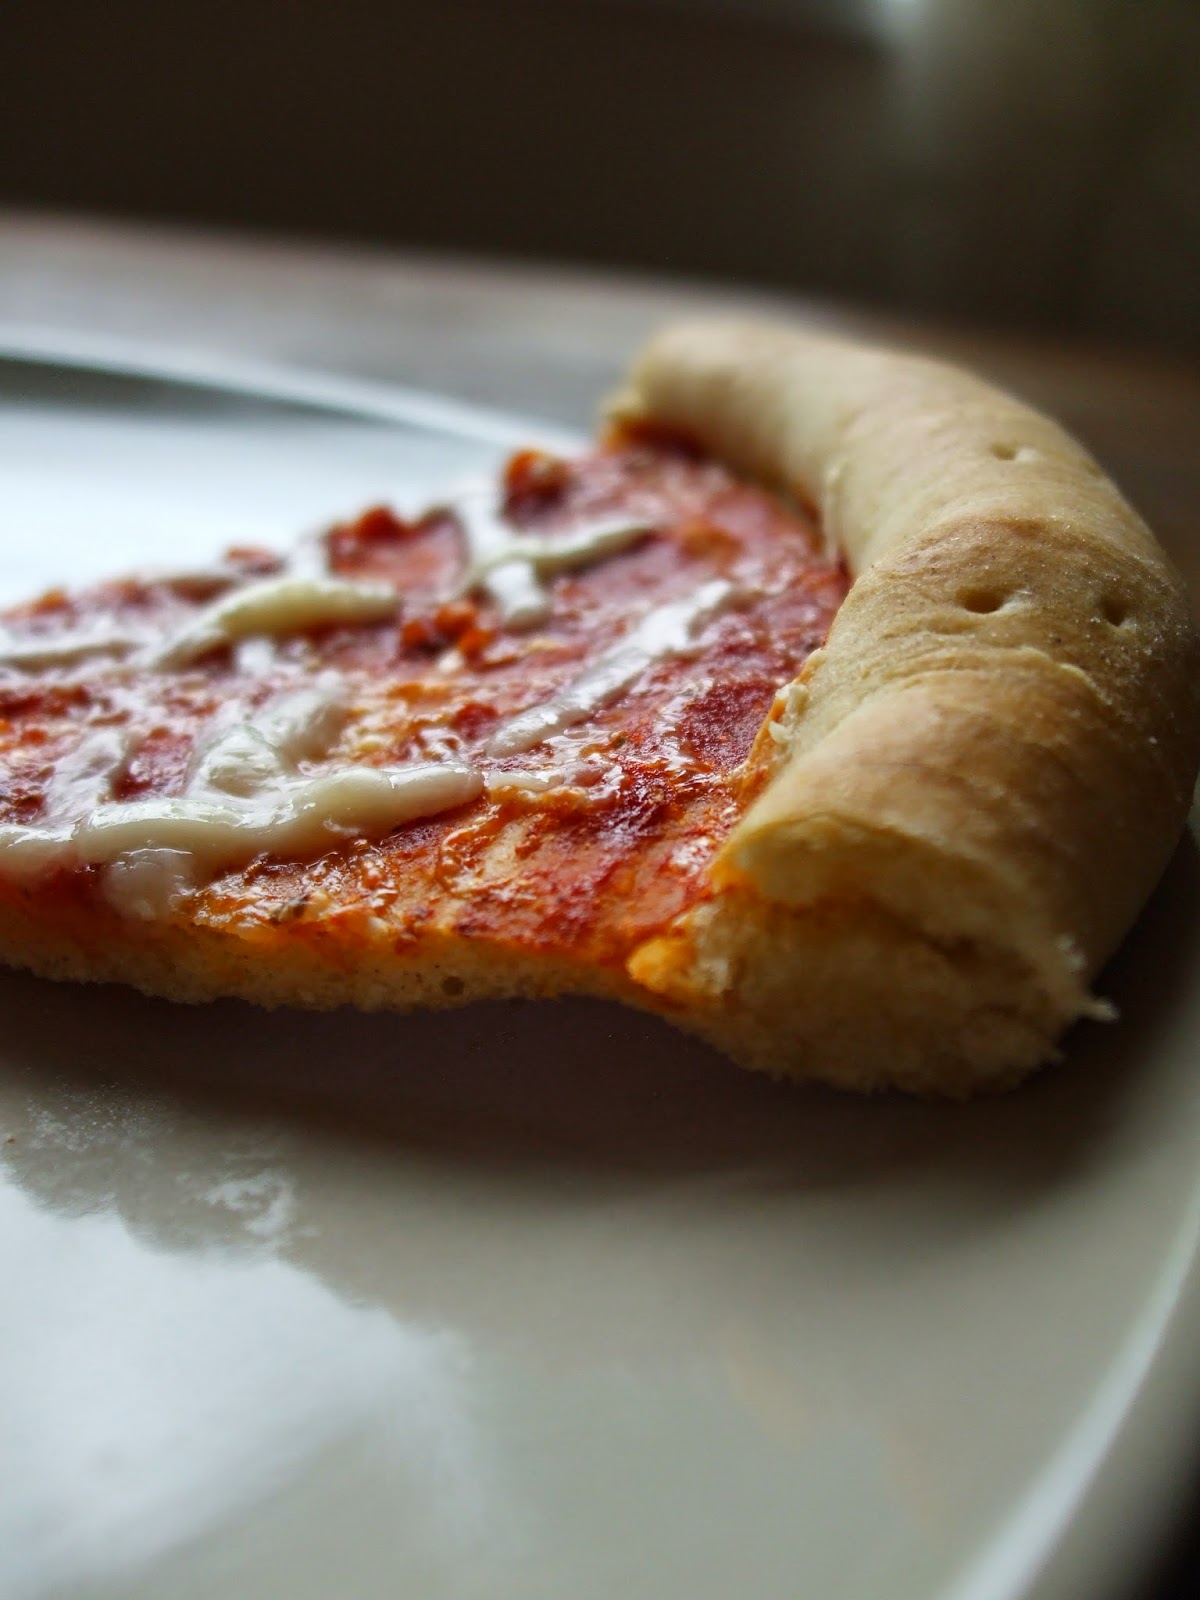
Quick Pizza Base (Wheat-, Dairy-, Egg-, and Yeast Free)

Nom nom, wheat and yeast free pizza... the great thing about home made pizza is the ability to customise your topping!


One of the things I really miss about being able to eat wheat and having more time on my hands is the wonderful taste of pizza. I used to love getting a takeaway pizza every once in a while as a treat, and nowadays the experience is always disappointing given that gluten-free pizzas from major pizza places are absolutely vile.


I did however learn how to make traditional yeast-risen pizza bases using spelt flour, which was pretty easy, but these days I try to avoid yeast as well as not only does it sometimes upset my stomach, giving me a bit of acid reflux, but also baking with yeast is fairly time consuming.

So, I altered a naan bread recipe that I found in an Indian cookery book in my parents' bookshelf to make a very nice and fairly reliable pizza base recipe that uses baking powder instead of yeast.

FREE FROM
☑ Soya (check for soya lecithin)
☑ Yeast
☑ Wheat
☑ Nuts
☑ Eggs
☑ Dairy

CONTAINS
☒ Gluten (unless you use gluten-free bread flour)
☒ Refined sugar products


 INGREDIMENTS

For the base:
  • 8 ounces (225 grammes) spelt flour
  • 2 teaspoons (10 millilitres) baking powder
  • Pinch of salt
  • 1 teaspoon (5 millilitres) caster sugar
  • 1 tablespoon (15 millilitres) sunflower oil
  • ¼ pint (150 millilitres) hand-hot water
  • Oil, for rubbing
  • Topping of your choice: tomato sauce, grated cheese, slice meats, peppers etc.


HOW-TO 
  • Sieve the flour, baking powder, salt and caster sugar into a large mixing bowl. Drizzle over the oil and rub into the flour.
  • Mix in the water a bit by bit until you get a nice soft dough that's a little tacky; you may not need to use all the water.
  • Sprinkle the work surface with flour and knead the dough a little for about 5 minutes. Brush the mixing bowl with a little oil and put the dough ball in, rolling it around to coat in the oil. Allow to sit and rest for about 20 minutes.
  • Preheat the oven to 200°C (400°F, Gas Mk.6, or hot).
  • Once the dough has rested, roll out on a floured work surface to your wanted thickness and shape; I recommend about a quarter inch (5 millimetres). Brush the edges with a little water and roll up into a crust.
  • Put gently place onto a baking tray lined with baking paper and prick with a fork. Cook for about 10 minutes.
  • Remove from oven an add the topping. Return to the oven for a further 10 minutes.
  • Once cooked, allow to cool slightly to avoid burning; cut into slices.


THIS TIME LAST YEAR: Chewy Caramel

Wednesday, 6 August 2014

No-Gelatine Chilled Cheesecake: Chocolate

WOOOOOOOOOOOO!! 100 posts today!! So proud of myself and my blogging exploits! Roll on 150!

In my last post, I explained how I made the lemon side of the cheesecake and today I will explain how to make the chocolate side! Because everybody loves chocolate...


When making the lemon half, I used the power of nature and used the lemon juice reacting with the dairy products to set the cake. This time, however, I'm using chocolate to set the cake. When you add the chocolate, it's melted, but while it sits overnight in the fridge it sets up again, making the rest of the ingredients firmer, much like a ganache.


Here is the recipe I used for the chocolate half

FREE FROM
☑ Soya (check for soya lecithin)
☑ Yeast
☑ Wheat
☑ Nuts
☑ Eggs

CONTAINS
☒ Gluten (unless you use gluten-free oats)
☒ Refined sugar products
☒ Dairy


 INGREDIMENTS

For the base:
  • 6 ounces (170 grammes) spelt flour
  • 2 ounces (55 grammes) rolled oats
  • 2 ounces (55 grammes) cold butter, cubed
  • 2 ounces (55 grammes) caster or brown sugar
  • Pinch of salt
  • Optional: Pinch of cinnamon

For the cheesecake mixture
  • 10 ounces (300 grammes) soft cream cheese
  • 3 ounces (85 grammes) caster sugar
  • 5 fluid ounces (150 millilitres) whipping cream
  • 1 tablespoon (15 millilitres) vanilla essence
  • 5.5 ounces (150 grammes) milk or dark chocolate, depending on how rich you want it
  • Pinch of salt

HOW-TO 
  • Make the biscuit base according to the recipe here, but empty the mixture into an 8 inch (20 centimetre) spring form tin instead. Allow to cool completely.
  • Melt the chocolate gently in a heatproof bowl over a pan of simmering water, or in the microwave set to 'Defrost' for a minute at a time until smooth. Allow to cool.
  • To make the filling, beat the cream cheese and sugar together until smooth and creamy. Add in the whipping cream and vanilla essence then beat until it forms soft peaks.
  • Add the melted chocolate and fold gently using a metal spoon or rubber spatula until completely combined. Be gentle and don't knock any air out of the cream.
  • Pour the filling onto the base and smooth out without eating any. Chill in the fridge for at least 2 hours, preferably overnight.

As you can see, I made it into a split cheesecake, but the above recipe makes one 8 inch (20 centimeter) cheesecake.


Monday, 4 August 2014

No-Gelatine Chilled Cheesecake: Lemon

This year for her birthday, my sister asked me for a split cheesecake, like she does every year. When I say split cheesecake, I mean a cheesecake that's one half one flavour, and the other half another flavour. This year, she wanted lemon and chocolate.


My sister doesn't like baked cheesecake, only chilled, and usually I would set a chilled cheesecake with gelatine. However, my oldest brother is a vegetarian and as such doesn't eat any product made from a dead animal, which obviously included gelatine.


My past adventures with vegetarian gelatine have been unsuccessful, leading to much hair pulling, crying, and expense. This year I decided to research how to make chilled cheesecake without using a setting agent at all and discovered a wonderful new trick: I learnt that through the miracle of a chemical reaction between dairy products and citrus juice, one could set a cheesecake completely using only lemon juice

Here is the recipe I used for the lemon half

FREE FROM
☑ Soya (check for soya lecithin)
☑ Yeast
☑ Wheat
☑ Nuts
☑ Eggs

CONTAINS
☒ Gluten (unless you use gluten-free oats)
☒ Refined sugar products
☒ Dairy


 INGREDIMENTS

For the bases:
  • 6 ounces (170 grammes) spelt flour
  • 2 ounces (55 grammes) rolled oats
  • 2 ounces (55 grammes) cold butter, cubed
  • 2 ounces (55 grammes) caster or brown sugar
  • Pinch of salt
  • Optional: Pinch of cinnamon

For the cheesecake mixture
  • 10 ounces (300 grammes) soft cream cheese
  • 3 ounces (85 grammes) caster sugar
  • 5 fluid ounces (150 millilitres) whipping cream
  • 1 tablespoon (15 millilitres) vanilla essence
  • Grated zest and juice of 2 lemons
  • Pinch of salt

HOW-TO 
  • Make the biscuit base according to the recipe here, but empty the mixture into an 8 inch (20 centimetre) spring form tin instead. Allow to cool completely.
  • To make the filling, beat the cream cheese and sugar together until smooth and creamy. Add in the whipping cream ands vanilla essence then beat until it forms soft peaks.
  • Add the zest and juice of both lemons and the salt then beat briefly until well combined. Don't beat too much otherwise it will curdle.
  • Working quickly, pour the filling onto the base and smooth out. Chill in the fridge for at least 2 hours, preferably overnight.

As you can see, I made it into a split cheesecake, but the above recipe makes one 8 inch (20 centimeter) cheesecake.

THIS TIME LAST YEAR: Soft Vanilla Fudge

Friday, 1 August 2014

Anniversary Gift: Chocolate Dipped Gingerbread Teddies (Wheat Free)

So, I finally settled on an idea for my parent's anniversary gift by combining my two ideas into one: making gingerbread and dipping it in chocolate. And here's the result!


I was going to make some elephants, but I realised that I had no elephant cutters, and my freezer drawers aren't big enough to roll the dough out into sheets and then freeze them, which is what needs to be done to free-hand cut biscuits when using a really soft dough. So, I just combined a flower cutter with a heart cutter to make two grown up teddies and then the same technique in he next size down to make the babies. I used this dough recipe, using treacle instead of golden syrup.

Mummy Bear and Daddy Bear

Little Anna and Nixie Bears

Little Andrew and Paddy Bears

Once they were cooked, the didn't look quite right: the lines where I had used multiple cutters were visible, and some of the biscuits had puffed up oddly. I'm still getting used to my new oven and weird stuff like that is common at the moment. So, if there's one thing I've learnt in my nearly two decades of baking things, it's when things look odd either a) ice them, or b) cover them in chocolate. I went with option B, of course.

The brown dipping chocolate was 3.5 ounces (100 grammes) milk chocolate, 2 ounces (55 grammes) white chocolate, and 2 tablespoons (30 millilitres) sunflower oil melted together gently in a heatproof bowl over simmering water. For the love of all that's good and gracious, don't overheat it otherwise it'll go blotchy when it cools. It made them really pretty and smooth, and then I just decorated with a few touches of melted white chocolate, coloured with blue and pink.


I applied the white, blue and pink details not using a piping bag, but a medicine syringe. I went into my local pharmacy and asked for any auld plain medicine syringe for icing a cake, and they gave me a 2.5 millilitre syringe free of charge because they're nice like that. However, the syringe was very tricky to use because it only really had two responses to pressure: do nothing, or squeeze everything out at once... I made it work though.

To make the bows and noses, I squeezed a blob of chocolate and then using a cocktail stick dragged out the corners of the bows and drew the lips. I think they look a little bit more like mice than bears, but my parents copped that they were bears so I was more successful than I thought!

The box again this year was a challenge because the collection of teddies took up a lot of space. I bought two 42 pieces of coloured card, but it wasn't the heaviest card and had to be supplemented with an extra layer of card inside to make it more stable. Also, between me buying it and walking home it had become slightly crumpled.


All the fold marks are me doing an origami on it. I like to fold the boxes rather than glue them because I think it makes the corners sturdier.


So there we have it! Another successful anniversary gift to my parents. Happy anniversary, Mum and Dad!

THIS TIME LAST YEAR: Traditional Coconut Ice

It's been a while! Happy 9th Anniversary!

  It's been a while. The past two years have been a helluva a ride. This year is gonna hold some big changes for this blog. I'm comp...